Proofpoint Targeted Attack Protection (TAP) Integration Guide🔗
The following instructions are for configuring Proofpoint Targeted Attack Protection (TAP) to facilitate log ingestion into Secureworks® Taegis™ XDR.
Proofpoint Requirements🔗
An active Proofpoint TAP account with privileges to create service credentials is required to integrate with XDR.
Note
Not all Proofpoint subscriptions include TAP.
Data Provided from Integration🔗
| Normalized Data | Out-of-the-Box Detections | Vendor-Specific Detections | |
|---|---|---|---|
| Proofpoint | HTTP |
Note
XDR detectors are not guaranteed to be triggered, even if a data source's logs are normalized to a schema associated with a given detector. However, you can create Custom Detection Rules to generate detections based on normalized data from a data source.
Generate Proofpoint TAP Service Credentials🔗
-
Follow the instructions in the Proofpoint documentation, Generate TAP Service Credentials.
-
Note the
Service PrincipalandSecretfor the next steps.
Add Integration in XDR🔗
-
From the Taegis Menu, select Integrations → Cloud APIs.
-
Select Add an Integration from the top of the page.

Add an Integration -
From the Optimized tab, select Proofpoint.

Creating a new Proofpoint Integration -
Enter the following fields — Obtained in the first step:
- Service Principal
- Secret
- Name — This serves as a unique name for your integration; it can include any valid values up to 100 characters.
-
Select Done. The Cloud API Integrations page is displayed with the successfully added Proofpoint integration.
Once the above steps are completed, Proofpoint integration details are available on the Cloud APIs page. From the Taegis Menu, select Integrations → Cloud APIs.
Advanced Search using the Query Language🔗
Example Query Language Searches🔗
To search for Proofpoint email events from the last 24 hours:
FROM email WHERE sensor_type = 'ProofPoint' and EARLIEST=-24h
To search for Proofpoint email events classified as phishing attempts:
FROM email WHERE sensor_type = 'ProofPoint' AND threats.classification = 'phish'
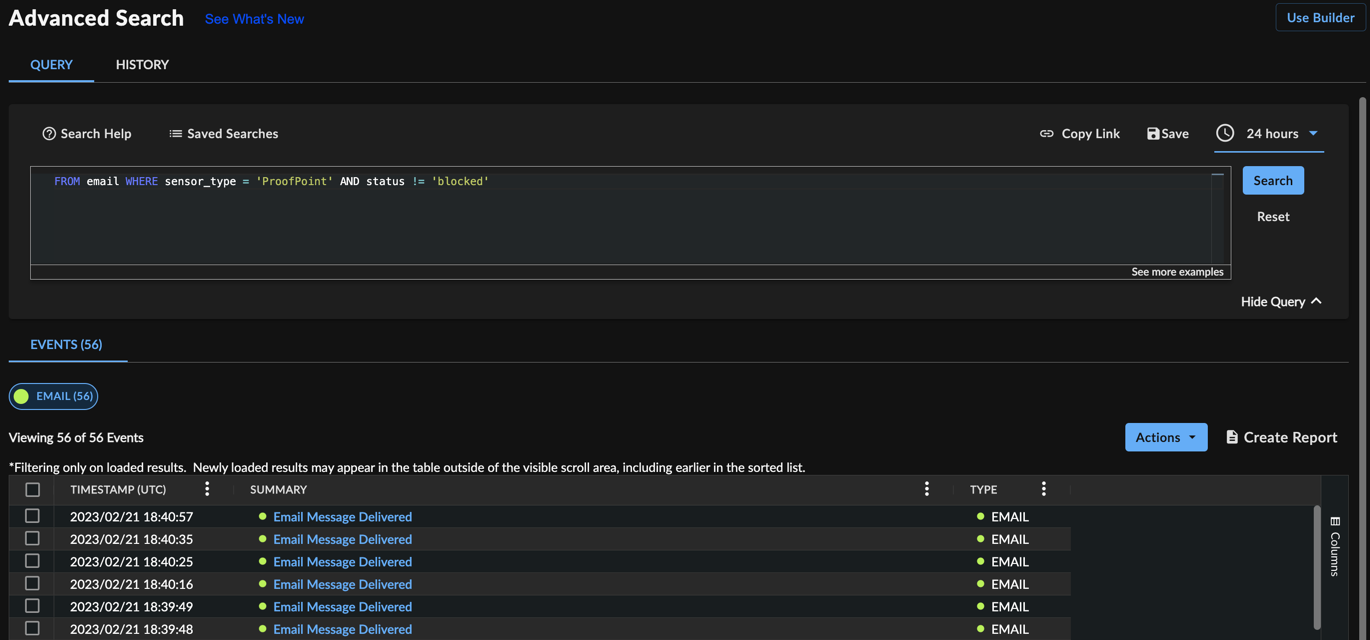
To search for Proofpoint email events that were NOT blocked:
FROM email WHERE sensor_type = 'ProofPoint' AND status != 'blocked'
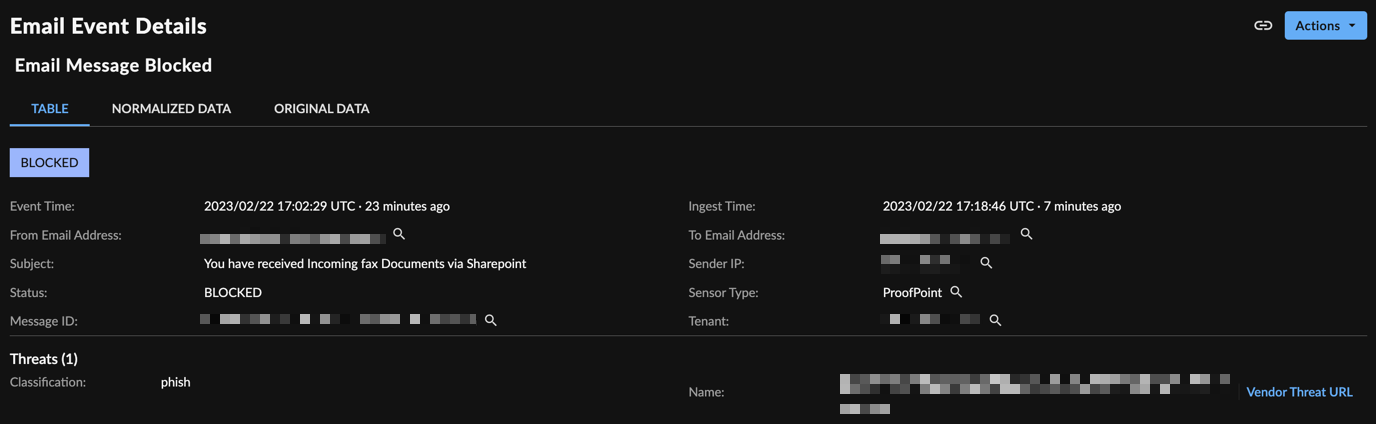
Event Details🔗
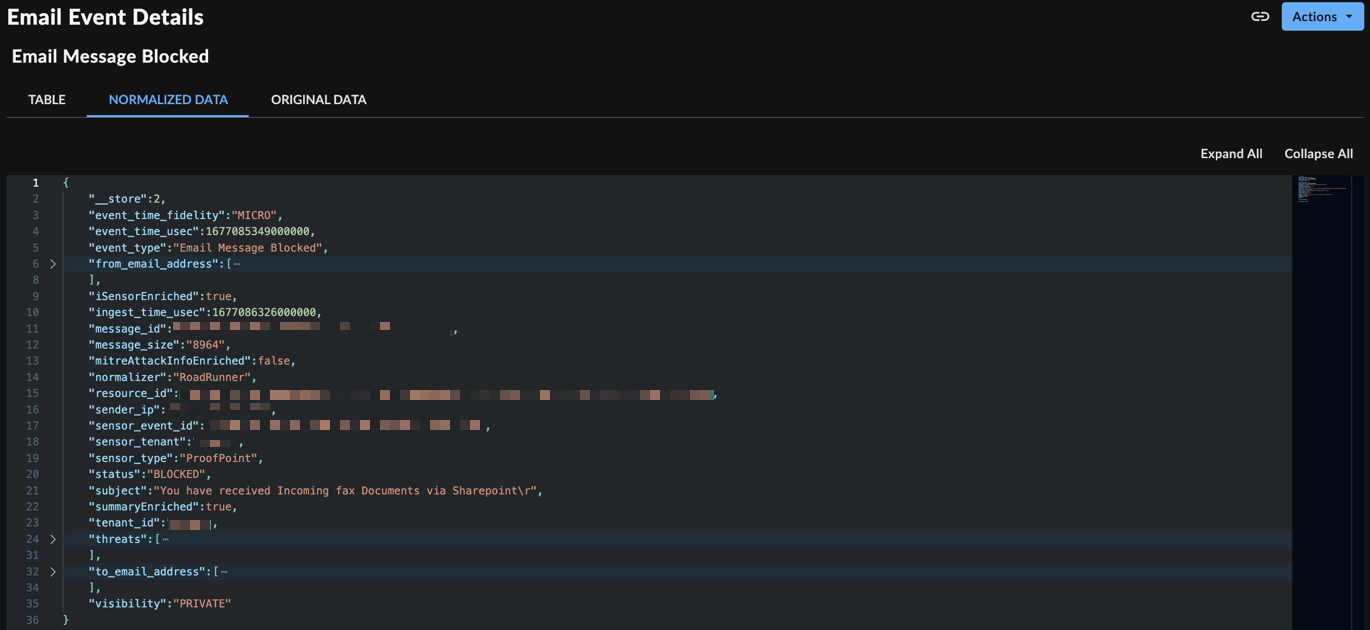
Data Normalized by XDR🔗
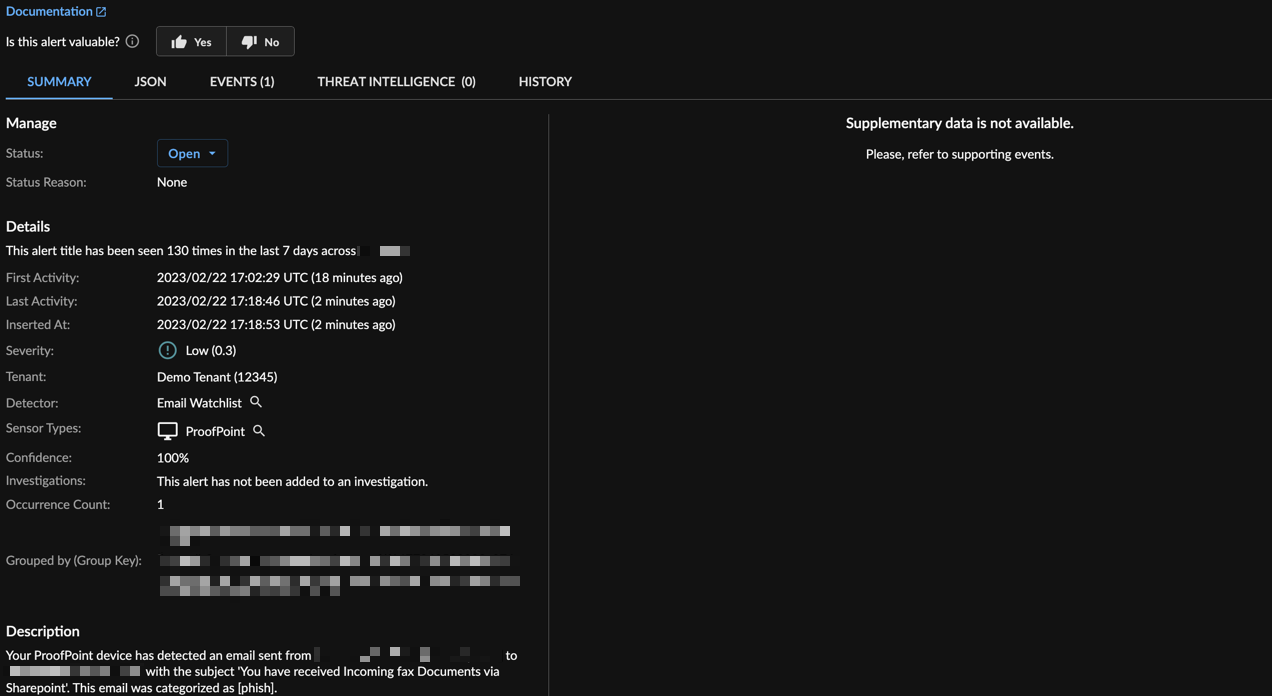
Detection Details🔗