Notification Configurations🔗
Notification Configurations determine how service providers contact you and your organization using notification rules created by providers and escalation policies that tenants with the applicable service assign to a rule.
Notification Rules🔗
Notification rules allow customization of when a notification is sent. Service notifications are currently supported, where a service provider such as Secureworks® Taegis™ MDR defines the notification scenarios and each tenant with the applicable service assigns the escalation policy to use when a notification is sent.
Important
Service notification rules can only be created by service providers. The rules that providers create are only available for customers with MDR or other relevant services to assign an escalation policy to. Tenant-specific rules for XDR-only customers will be available at a later date.
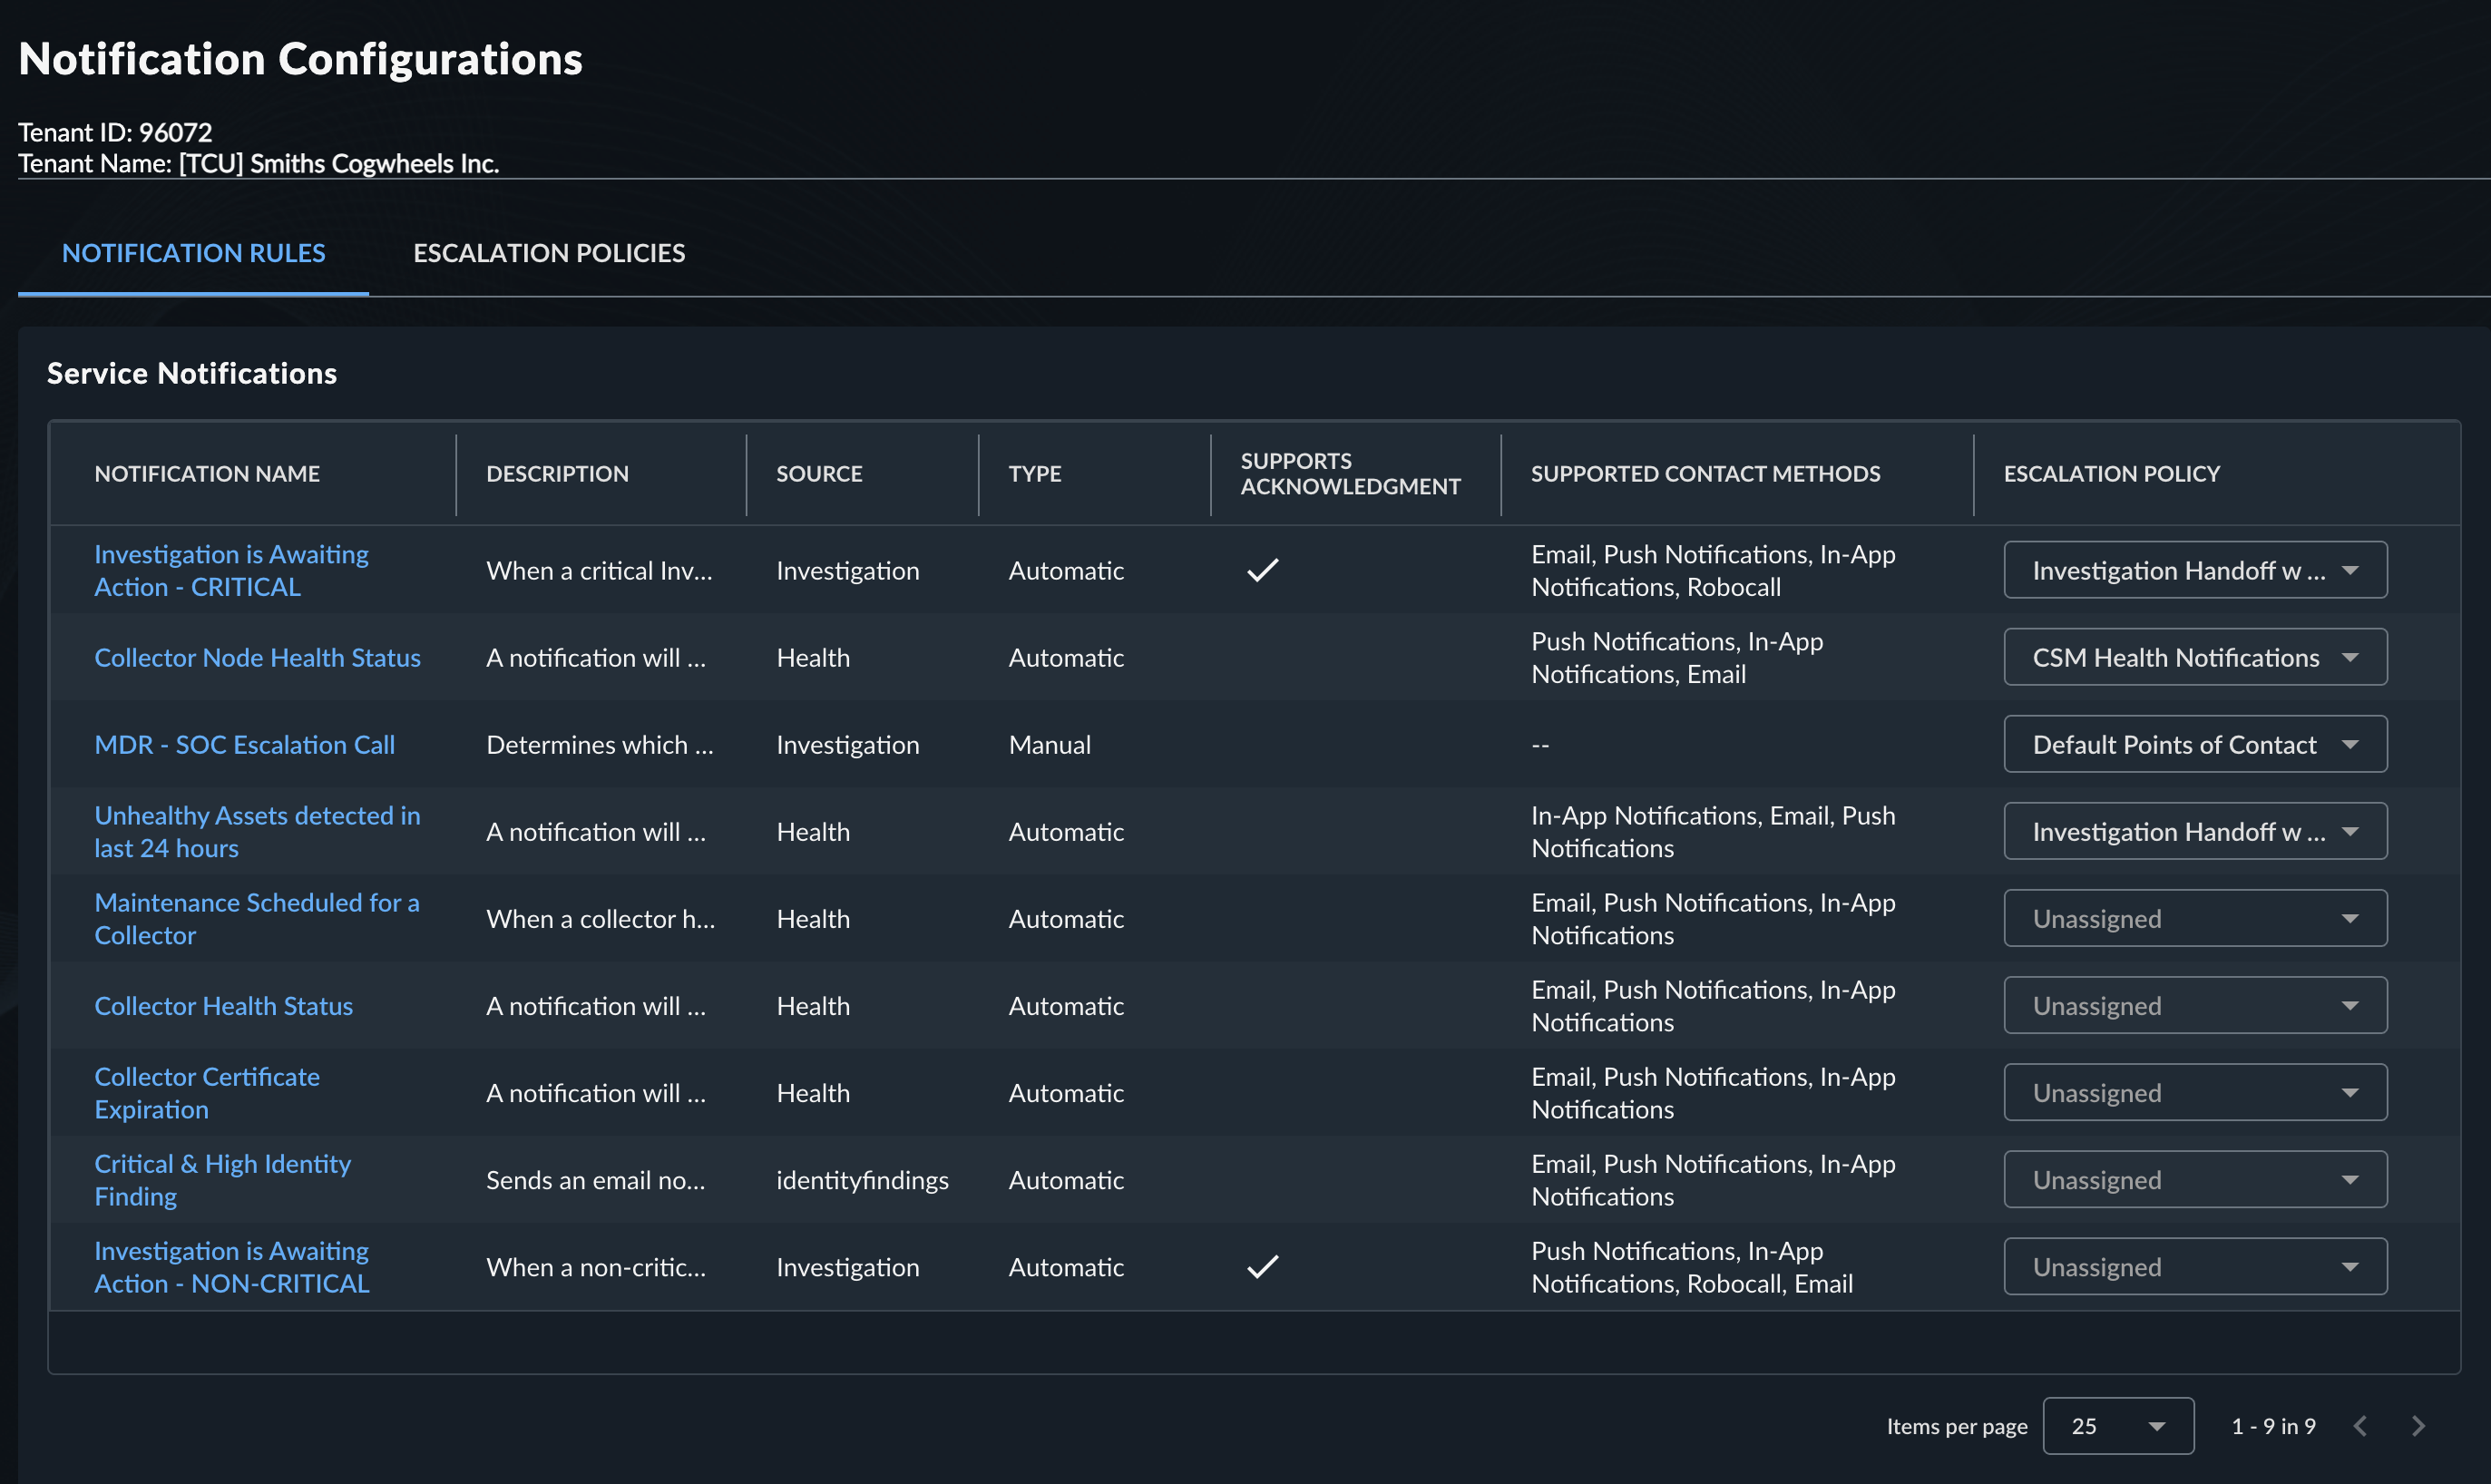
The rules available to you depend on the services to which your tenant subscribes and there are rules for different use cases. Browse through available rules and assign an escalation policy as desired. Not all rules have to be used.
Select a notification rule name to see details about its configuration and supported contact methods. Not all rules support all contact methods.
There are two types of notification rules, manual and automatic:
Manual Rules🔗
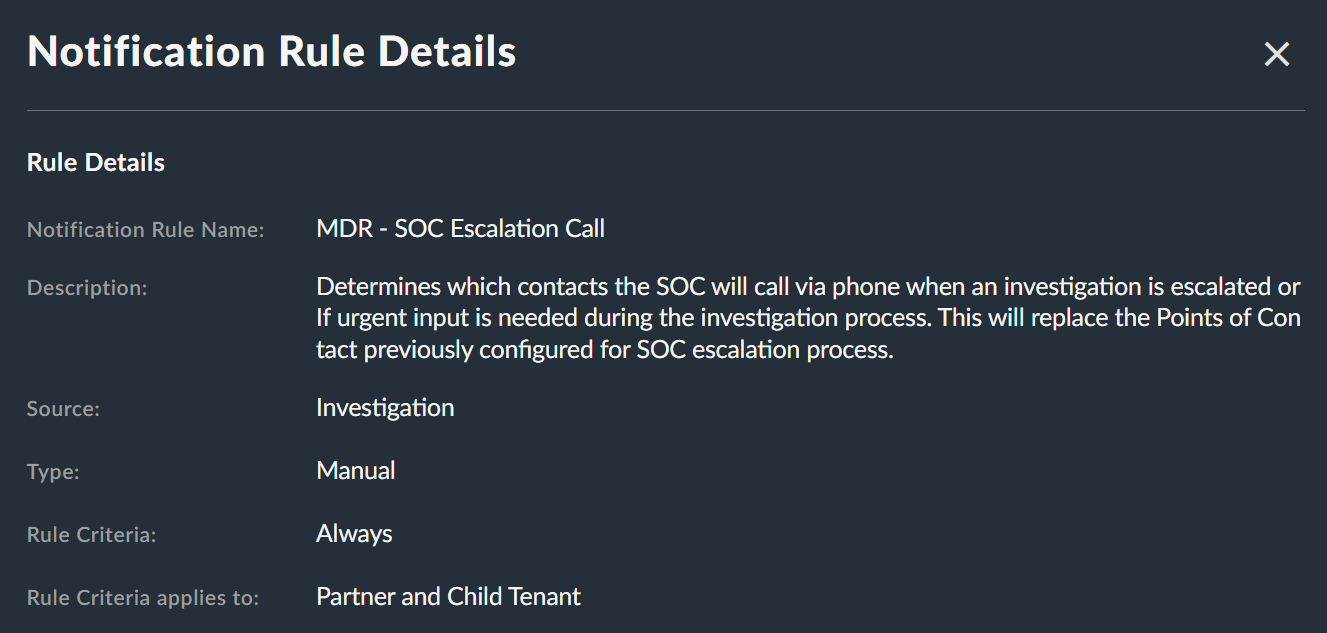
A human triggers manual notification rules, such as when a service provider like Secureworks® Taegis™ MDR needs to notify your organization about a security incident.
The MDR – SOC Escalation Call rule exemplifies a manual notification and is pre-configured to dynamically provide SOC analysts with the appropriate contacts, ensuring the right contact is reached. Assign a properly configured escalation policy to this rule for manual phone escalations.
Automatic Rules🔗
Specific events in the XDR tenant trigger automatic notification rules. Examples include a case awaiting action or health-related issues with collectors and assets.
Important
Automatic rules initiate only automated contact methods such as email, robocall, and push notifications, while manual rules do not support automated contact methods.
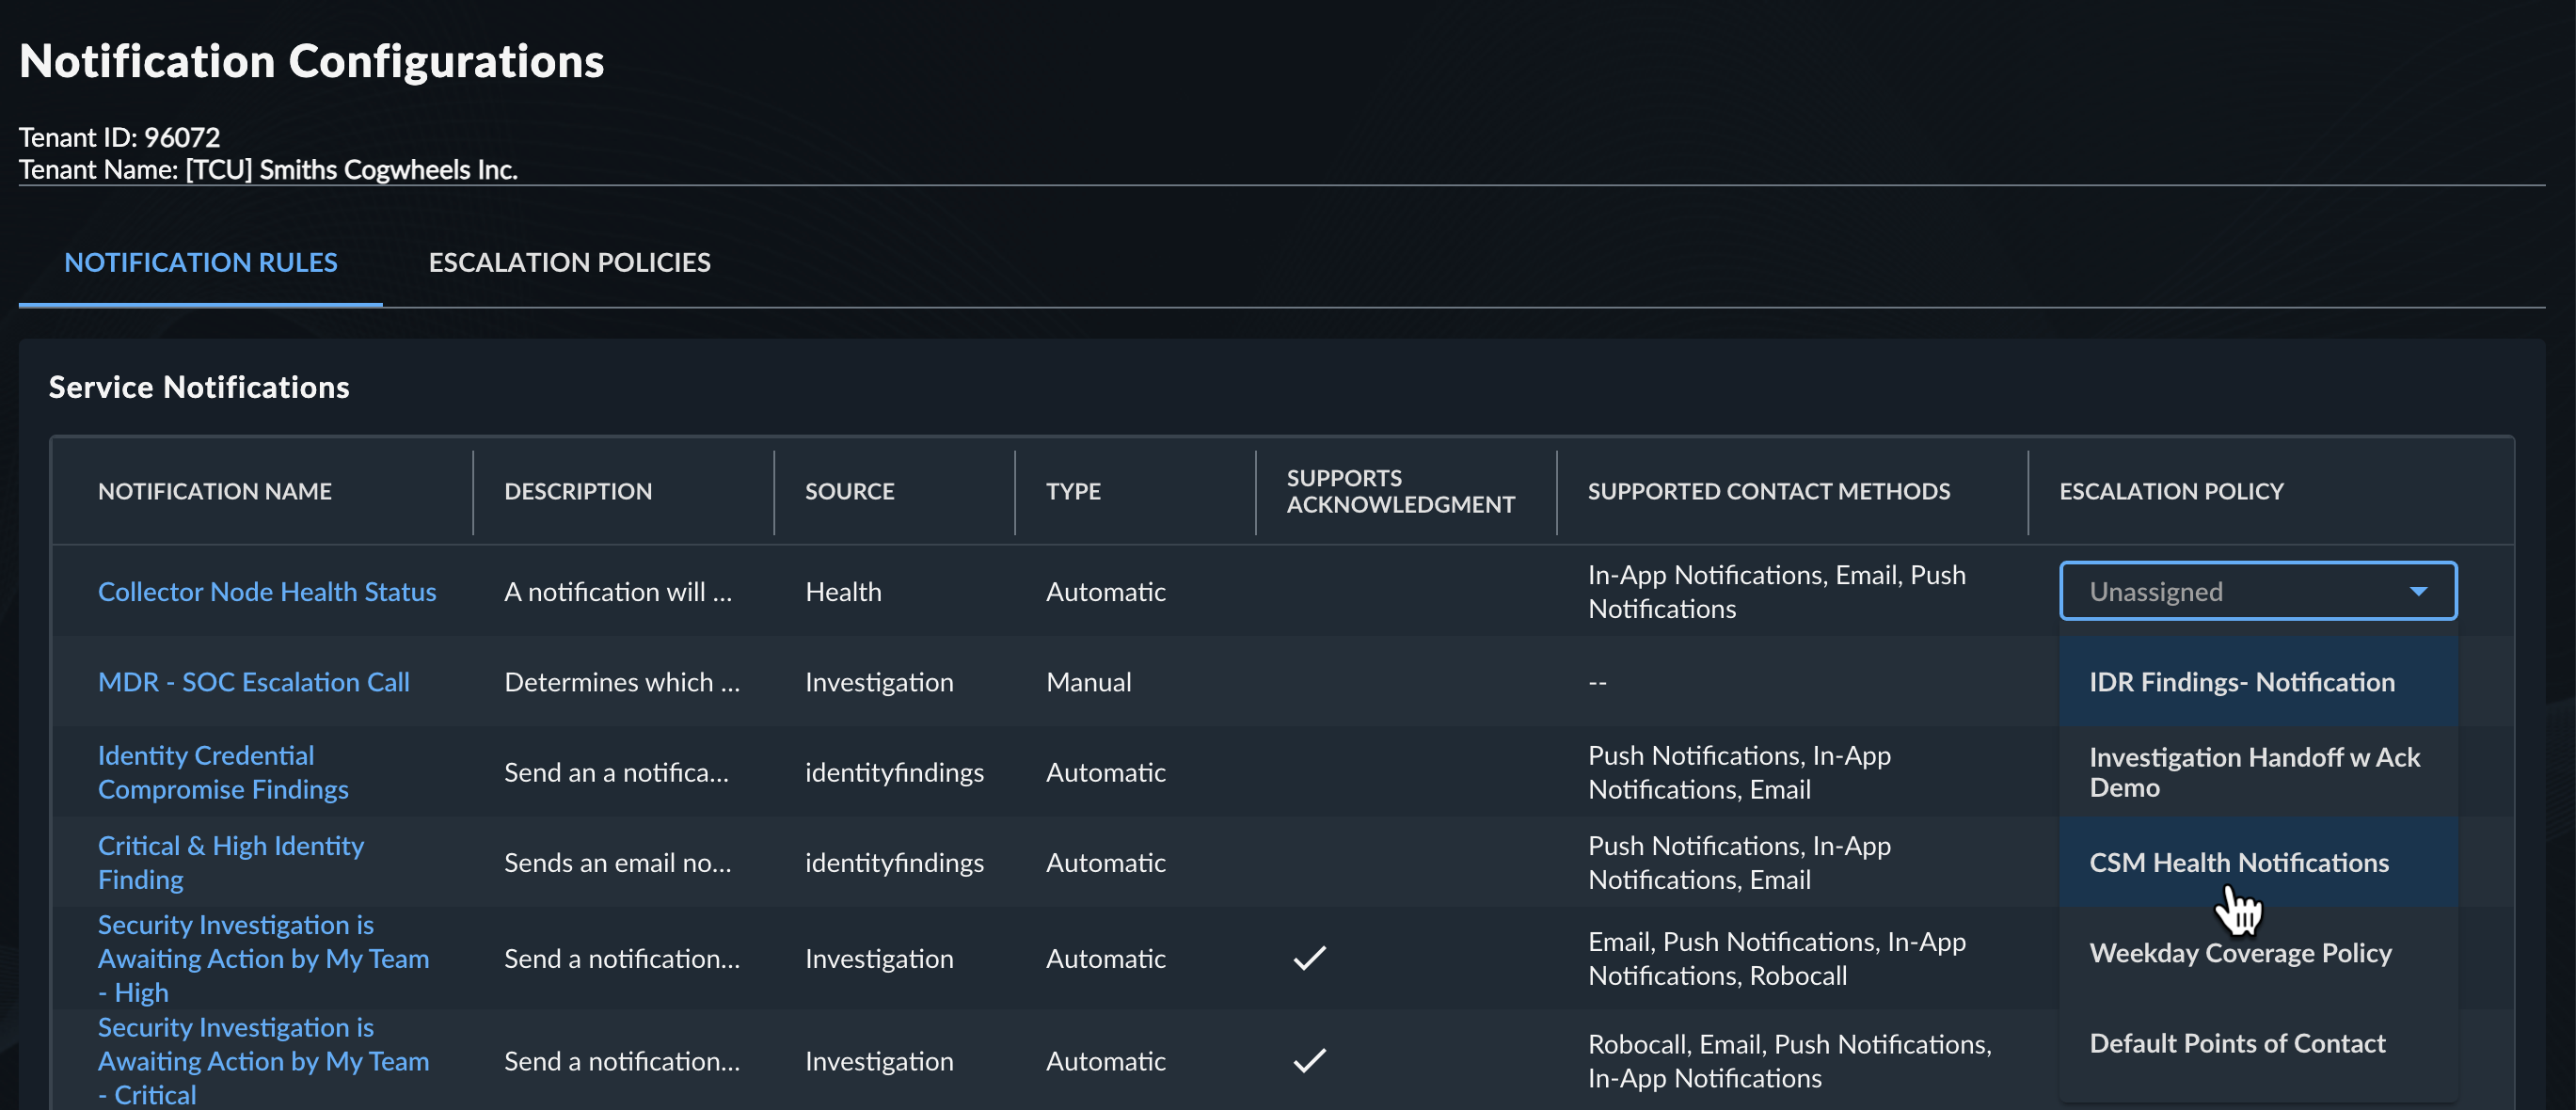
Assign Escalation Policies🔗
Use the dropdown menu from the Escalation Policy column to assign a configured escalation policy to a notification rule. The sequence and criteria configured in the policy will then be used for notifications for the events covered by the rule.
Escalation Policies🔗
Escalation policies define a sequence of contacts with criteria for contacting each, like time of day, day of the week, and preferred contact methods. Multiple escalation policies can be created to address different scenarios, such as holidays or varying operational and response team needs.
Note
If the XDR tenant had previously defined points of contact, this is migrated to a pre-made Default Points of Contact escalation policy.
Escalation Acknowledgment🔗
The acknowledgement option supported by some automatic notification rules allows you to present contacts with the option to acknowledge the escalation or escalate it to the next contact in the policy sequence. The wait time interval you set determines the amount of time the policy will wait for response from one contact before moving to the next.
Acknowledgment in policies is available for electronic and automated communication. This feature doesn't apply to manual notification rules like MDR - SOC Escalation Call and is not supported by all automated rules.
Note
For case notification rules, the Assignee of a case changes to the user that acknowledges the notification, or to the final user in the policy if not acknowledged.
Supported Contact Methods🔗
Automatic notification rules may support the following automated contact methods:
- Email - User will receive an email to the address associated with their account.
- Push Notifications - User will receive a push notification via the XDR Mobile App or browser registered in their User Profile & Settings. Eligible notifications sent through Notification Rules will trigger a push notification to registered devices only.
- Robocall - User will receive an automated voice message to the contact number in their User Profile.
Important
Users should verify that the email address and phone number listed in their User Profile are correct and that the devices they would like to receive push notification on are registered.
Create Escalation Policies🔗
To create a new escalation policy, follow these steps:
-
Select Create Escalation Policy from the Escalation Policies tab to define a new policy.
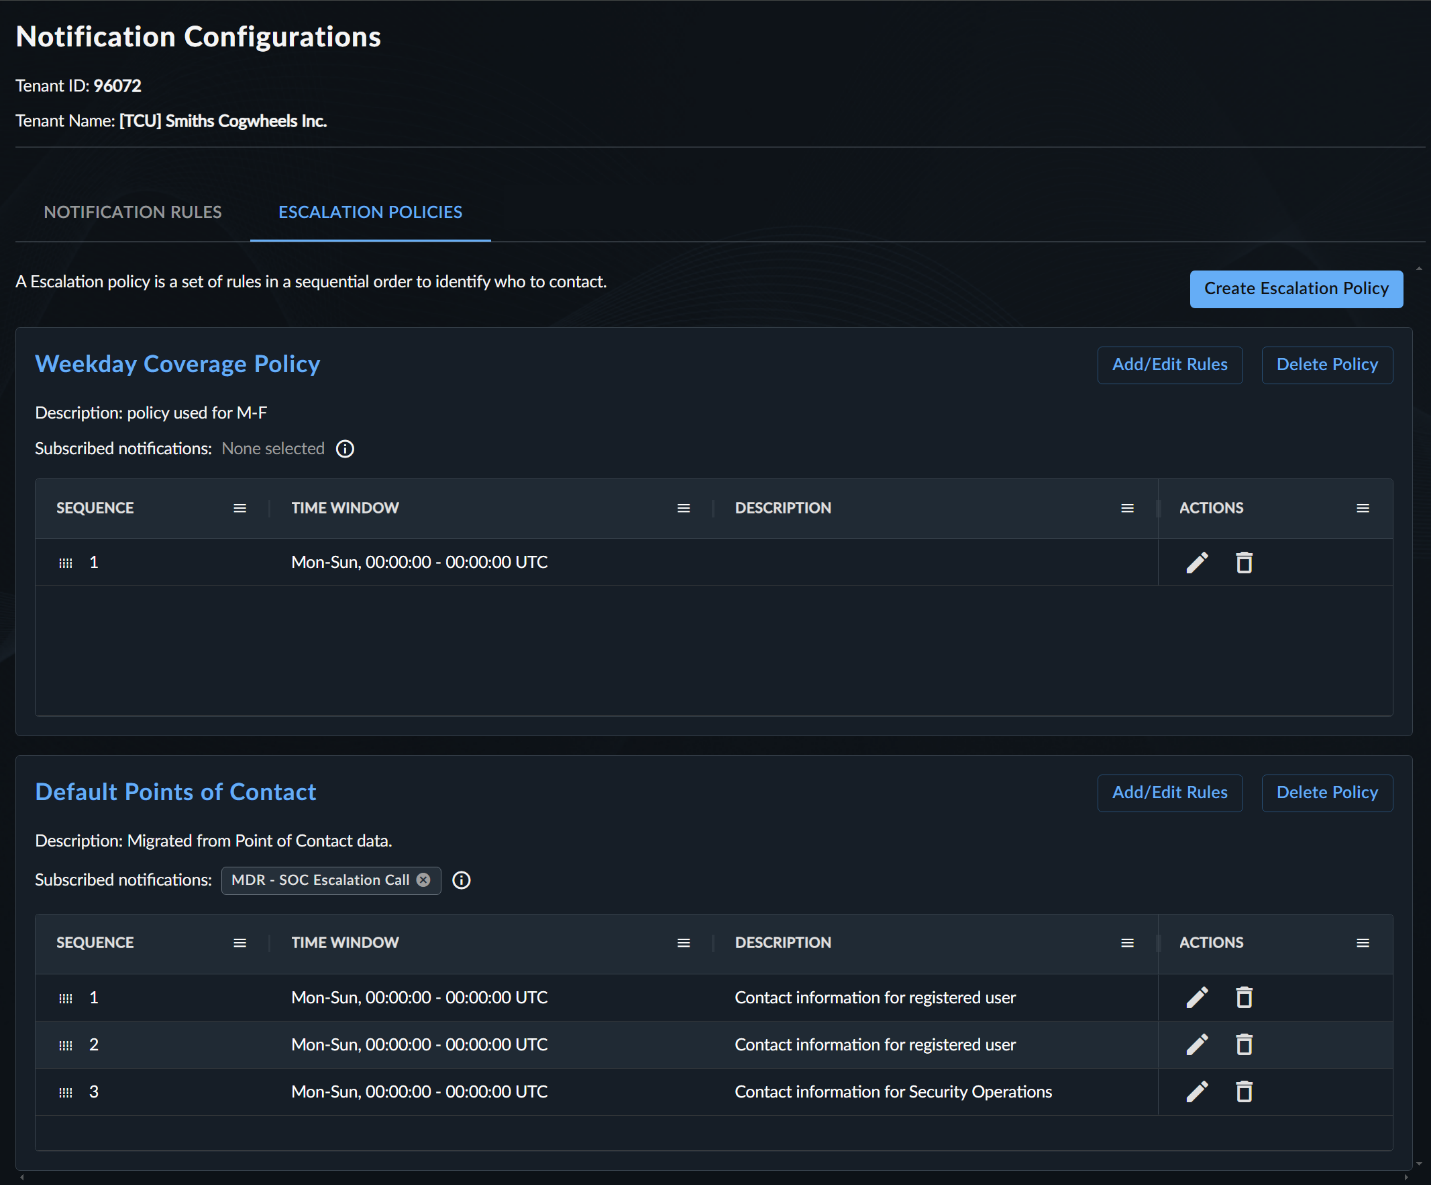
Escalation Policies -
Enter a Policy Name and Policy Description.
-
If you would like contacts to acknowledge escalations, select the Acknowledgment checkbox and define a wait time interval in
HH:mm:ssformat that occurs before proceeding to the next contact if there's no response.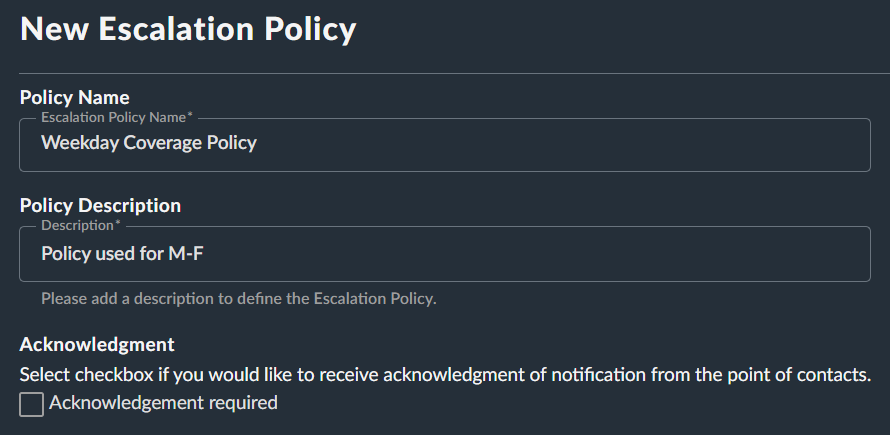
Escalation Policy Details -
In the Add/Edit Rules section, configure a sequence rule for each contact to be added to the policy.
-
In the Point of Contact section, select the contact type for the rule:
- Registered User: Choose a registered user from the XDR tenant. Once selected, the Name, Email, and Phone info are populated from the user's information in User Profile & Settings.
- External Contact: Enter contact information for a contact not registered in the XDR tenant. This option displays a form to provide Name, Email, and Contact Number details for external contacts.
Tip
An external contact allows for the use of a shared phone number in the escalation policy.

Point of Contact -
In the Preferred Contact Methods section, select one or more preferred contact methods for the contact:
- Email - Automated email sent to the address associated with the user's XDR account
- Push Notifications - Push notification via the XDR Mobile App or browser registered in the user's User Profile & Settings
- Robocall - Automated voice message to the contact number in the user's User Profile
-
In the Time Windows section, specify the days of the week and time period the contact can be reached, or choose All Days and Any Time for 24-hour coverage everyday. The escalation policy follows a sequential order during manual calls, presenting the analyst with only valid matching contacts at the time of the contact request.
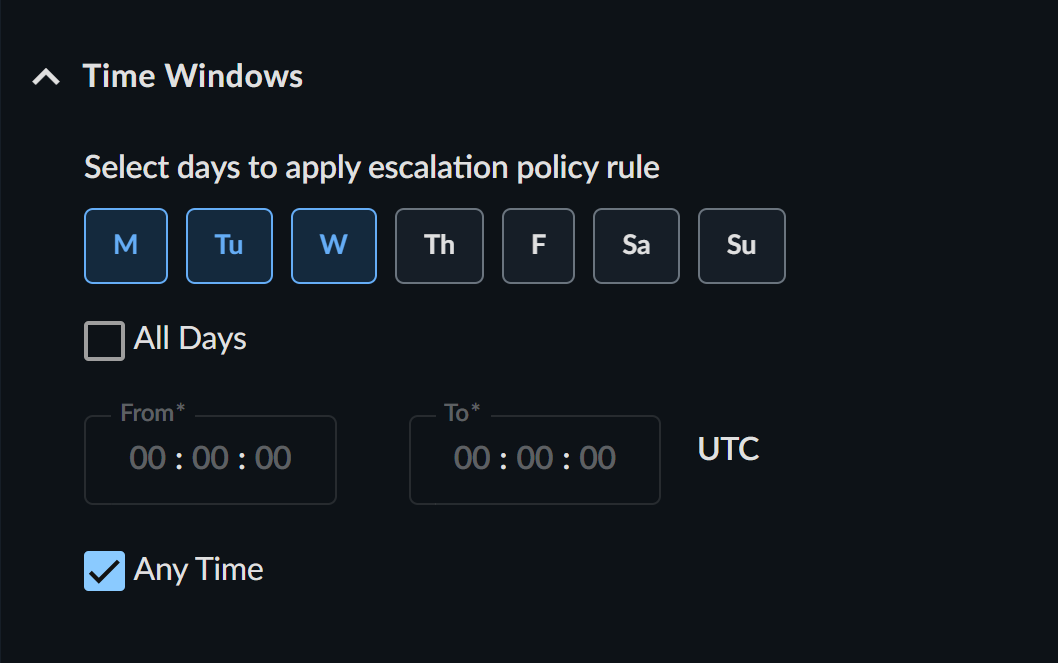
Time Windows Selection Important
Ensure there is continuous user coverage throughout the week. Always have at least one user available at any time.
-
-
Repeat the process for each user as needed in the escalation policy.
Note
Register up to ten contacts in a single escalation policy.
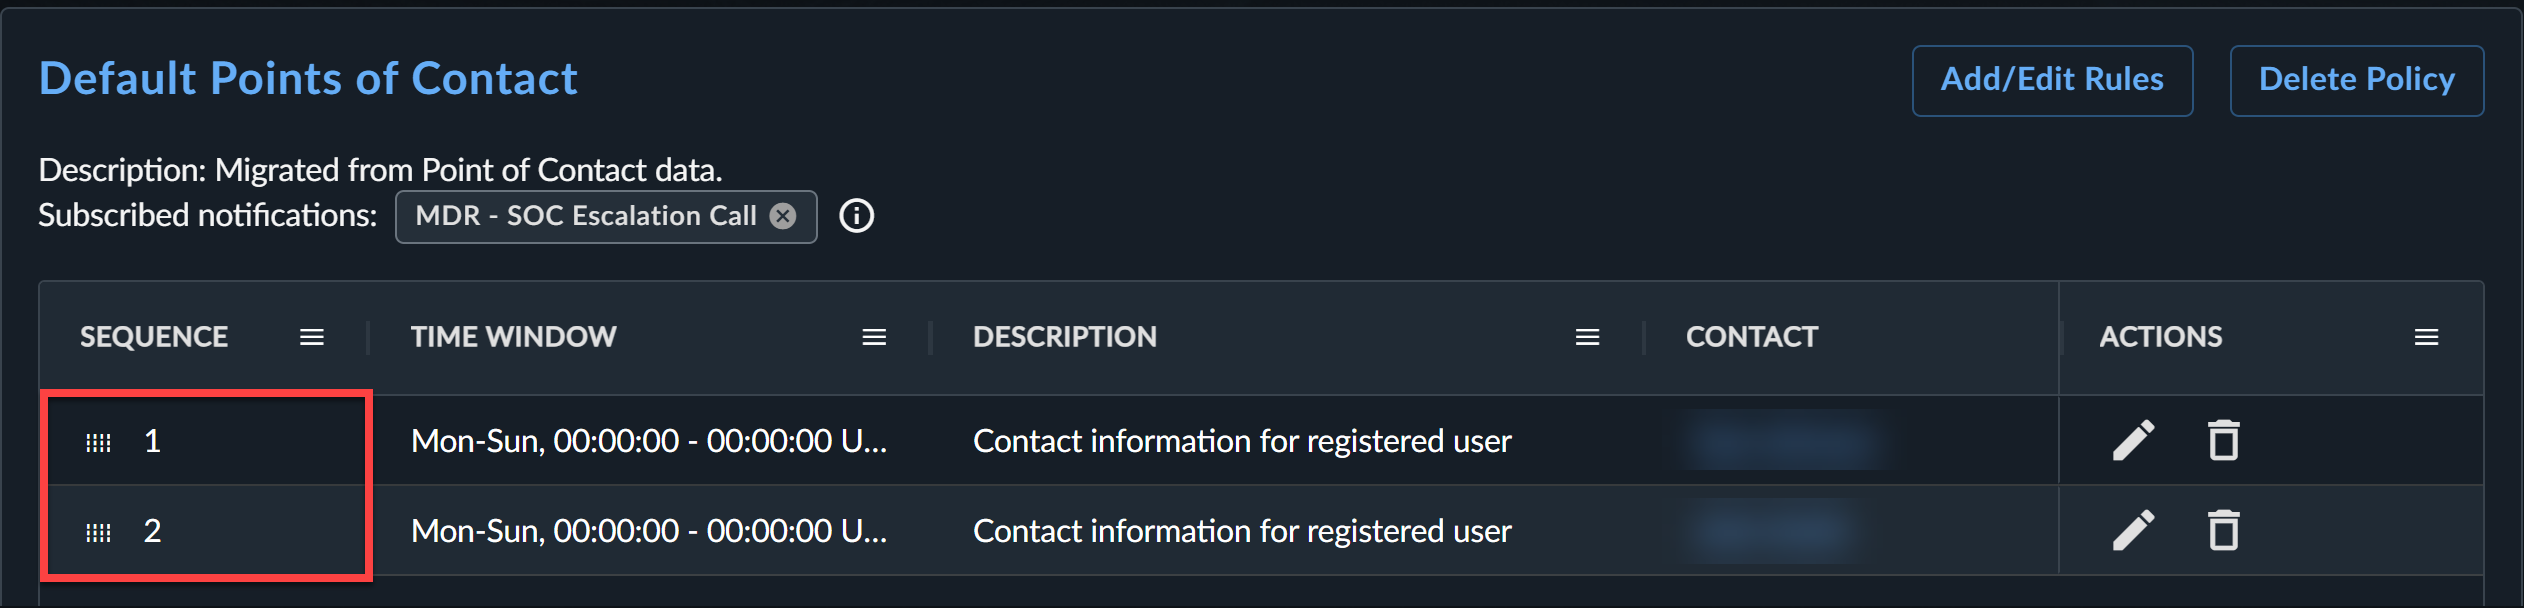
-
Use the drag-and-drop icons to rearrange the rule sequence if needed.
-
Select Save Escalation Policy when finished.
Note
Overlapping rules can cause the system to send duplicate notifications.
Edit Escalation Policies🔗
Adjust escalation policies from the Escalation Policies tab.
Edit Policy🔗
Use the Add/Edit Rules button to edit policy name, details, and each rule's granular configuration. Rules can also be reordered from this view.

Reorder Rules🔗
Reorder rules using the drag-and-drop icons from the Escalation Policies tab overview page.
Edit or Remove Rules🔗
Use the pencil icon in each row under the Actions column to edit the policy or the trashcan icon to remove a rule.
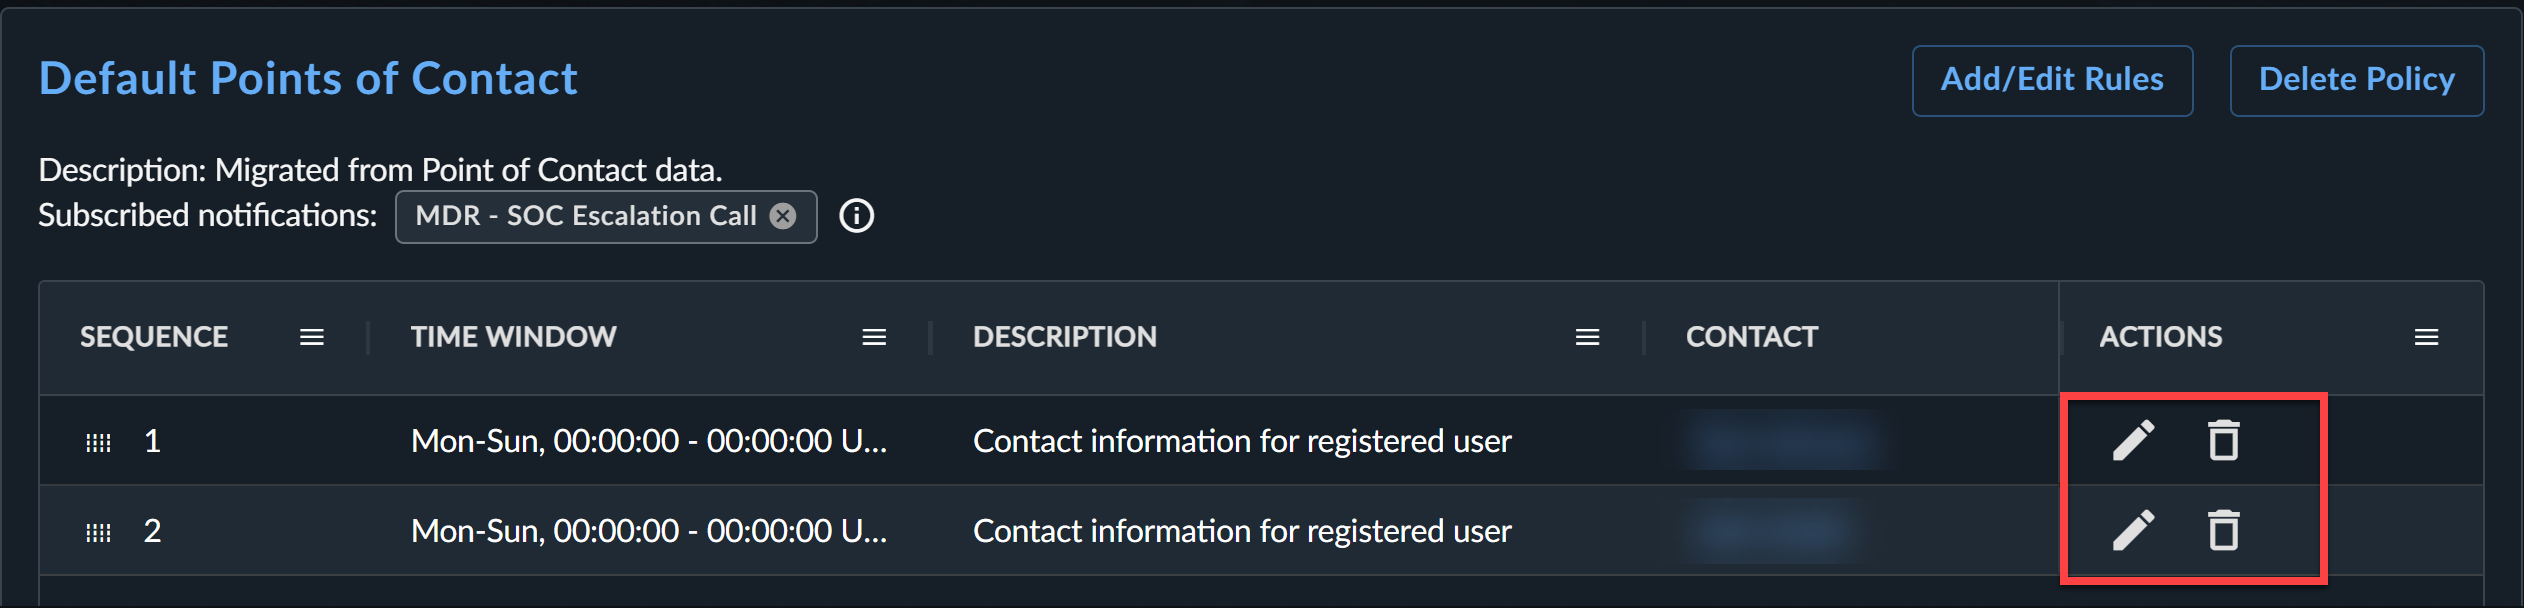
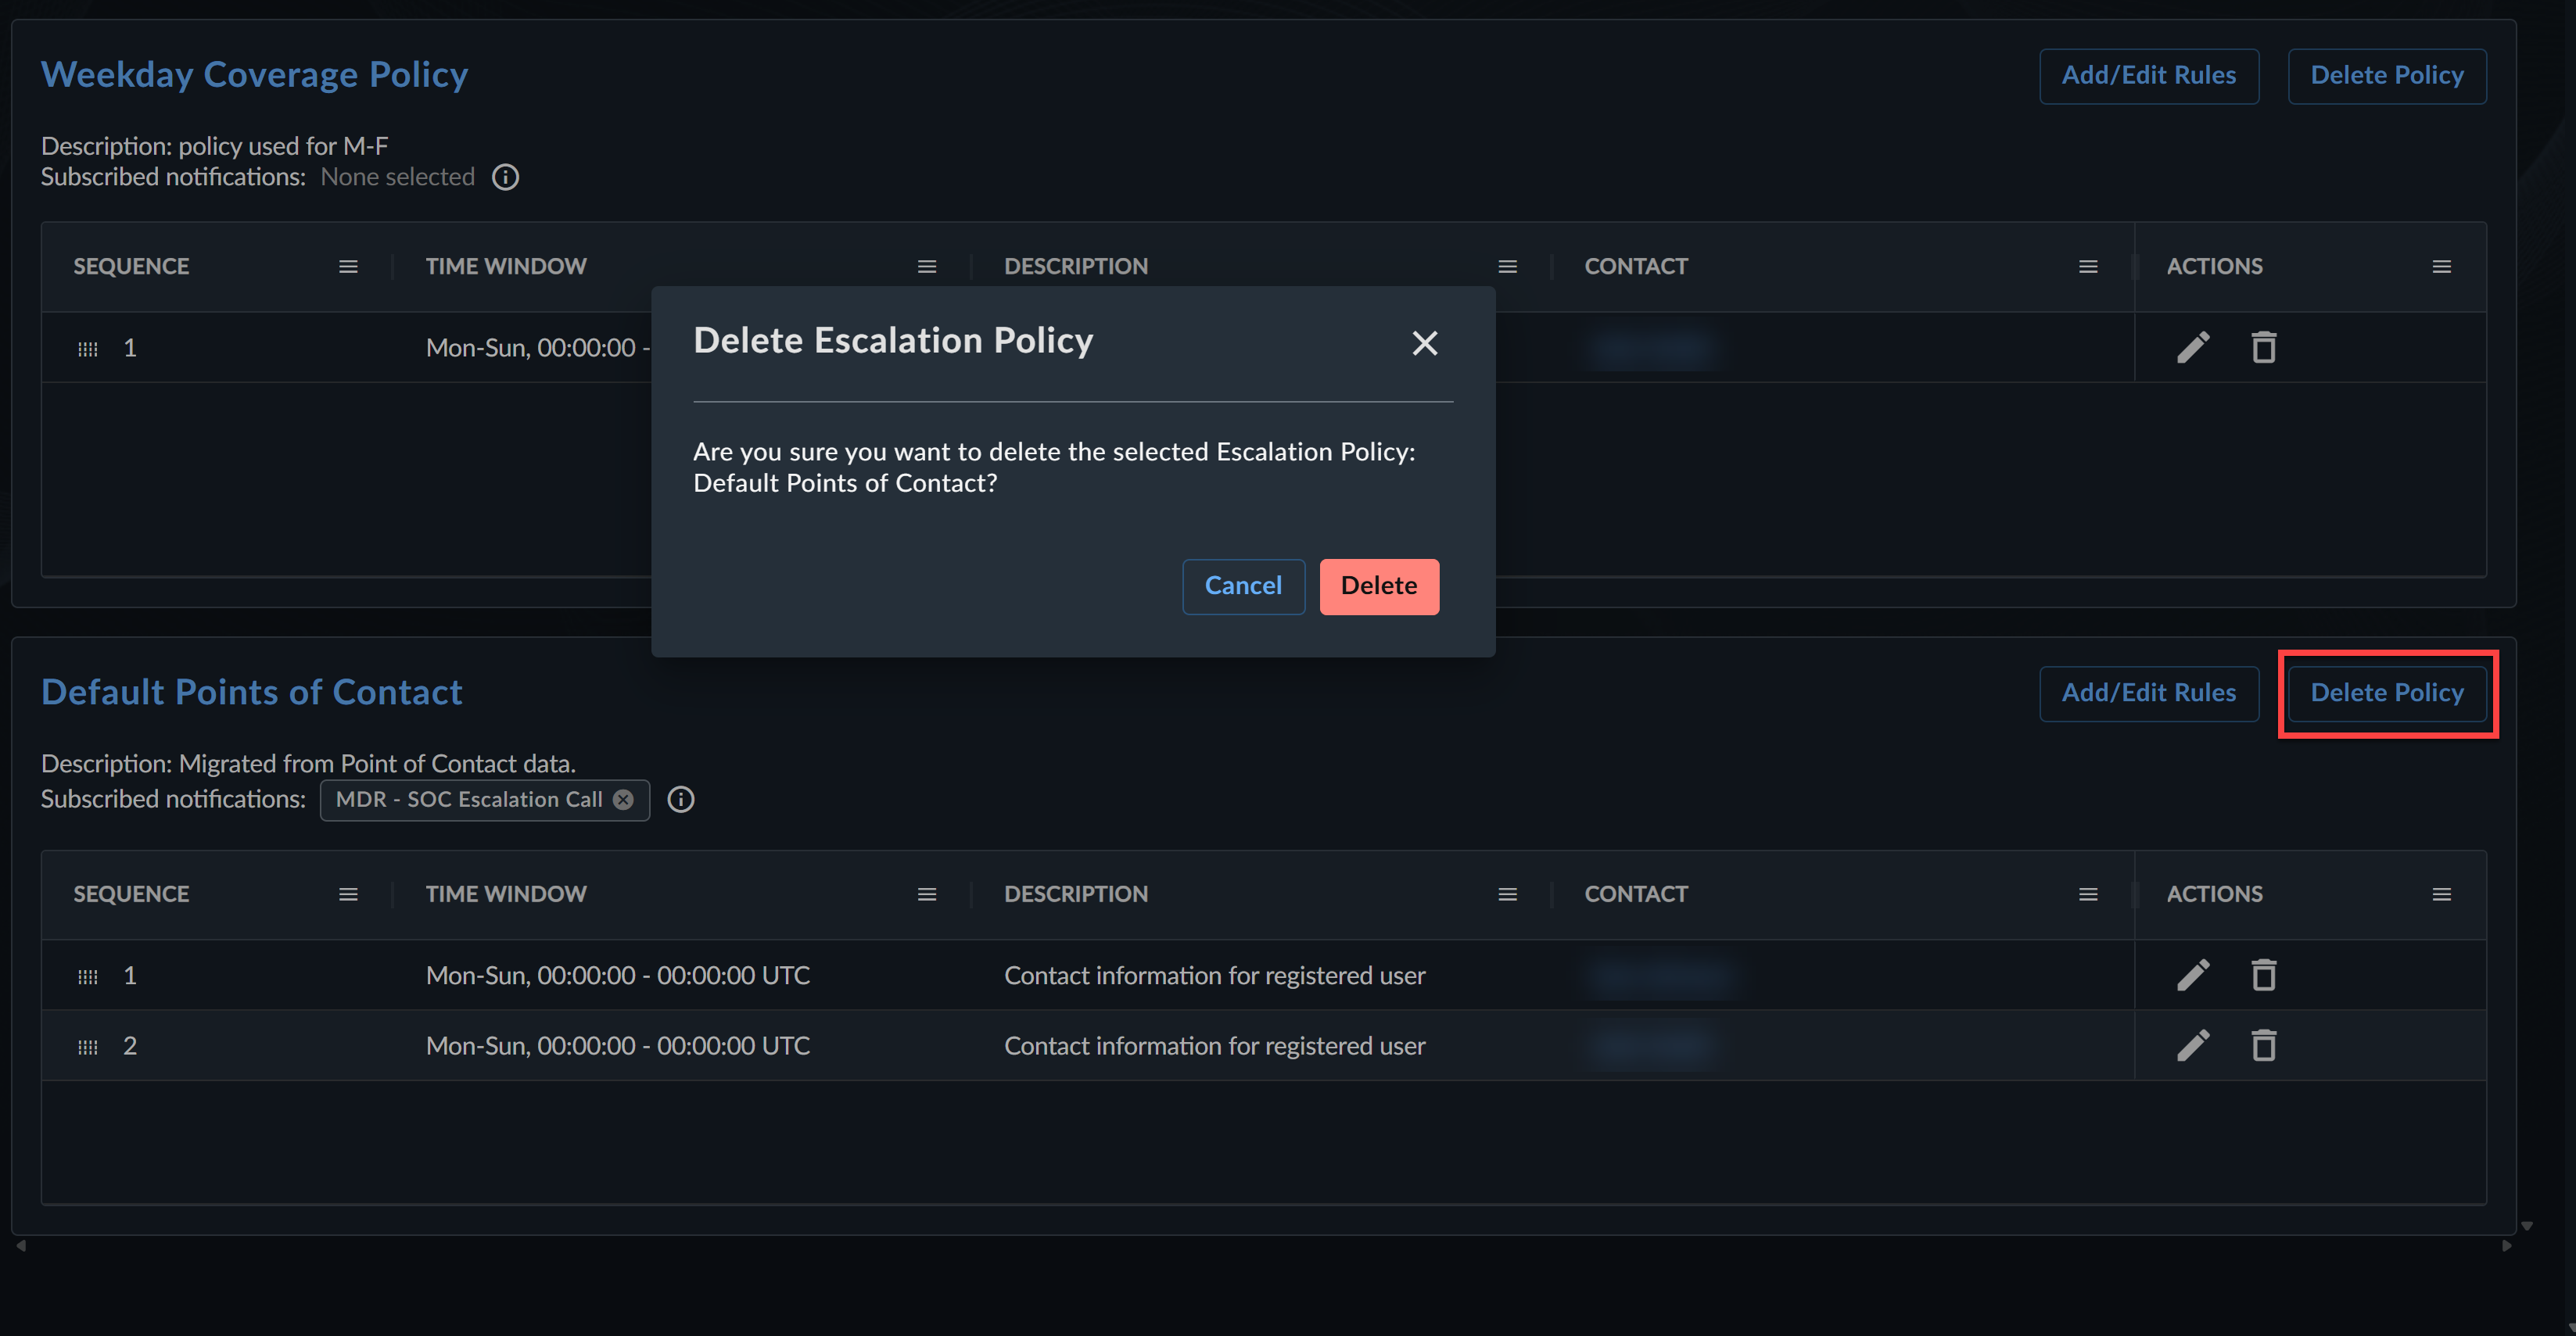
Delete Policy🔗
Use the Delete Policy button to remove an entire policy, prompting a confirmation dialogue.