Enterprise Single Sign-On (SSO)🔗
Single sign-on (SSO) enables you to integrate Secureworks® Taegis™ XDR access with a localized corporate authentication system, termed a connection in XDR.
With SSO enabled, XDR users utilize their corporate authentication credentials when accessing XDR, which means if you are logged in to your corporate network, you no longer need a separate password or MFA to log in to XDR.
Important
Users still require a user account to be created in XDR including an applicable role with the same email address used in your corporate authentication system. The email address is what allows the synchronization between the authentication systems on a per-user basis.
Enabling SSO provides the following benefits:
- XDR adheres to your password and MFA standards
- No need for a separate MFA system or remembering an additional password
- User admin is centralized to your corporate authentication system as this is linked to XDR
- Once your session times out and you need to log back in, there is no need for password and MFA entry to reaccess the system
Prerequisites🔗
Security Assertion Markup Language 2.0 is a version of the SAML standard for exchanging authentication and authorization identities between security domains.
Your authentication system must be compatible with the SAML2.0 authentication protocol to set up an integration with XDR.
Enterprise SSO Overview🔗
Important
If you have been supplied XDR through a Partner (MSSP) organization, please confirm with your Partner that SSO integration is supported before continuing.
Tenant Administrators can manage SSO connections on the Enterprise SSO page, accessed from Tenant Settings → Enterprise SSO in the Taegis Menu.
Note
Enterprise SSO is only configurable by users with the Tenant Admin role.
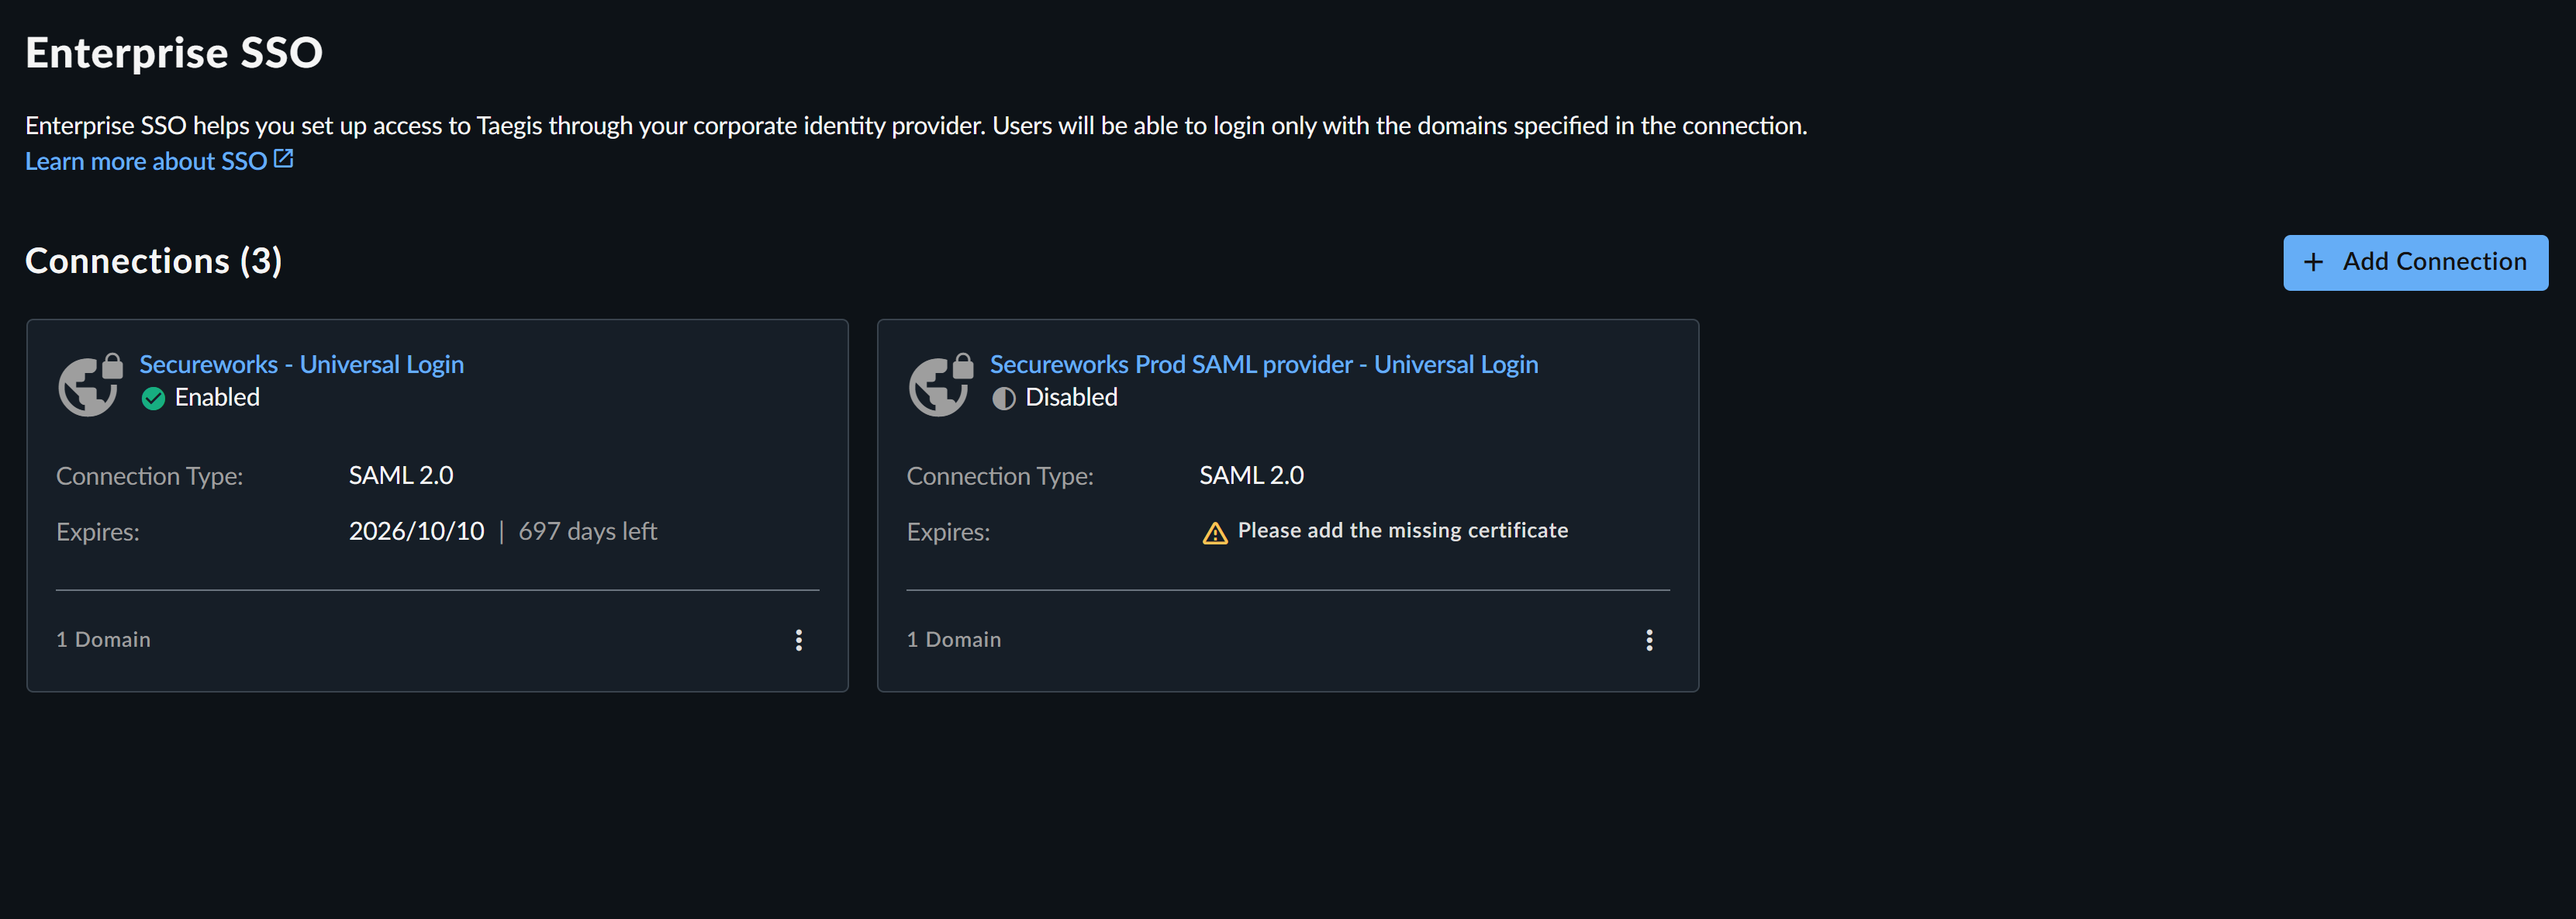
Connections Tab🔗
The Connections tab displays current SSO connections as summary cards with the number of domains, expiration date of the signing certificate, and one of the following statuses of the connection below the name:
-
Enabled — All users whose email login credentials match the domains specified in the SSO configuration will access XDR using SSO.
-
Disabled — The SSO connection is not active for any users with email addresses matching the configured domains. Only disabled connections can be deleted.
- Draft — A connection is moved into Draft status if the configuration is incomplete. This may happen if an update is applied and the system reboots, if there are issues on the browser, etc.
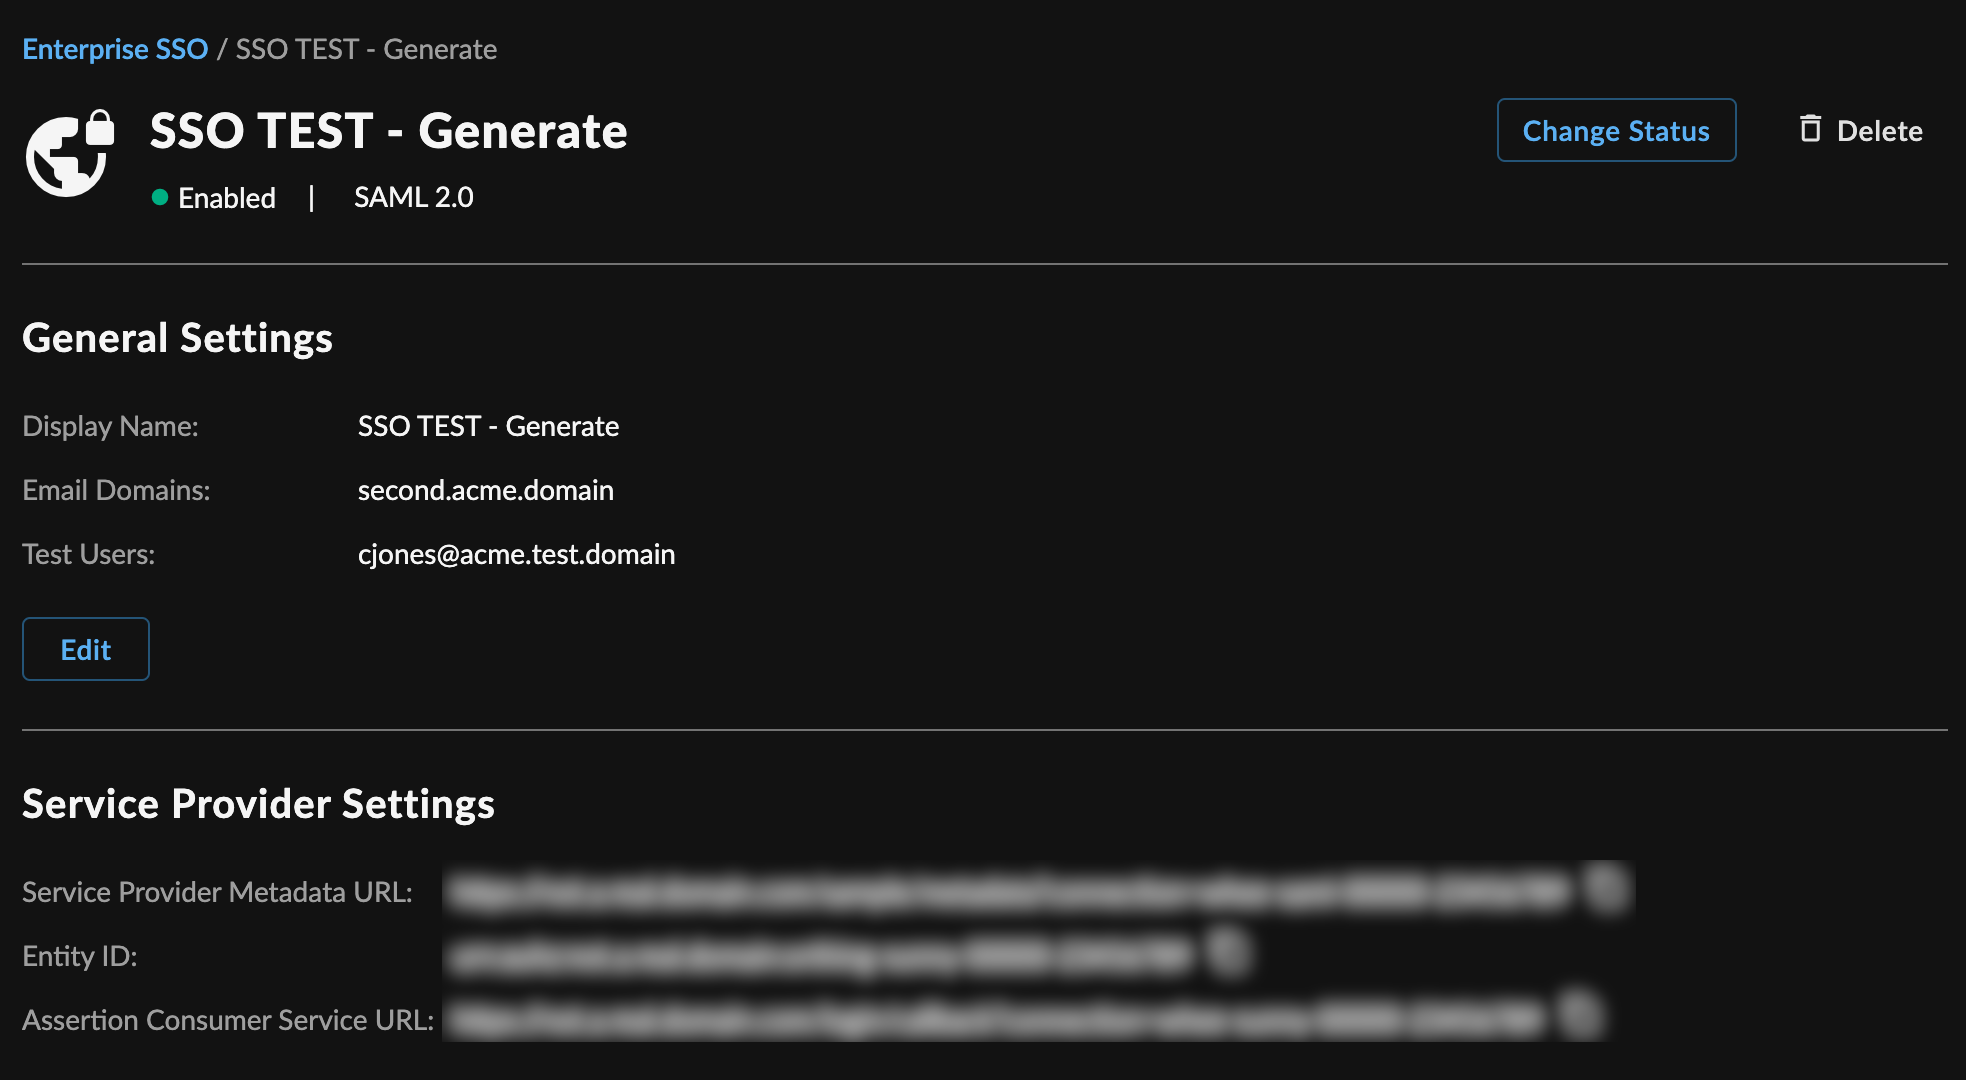
Select a summary card to review the connection details, change the status, edit details, or delete the connection.
You can also change the status or delete the connection by selecting the menu icon from the bottom-right corner of a card on the Enterprise SSO page.
Domains Tab🔗
Use the Domains tab to register and verify email domains before configuring them for Single Sign-On (SSO), enhancing security and preventing accidental or unauthorized SSO setup for unrecognized domains.
This tab displays a table of all registered email domains and their current verification status, providing improved visibility and management. Additionally, it allows Tenant Administrators to register and verify new email domains before they can be used for a new SSO connection.
Important
Before an email domain can be used in an SSO connection, it must be registered and verified in the Domains tab.
Why Domain Verification Matters🔗
- Prevents misconfiguration: Only domains actively in use by users within the tenant can be linked to SSO, reducing the risk of accidental exposure or malicious domain spoofing.
- Improves visibility: The Domains tab allows administrators to view all approved and verified domains in one place.
- Aligns with security best practices: Ensures SSO configurations are tightly scoped and aligned with known user identities.
Register a Domain🔗
To register and verify a domain:
- From the Taegis Menu, navigate to Tenant Settings > Enterprise SSO > Domains.
- Select + Register Domain and enter the domain name, such as
demo.com.
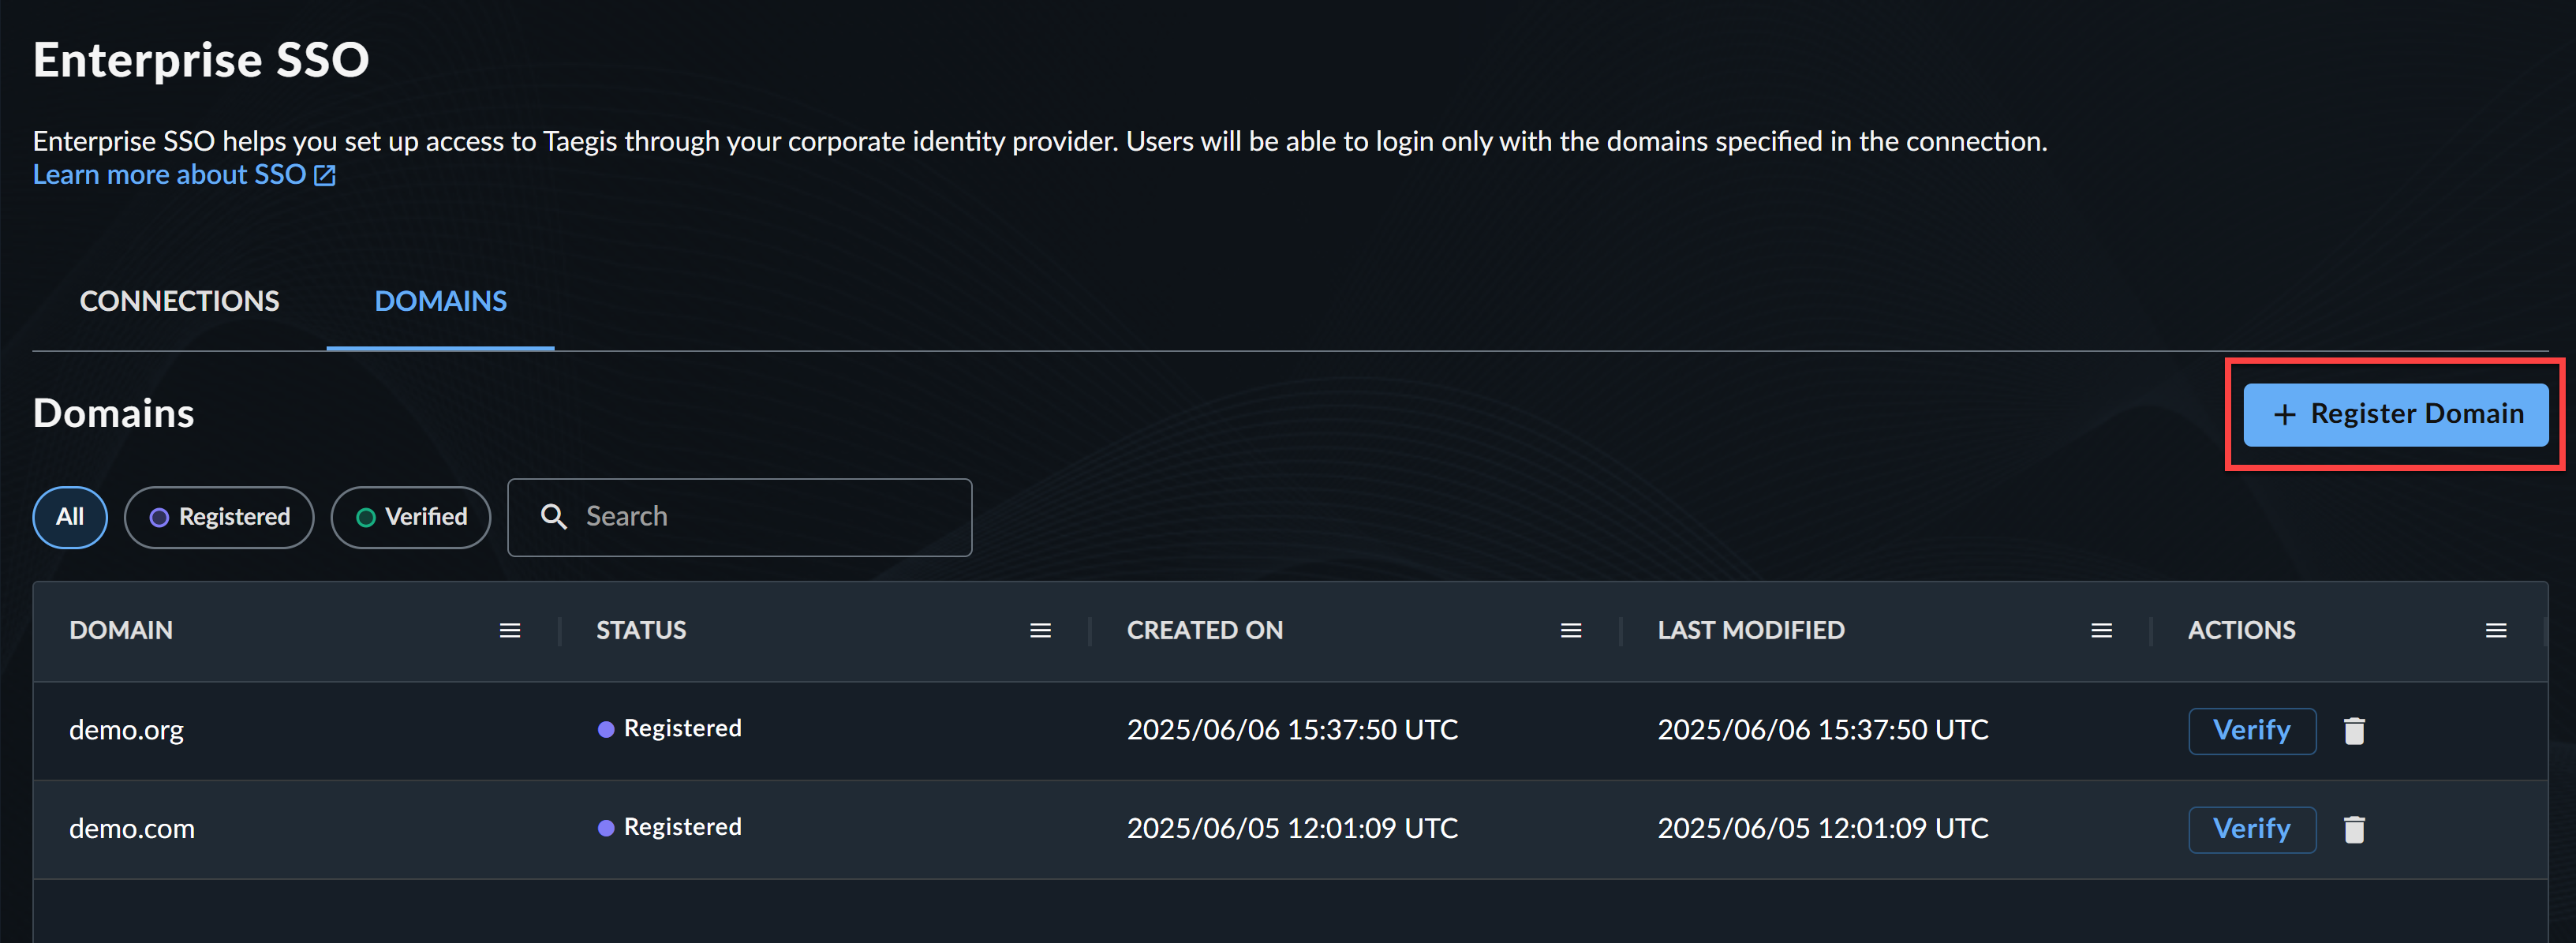
- Select Verify under the Actions column.
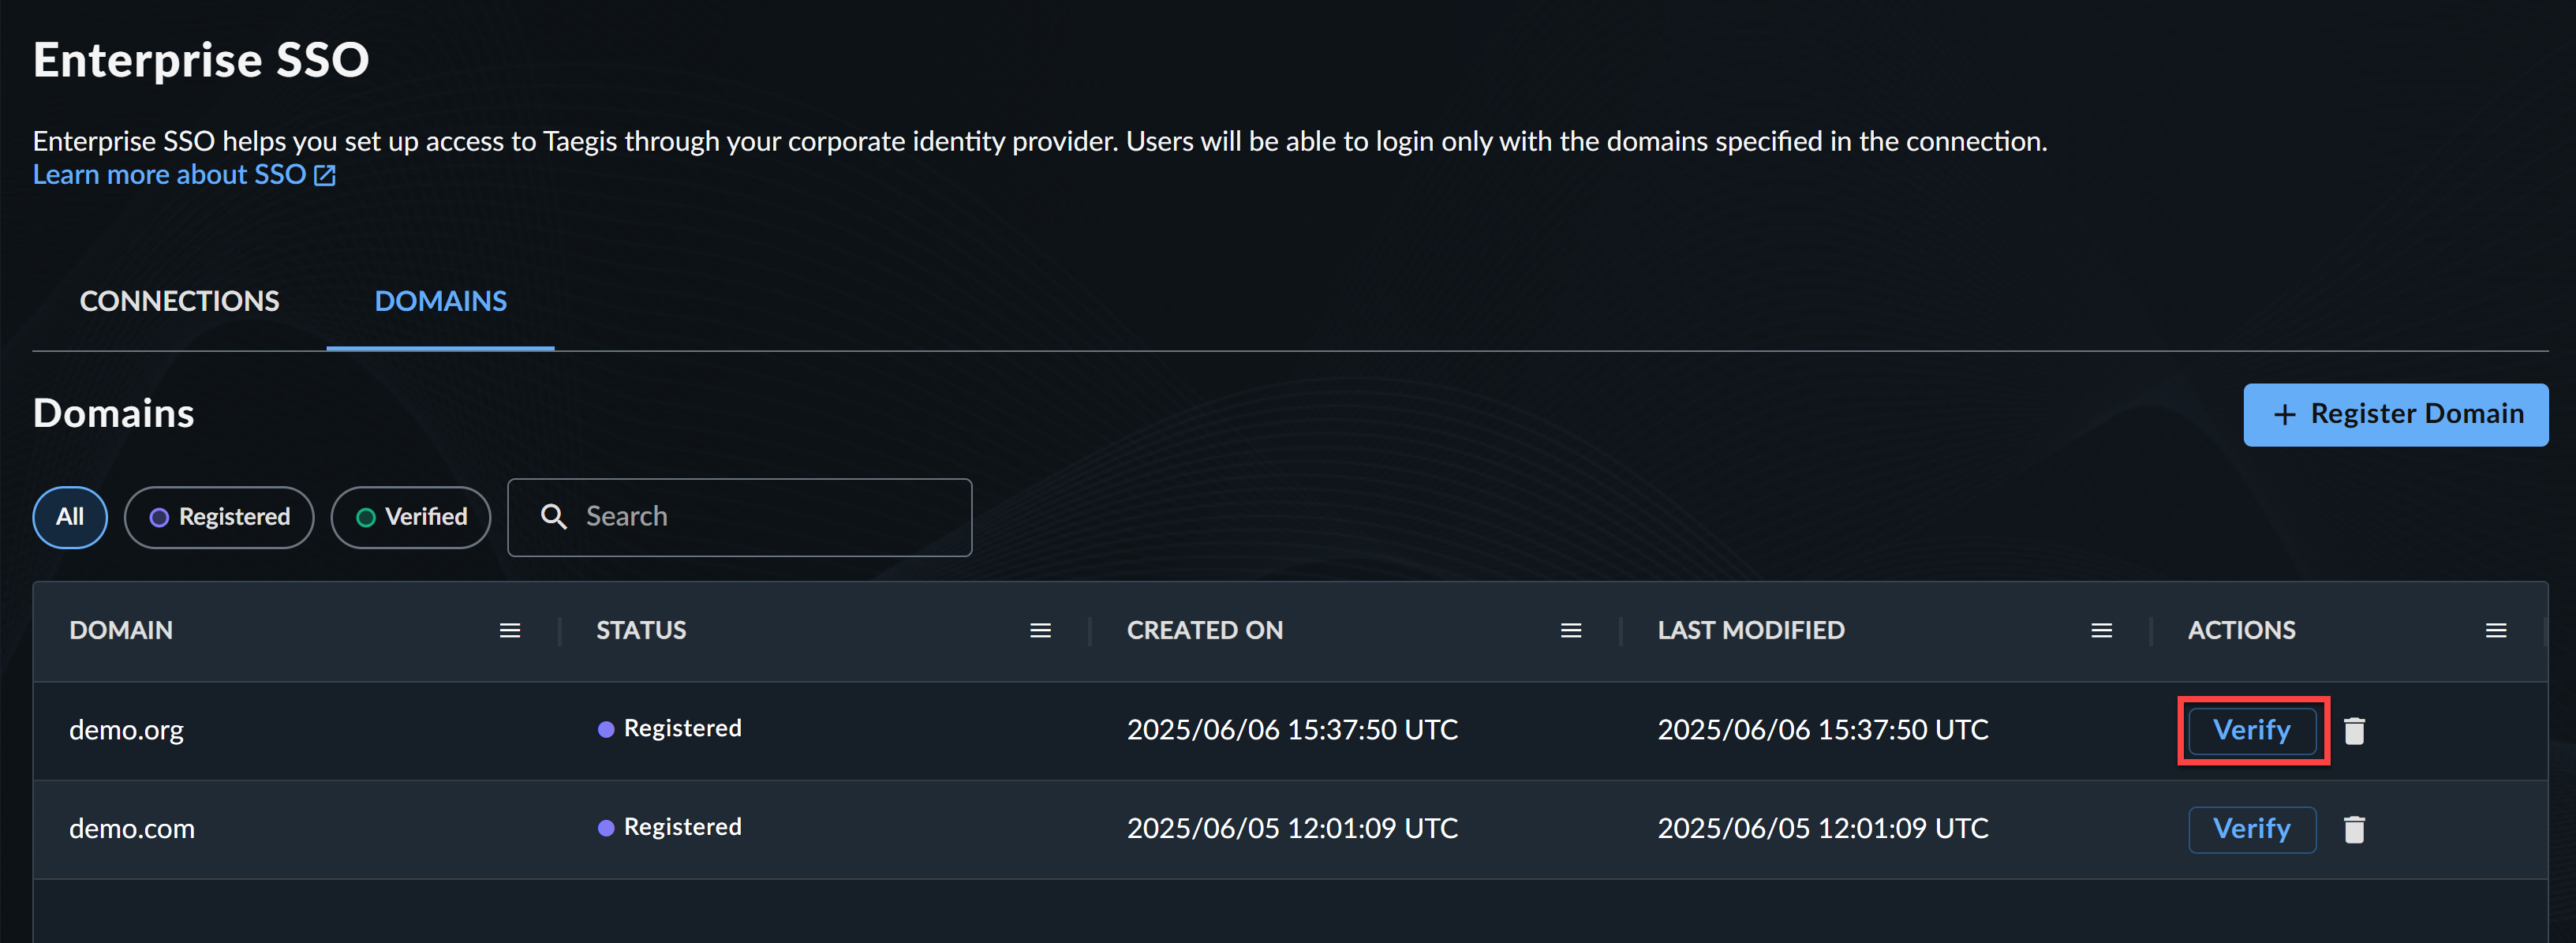
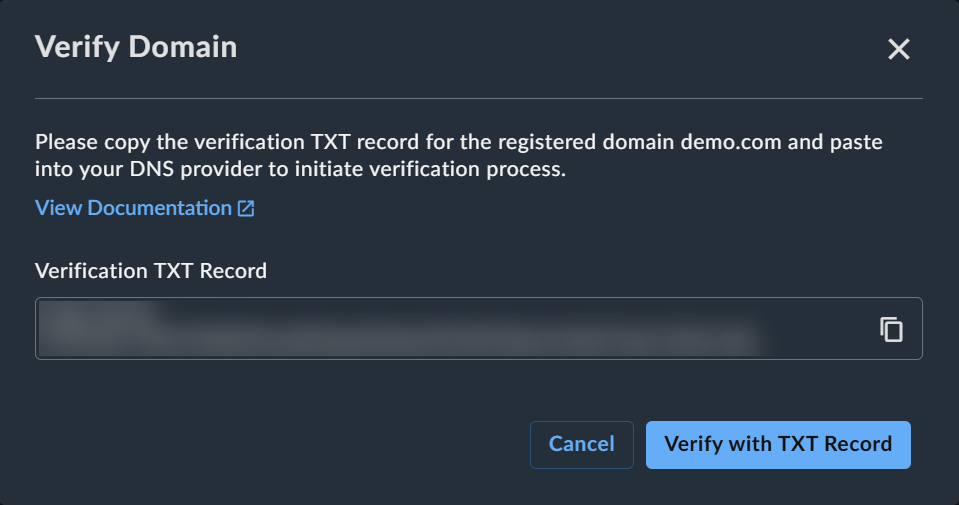
-
Verify with a DNS TXT record:
- Copy the verification TXT record for the registered domain.
- Add the TXT record to your DNS provider.
- Select Verify with TXT Record.
Note
TXT domain verification steps vary by authentication provider. For general TXT domain verification guidance from Microsoft, see Add DNS records to connect your domain.
Once a domain is verified, it becomes available for selection when configuring or editing an SSO connection.
Important
You can invite users to your Secureworks® Taegis™ XDR tenant before SSO is fully configured. However, those users must access XDR using username, password, and MFA until their email domain is verified and included in an enabled SSO connection. To ensure SSO access from the outset, make sure to:
- Verify the user’s email domain
- Complete the SSO connection configuration before inviting them to the tenant.
Add New SSO Connection🔗
Tenant Administrators can configure up to six SSO connections per tenant. Specified domains must be unique per connection and not span across connections.
Important
If you are opted in to Preview mode, you must register and verify an email domain in the Domains tab before it can be used in an SSO connection.
To set up a new connection, follow these steps:
- From the Taegis Menu, select Tenant Settings → Enterprise SSO.
- Select + Add Connection. The Add a New Connection panel displays. Use the guidance within each of the following sections to complete configuration.
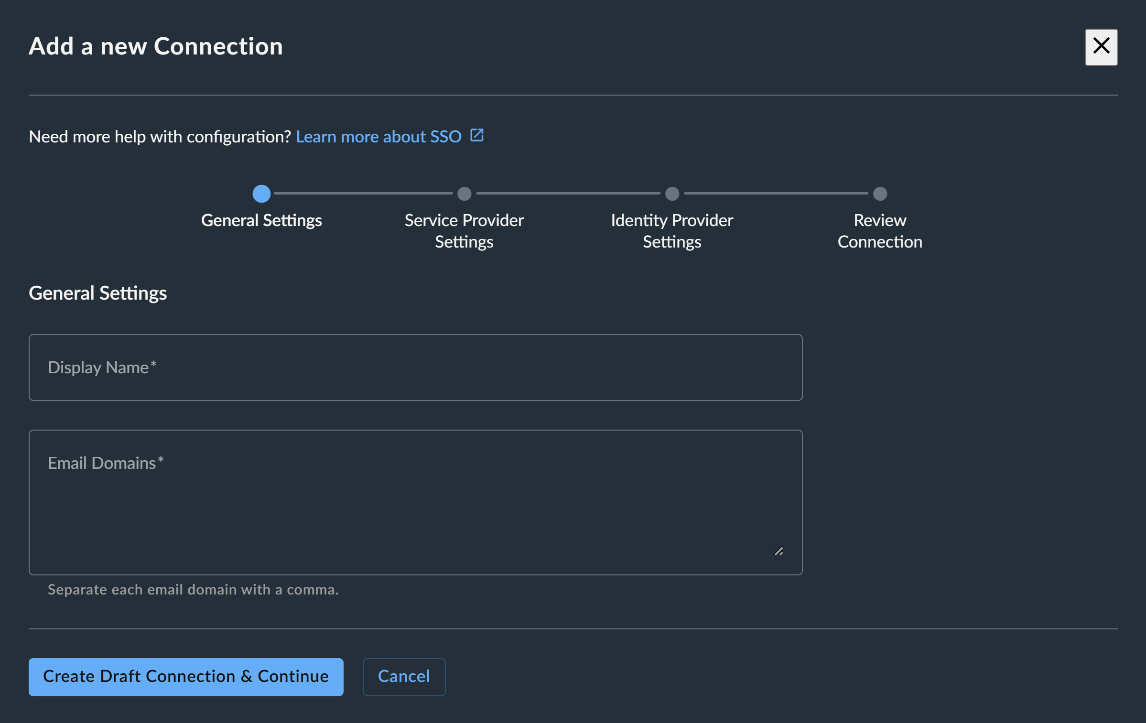
General Settings🔗
Provide the following information in General Settings:
- Display Name — Enter a descriptive name for the connection to easily identify it for audit and in case you configure multiple.
- Email Domains — Enter all domains for approved email addresses separated by a comma; e.g.,
company.com, companytemp.com, company123.com. If you are opted in to Preview mode, use the dropdown menu instead to select the domains you previously verified in the Domains tab.
Once these details have been provided, select Create Draft Connection & Continue.
Service Provider Settings🔗
Within the SSO configuration, XDR is defined as the Service Provider while your authentication system (Active Directory, PingFederate, Okta, etc.) is defined as the Identity Provider.

The Entity ID and Service URL in Service Provider Settings can be copied by selecting the copy icon to the left of these items. These are required when defining a connection within your corporate identity provider.
Once these details have been gathered, select Next,
Identity Provider Settings🔗
At this stage, you will be required to complete the configuration of your corporate identity provider connection.
Important
SAML Attributes🔗
The identity provider needs to be set up to return three required SAML attributes:
- The SAML NameID attribute is used to identify the user and must be the user's email address. The format of the NameID attribute must be
urn:oasis:names:tc:SAML:2.0:nameid-format:persistent. - The SAML attribute for the email address should be named
http://schemas.xmlsoap.org/ws/2005/05/identity/claims/emailaddress, with the value set to the user's email address. - The identity provider should confirm that the email is verified by including an attribute named
email_verifiedwith the value set totrueas a string, not Boolean:email_verified = true.
XDR will require information from the identification provider to complete the connection to your Tenant. Any user requiring access to XDR still needs an account created within XDR, but password and MFA authentication procedures will be taken from your corporate authentication system, such as Okta or Active Directory.
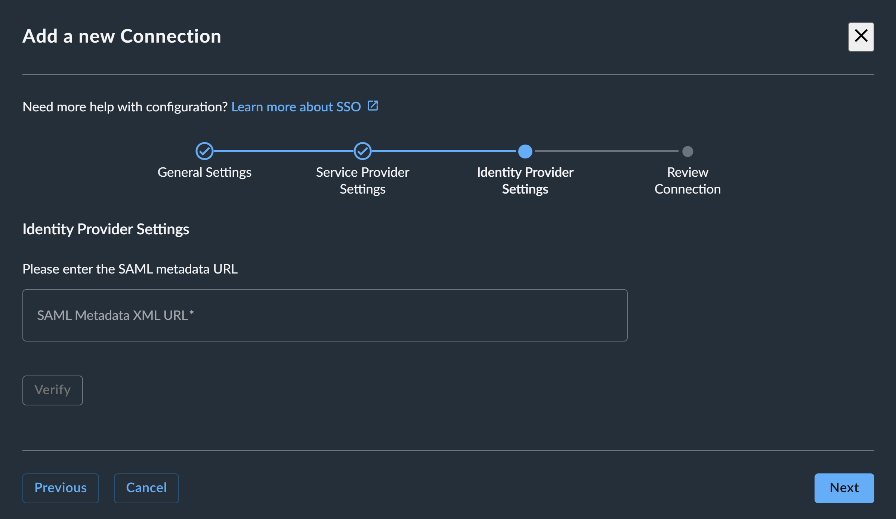
-
In Identity Provider Settings, supply the SAML Metadata XML URL from your Identity Provider and select Verify.
-
Once Verify has been selected, the signing certificate will be displayed. This should be checked against your identity provider information to confirm that the correct details have been captured as a part of the connection. If the details do not appear as expected, check the metadata url for any errors.
-
Select Next once verified to review the connection.
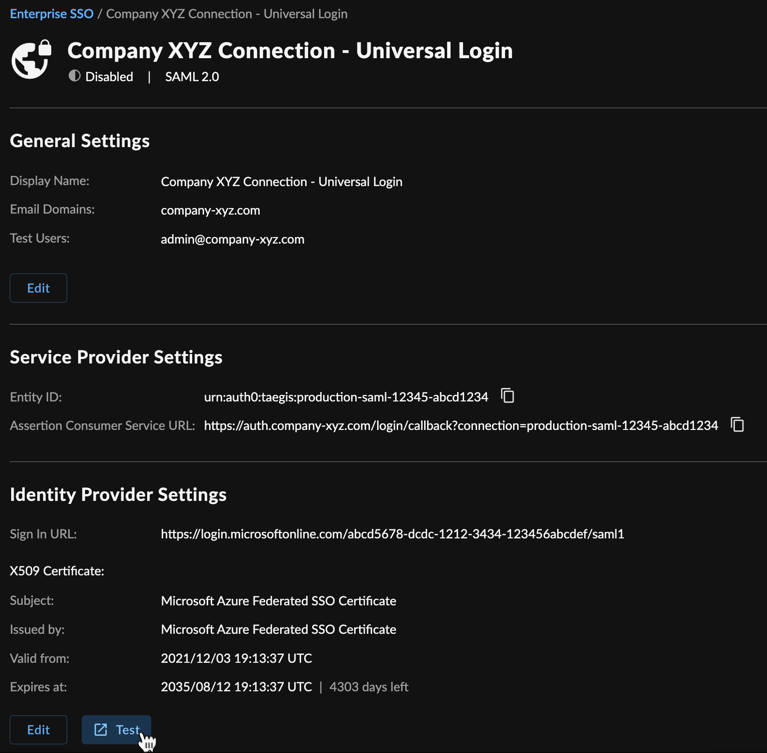
Review Connection🔗
In Review Connection, confirm that the summarized information is correct, and select Save Connection.

The new connection now appears as a summary card on the Enterprise SSO page in a Disabled status.
Test and Confirm SSO Connection🔗
After you have completed the steps to add a new SSO connection, select the summary card for the connection from Tenant Settings → Enterprise SSO. Select Test from the bottom of the connection details to confirm the configuration settings are operational. If there are any errors reported, reapply the settings and retest until successful.
After you have successfully tested the connection, change the connection status to Enabled so all users within the specified domain(s) are subject to SSO.
Note
Identity provider initiated logins are not supported. All logins must be initiated from XDR.
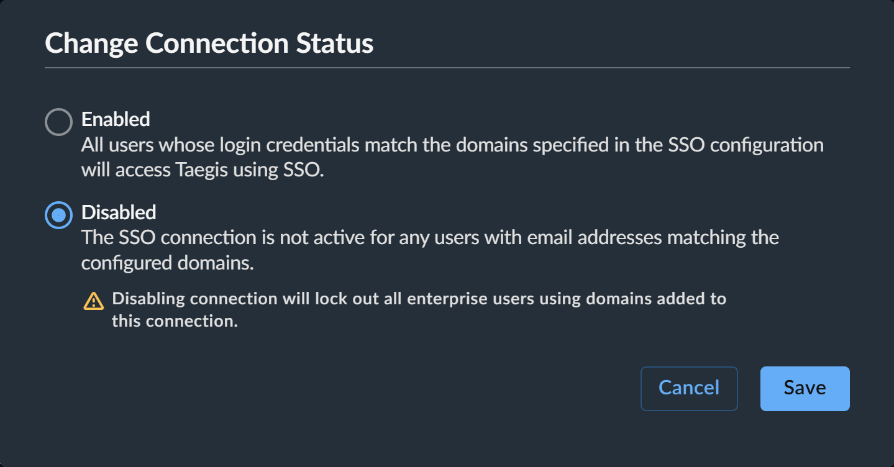
Change Connection Status🔗
To change the status of a connection, from the Enterprise SSO page:
-
Select the menu icon from the lower-right corner of a connection summary card and choose Change Status, or select a summary card to view the connection details and choose Change Status from the right of the page.
Note
Any connection in Draft status must be updated by selecting the summary card rather than the menu icon.
-
Select the desired connection status.
- Choose Save.
Edit Connection Details🔗
To edit the details of a connection, from the Enterprise SSO page:
- Select a summary card to view the connection details.
-
Choose Edit from the General Settings or Identity Provider Settings.
Edit Connection Details -
Make the desired changes and select Save.
Delete Connection🔗
Note
Connections must be changed to a Disabled status before they can be deleted.
To delete a connection, from the Enterprise SSO page:
- Select the menu icon from the lower-right corner of a connection summary card and choose Delete, or select a summary card to view the connection details and choose Delete.
-
Type the word
deleteto confirm this action is required and then choose Confirm Delete.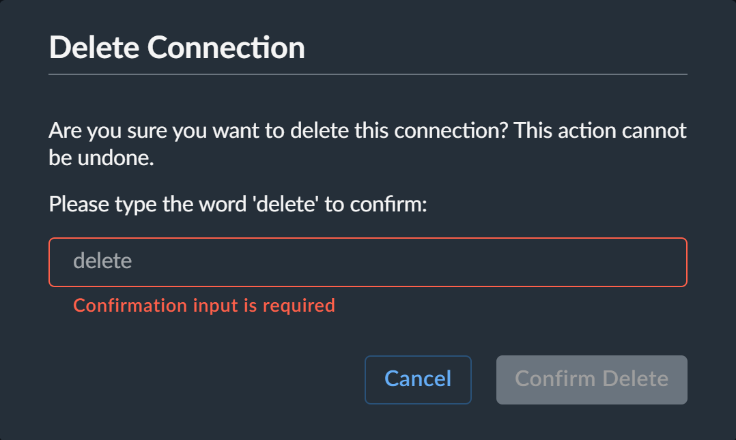
Delete Connection -
Returning to the Enterprise SSO page, verify the connection is removed.
Knowledge Base Resource🔗
Find guidance for configuring Enterprise SSO with Azure AD in this Knowledge Base article.