Taegis Actions🔗
Note
The terms Alerts and Investigations have recently been changed to Detections and Cases in Taegis XDR. You may still see references to the old terms while we continue to work towards platform convergence of Sophos and Taegis technologies. For more information, see Taegis Terminology Updates.
Overview🔗
Taegis Actions make it easier than ever to configure and use out-of-the-box response and enrichment actions. These actions are tightly integrated into the triage and case workflow to speed analysis and enable rapid response.
Taegis Actions support multiple integrations with common IT and InfoSec tools, work with multiple instances of each technology, and can be used as building blocks in more complex playbooks. This removes the need to configure and maintain playbook instances for technology-specific integrations.
Important
Existing playbook-based integrations remain supported and both playbooks and actions can be used together.
The new actions with simplified configuration support a single instance of the action, but additional instances can be configured using the advanced playbook template configurations. Connector configuration is still required for external integrations. Simply create one or more connections and then select them when configuring an action. The action will attempt to run on each configured integration, with no need to configure multiple playbook instances.
Migrating to Taegis Actions🔗
There are many advantages to moving to the new Taegis Actions from the technology-specific playbooks:
- Support for multiple connections/technologies — Take a single action and execute it on all applicable enabled instances in your environment.
- Ability to take actions from entities — Take actions directly from the UI, with no need to copy and paste identifiers or IP addresses.
- Can be reused in more complex playbooks — Build more complex playbooks with multiple steps.
To migrate from one of the technology-specific response playbooks, configure the new action in Secureworks® Taegis™ XDR and disable the old playbook instance(s).
Migration Example🔗
You may be using Taegis™ NDR Block and Cisco Meraki playbooks to block IPs on the NDR platform and on two Cisco Meraki firewall instances. These older playbooks do not show up on the Actions menu and must each be run manually with the IP address provided when executing the playbook. Instead,
-
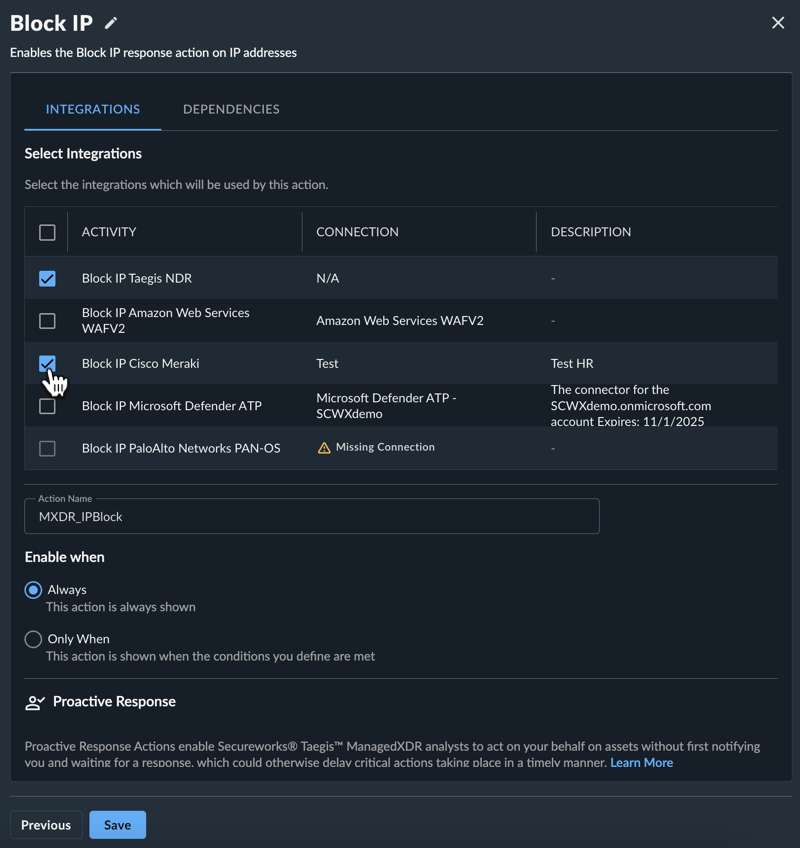
Add a single Block IP action, selecting the Taegis™ NDR and Cisco Meraki activities from the Integrations tab to use when the action is taken.
Add Block IP Action -
Disable each older configured playbook.
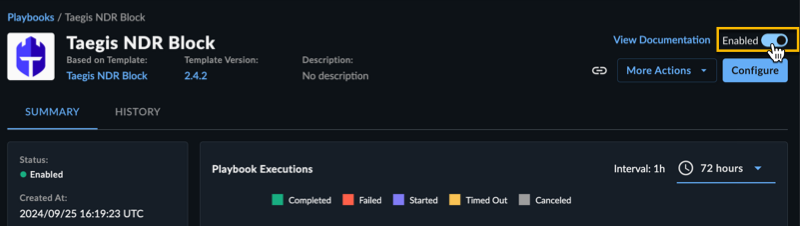
Disable Playbook
When the new Block IP action is taken from an entity's Action menu, it will block the IP on ALL configured instances with a single click.
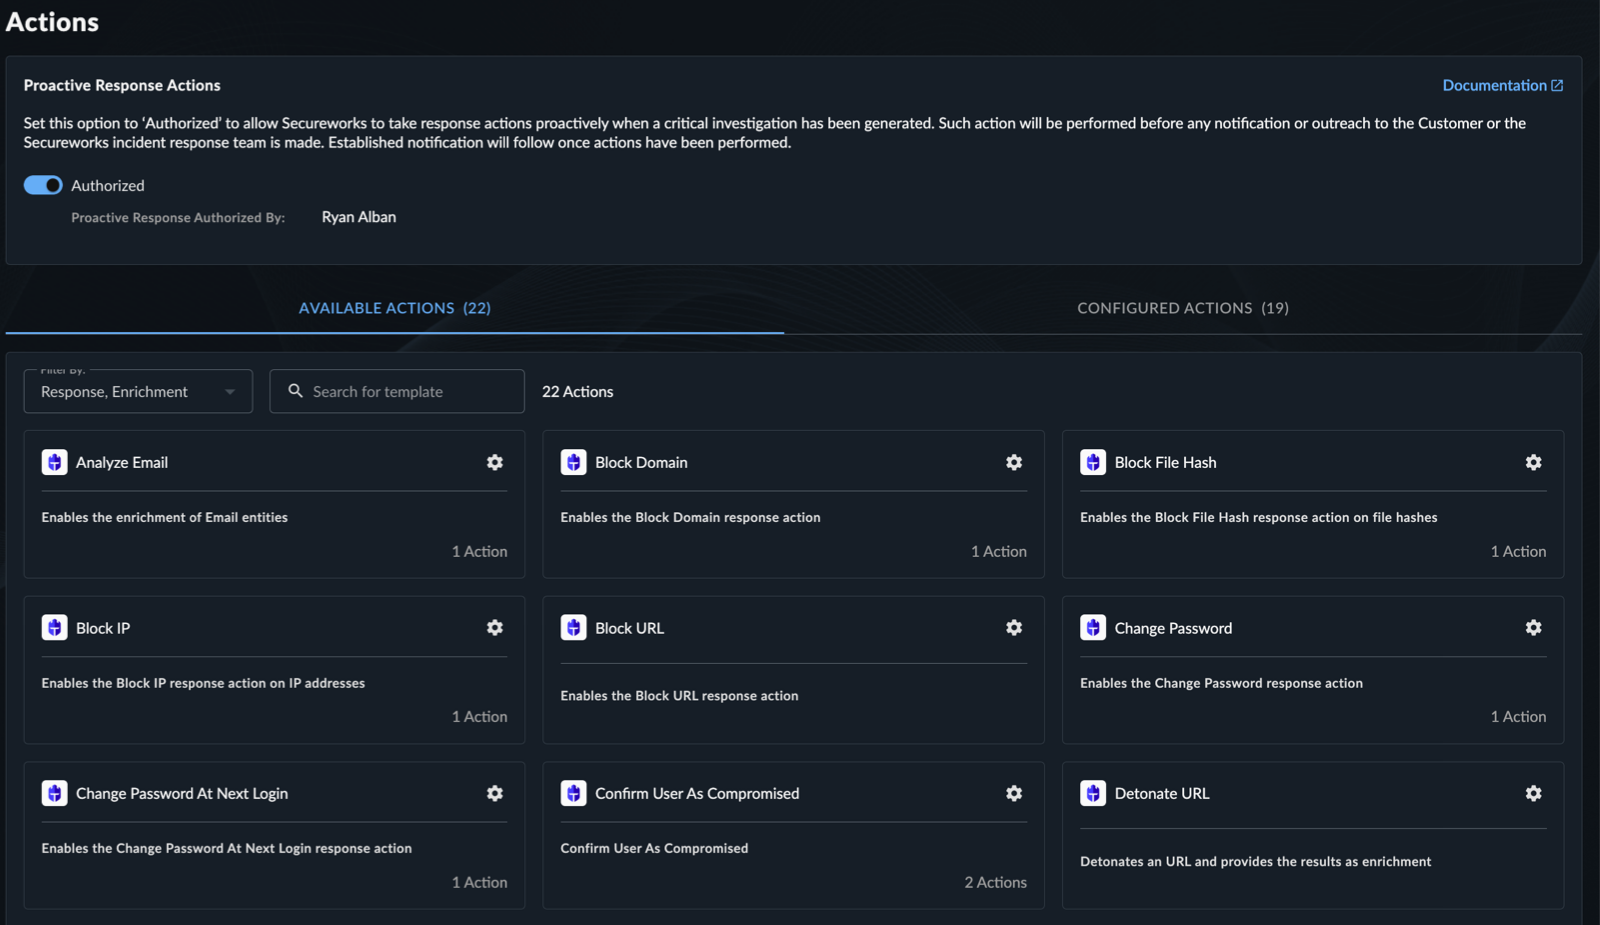
Available Actions🔗
Available response and enrichment actions will continue to be expanded with regular releases. The following are currently available.
Tip
Find a changelog of the most recently published playbook templates, actions, and connectors, as well as updates to existing templates and connectors on Automations Overview.
Response Actions🔗
One-click response actions allow you to swiftly execute response actions within your environment with a single click from the entity that needs a response. Available response actions include:
- Isolate / Restore Host
- Disable / Enable User
- Confirm / Dismiss User as Compromised
- Block / Unblock IP
- Block / Unblock Domain
- Block / Unblock File Hash
- Initiate Antivirus Scan on Host
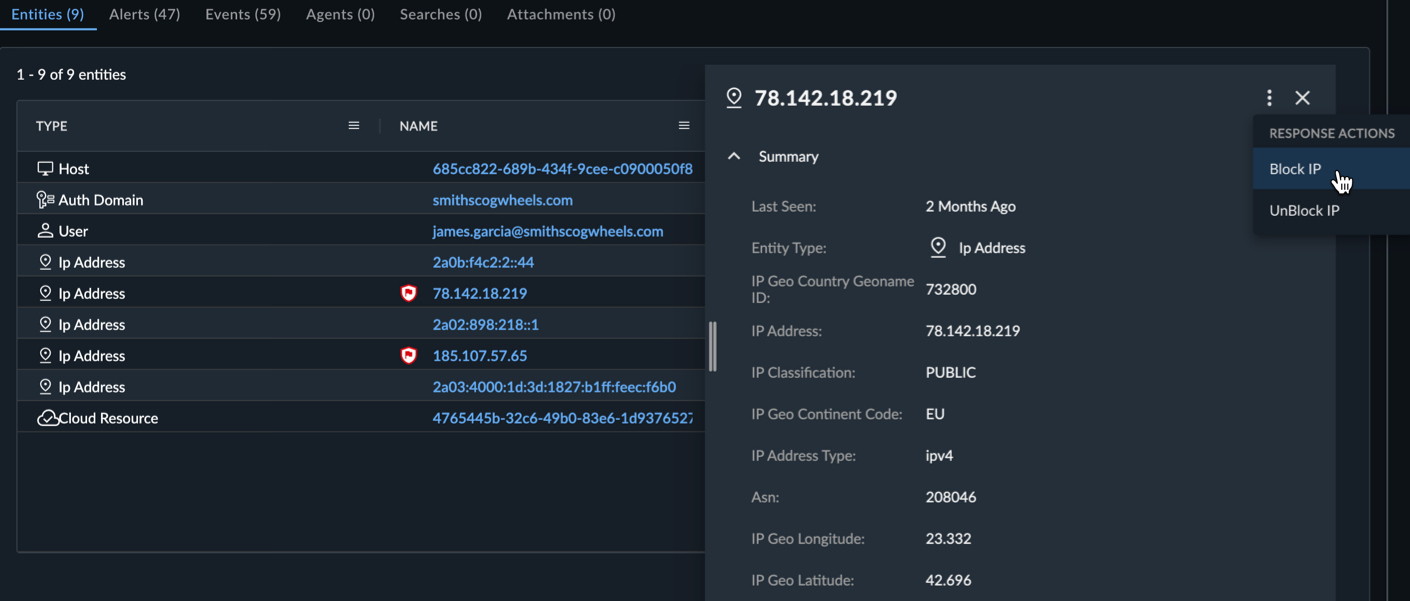
Once configured, see Take Response Actions on Entities for more information on executing the action.
Enrichment Actions🔗
Enrichment actions automatically connect to external tools and pull in additional information that can be invaluable when triaging detections or reviewing a case. This gives you the context information you need to fully understand the details of a detection, event, or entities in those detections, removing the need to pivot outside of the platform to research details about indicators and entities.
- Look Up Asset
- Look Up User
- Analyze Email
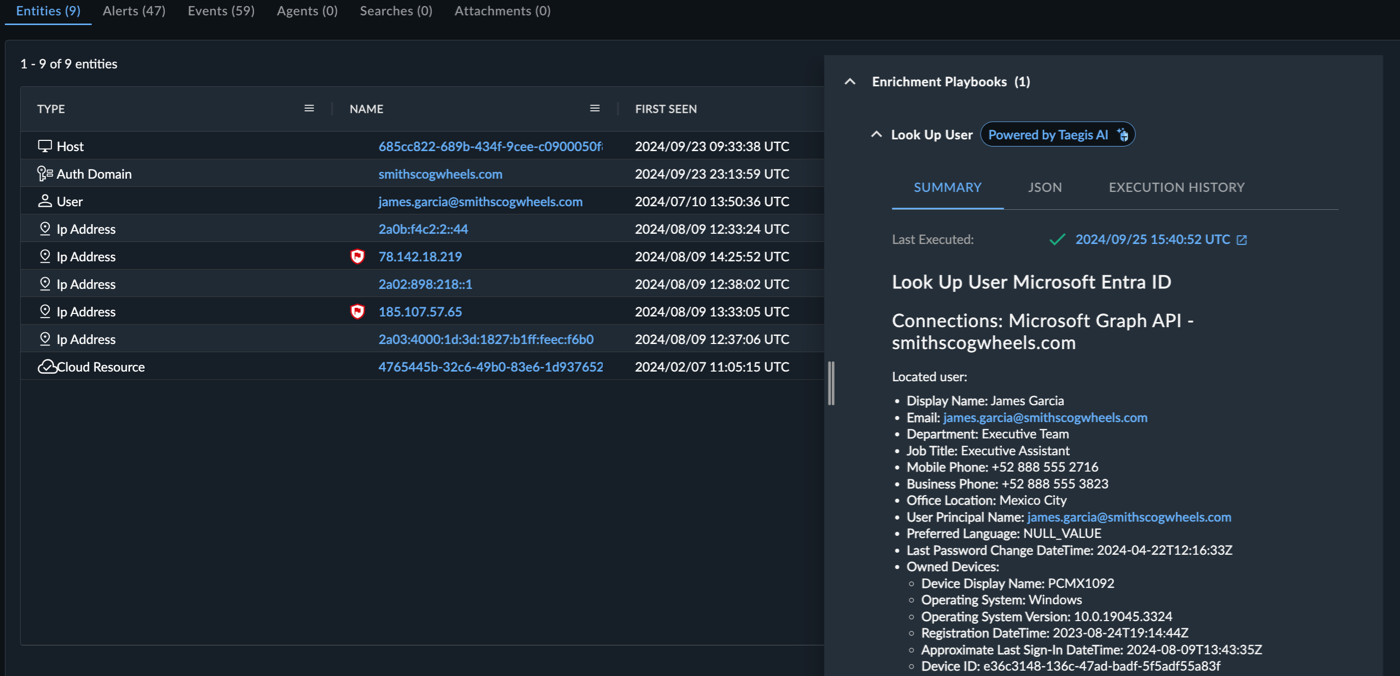
Once configured, view enrichment data in both Detection Details and Entities.
Proactive Response Actions🔗
Secureworks® Taegis™ MDR customers can enable Taegis MDR analysts to act on their behalf on assets without first notifying and waiting for a response, which could otherwise delay critical actions taking place in a timely manner. Analysts perform response actions after a case for a threat deemed critical has been analyzed. The process to authorize individual actions has been improved with Taegis Actions configuration and removes the need to manually enter specific action names.
You can now authorize Proactive Response for individual actions with a single configuration toggle. The Action Name is configured with the approved naming convention when you enable the authorization toggle and cannot be edited.
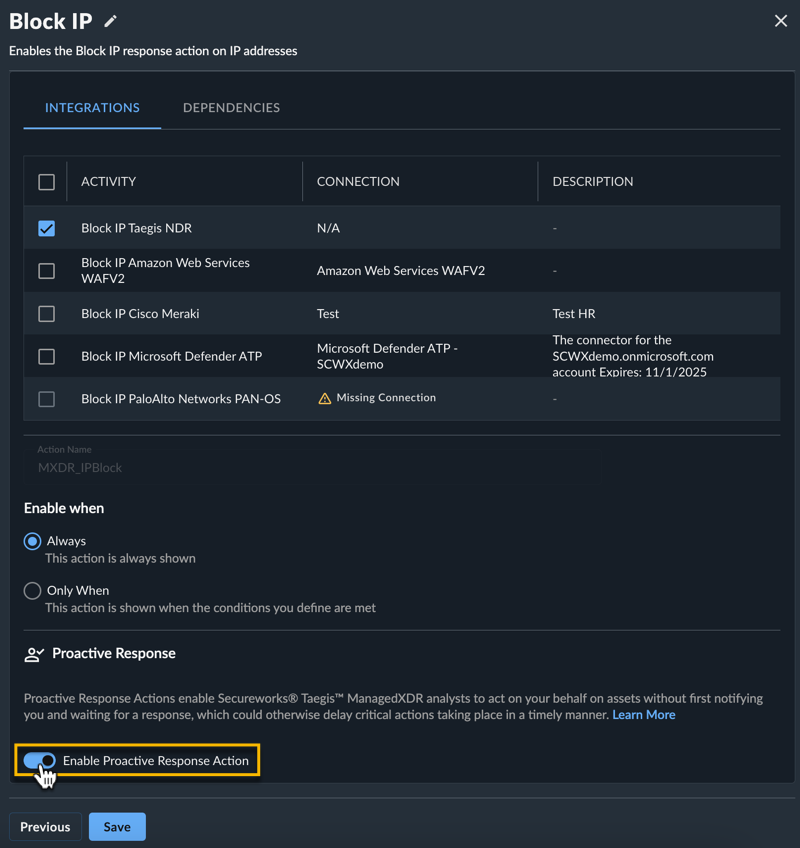
The following Response Actions are supported for Proactive Response:
- Isolate / Restore Host
- Disable / Enable User
- Block / Unblock IP
When additional actions are supported for Proactive Response, the authorization toggle will appear in the Proactive Response column on the Actions table.
For more information on Proactive Response, see Proactive Response Actions Overview.
View Taegis Actions🔗
To view and manage Taegis Actions, select Automations from the Taegis Menu and choose Actions. The Available Actions tab displays all actions available to configure, and the Configured Actions tab displays any actions that have already been configured.
Add Actions🔗
To add a new action, follow these steps:
-
Select the action you'd like to configure:
- From the Available Actions tab, choose the Select Action icon for the desired action, or
- From the Configured Actions tab, select + Add Action from above the table and then choose the Select Action icon for the desired action.
-
(Optional) Select the Edit icon next to the action name if you would like to edit the name or description.
-
From the Integrations tab of the action, select the integrations which will be used by this action.
Important
Depending on the action and your environment, be cautious when selecting multiple integrations. For example, selecting multiple EDR types for the Isolate Host action may result in a host being isolated by multiple agents if it is running them simultaneously.
Tip
View the supported activities and documentation from the Dependencies tab.
Add Block IP Action -
In the Action Name field, enter the name for the action that will appear in XDR to execute the action.
-
Select Always to always show the action, or choose Only When to enter a trigger filter in CEL syntax to provide the conditions in which the action will be shown. See CEL Explorer to test CEL expressions against a specific type of input so that you can see the outcome of the expression while completing your configuration.
-
(Optional) If you would like to approve a supported action to be a Proactive Response Action, select the Enable toggle. The Action Name field cannot be edited if approved as a Proactive Response Action.
-
Select Save to save the action, which is added to the Configured Actions tab in an enabled state.
Note
The actions configured on the Actions page display on the Playbooks pages. Editing the action will take you to the Configure Action form. Note the icon at the left of the row that indicates the instance is a response/enrichment action. Select the instance name to view details, including execution history and other relevant operation information. For more information, see Configured Playbooks.

Actions on Playbooks Table
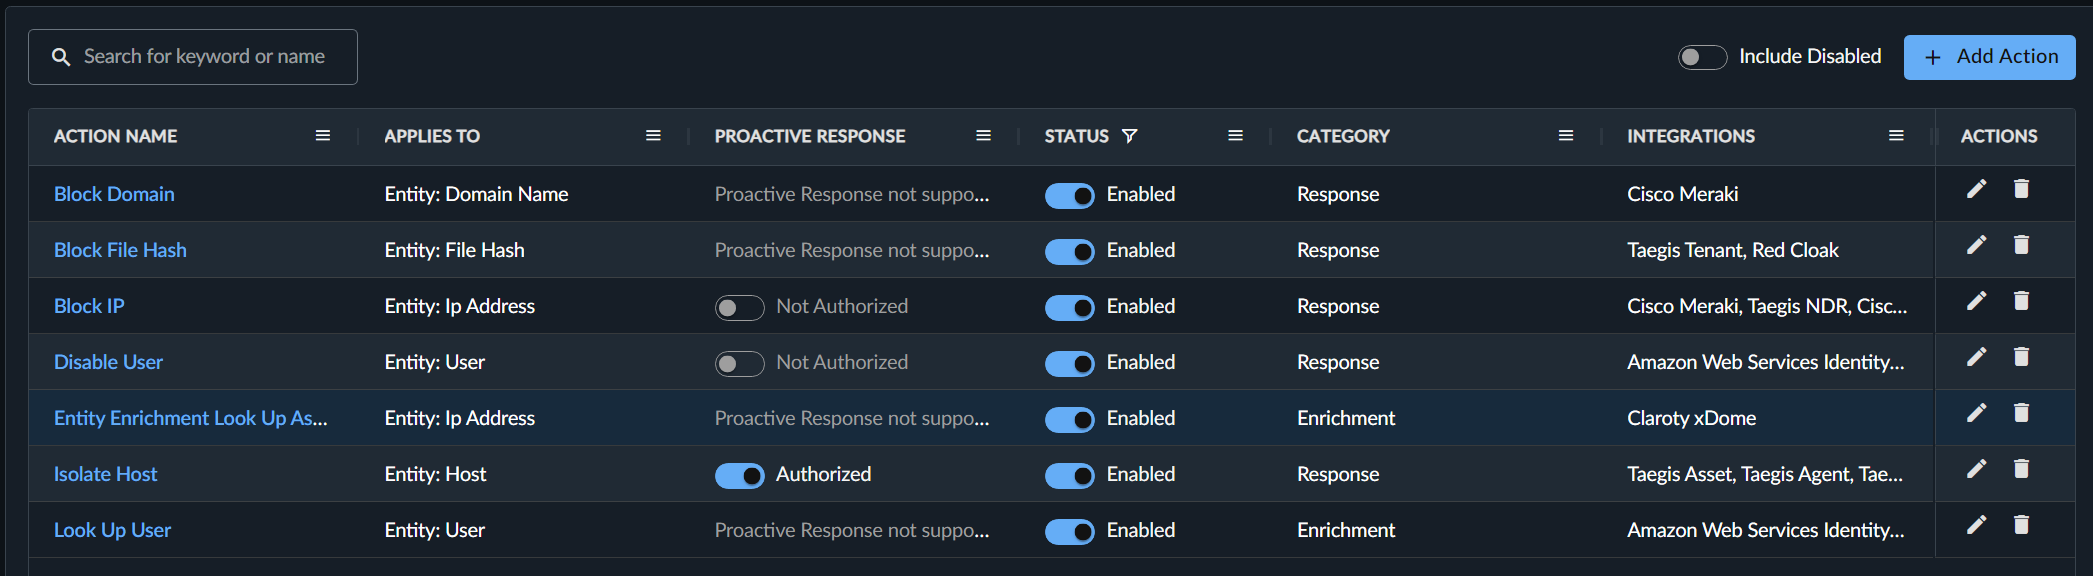
Enable and Disable Actions🔗
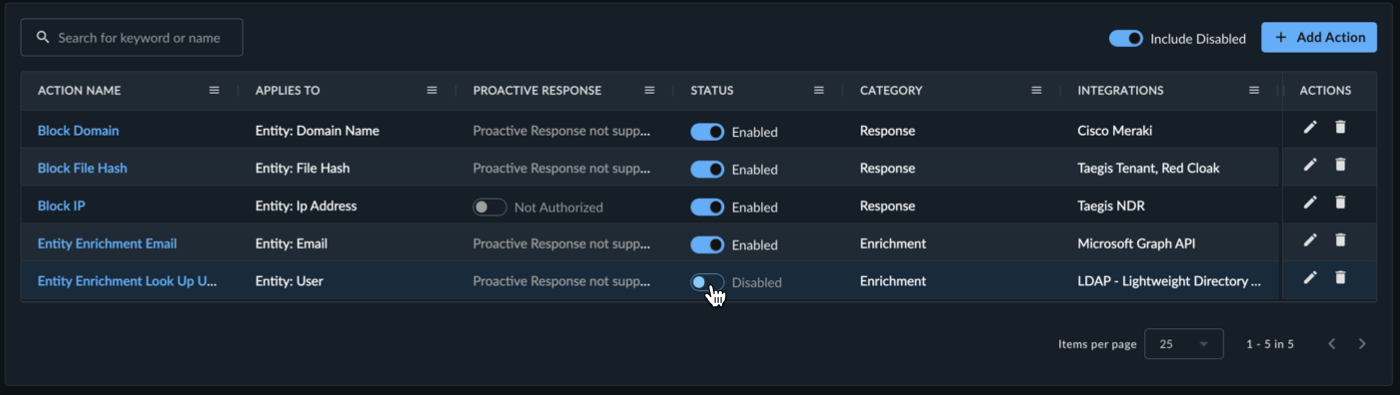
To enable and disable an action, follow these steps:
- From the Configured Actions tab, locate the desired action in the table, selecting the Include Disabled toggle to show disabled actions if needed.
- From the Status column, select the toggle to either enable or disable the action.
Edit Actions🔗
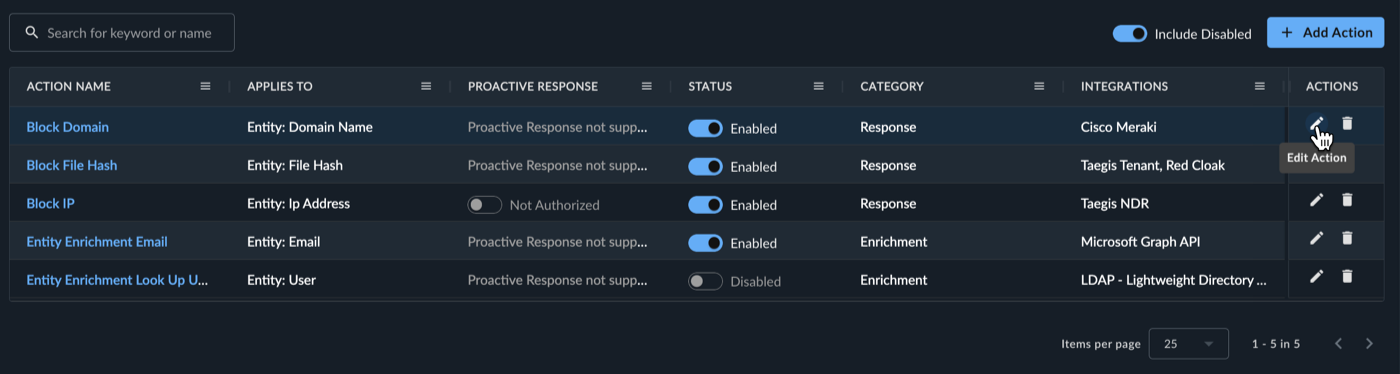
To edit a configured action, follow these steps:
- From the Configured Actions tab, locate the desired action in the table, selecting the Include Disabled toggle to show disabled actions if needed.
- From the Actions column, select the Edit Action icon. The action configuration displays.
- Make the desired changes and choose Save when complete.
Delete Actions🔗
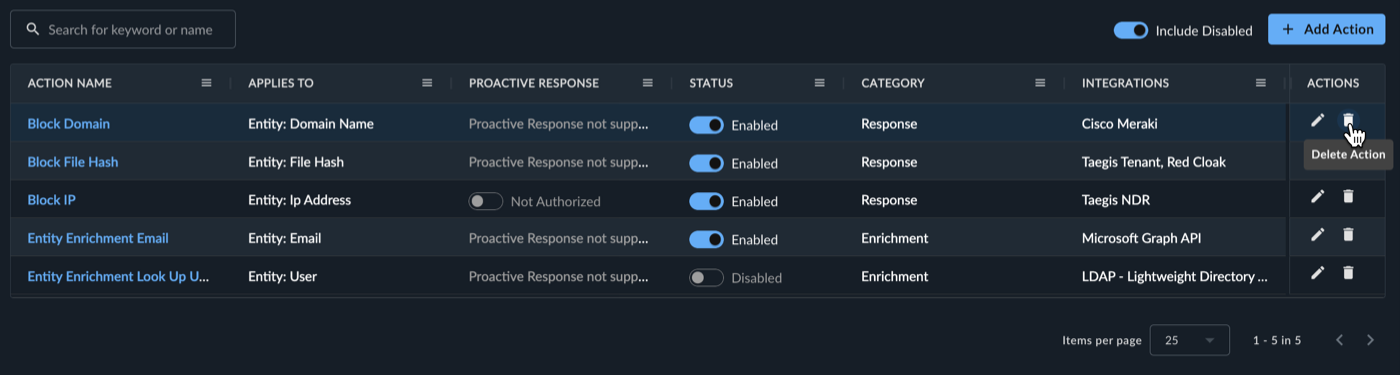
To delete a configured action, follow these steps:
- From the Configured Actions tab, locate the desired action in the table, selecting the Include Disabled toggle to show disabled actions if needed.
- From the Actions column, select the Delete Action icon. The Delete Action confirmation displays.
- Select Confirm Delete to confirm and delete the action.