Tenable Data Connector Installation🔗
This connector allows you to continuously import Tenable scan and asset data into your Secureworks® Taegis™ VDR application in order to leverage VDR contextual prioritization.
Note
Only the cloud-based Tenable Vulnerability Management product is supported. The Tenable on-premises solution is not supported at this time.
Navigate to the Connectors Interface🔗
To start the installation, follow these steps:
- Access the System menu by selecting the Account circle in the upper right, and then choose Settings.
-
Select Connectors from the System Settings box.
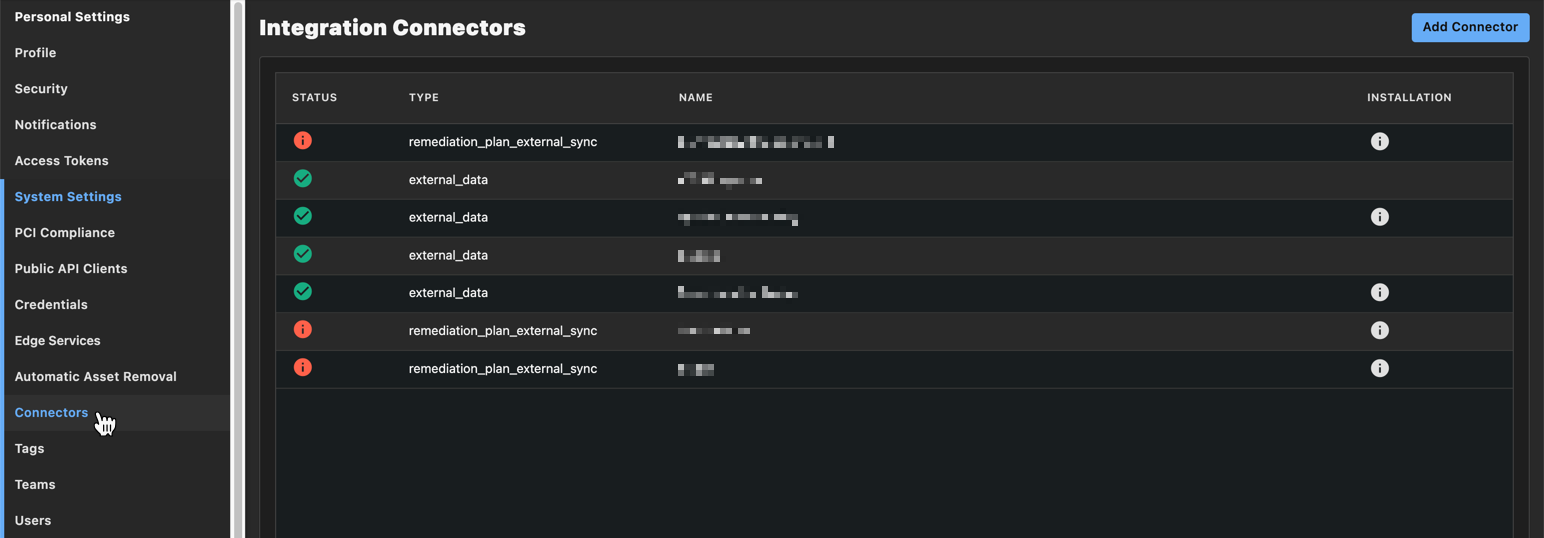
VDR Connector List -
Select Add Connector at the top right to add a new connector.
- Select External Scanner: Tenable from the Connector dropdown, and then choose Create New API Client from the API Client dropdown.
-
Select Submit to open the installation wizard in a new window.
Note
Your browser might ask you to allow pop-ups from the originating window.
-
From the wizard, follow the steps to complete the installation.
Local API Access🔗
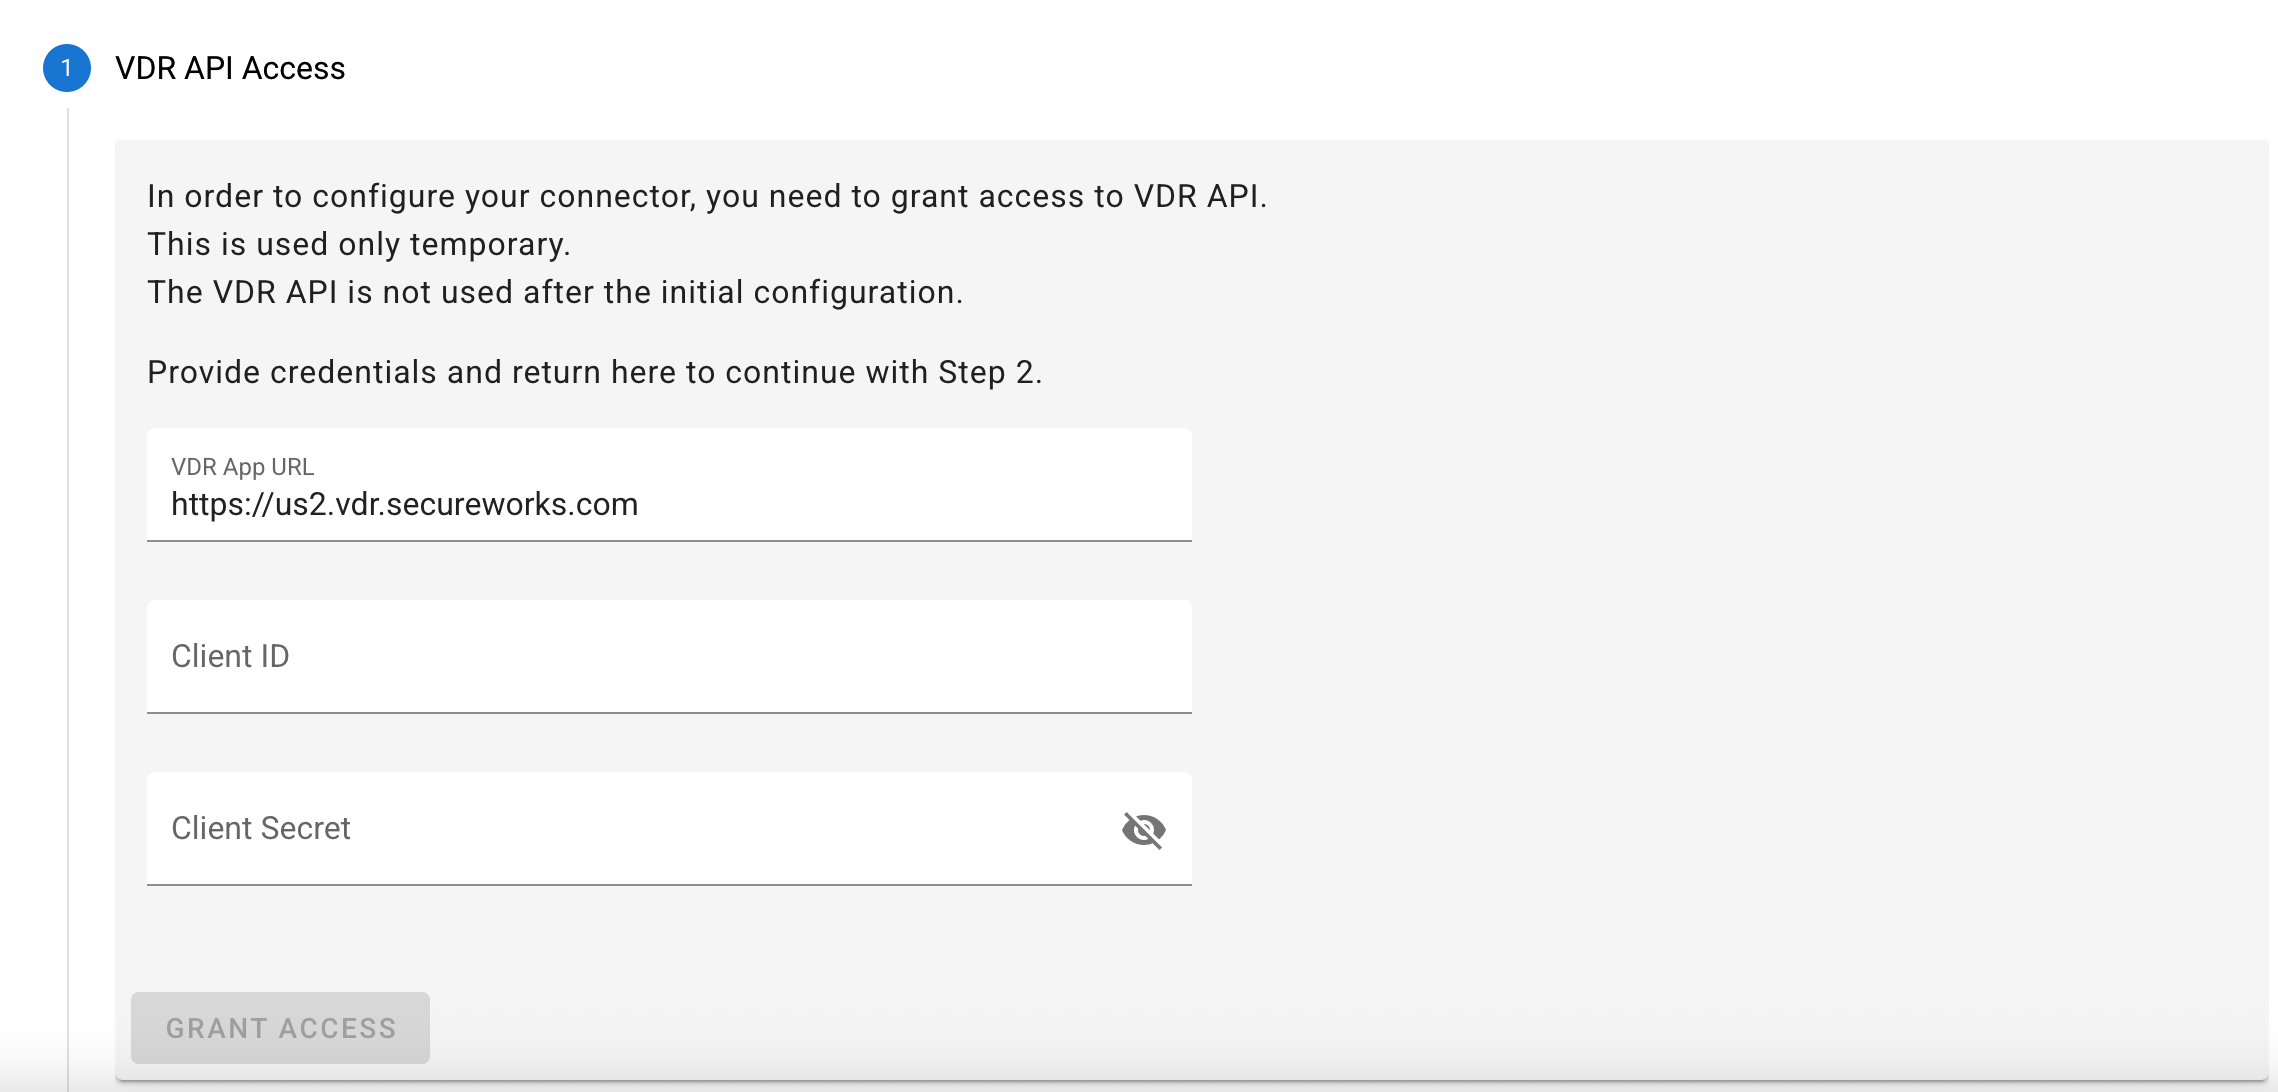
The VDR API Access step requires you to enter your instance app URL and a Public API Client ID and Client Secret if not already populated for you. Follow this guide in order to create one.
-
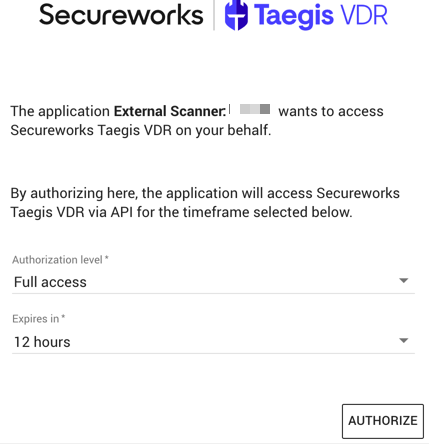
You will be asked to log in to VDR to authorize your Public API client to make requests on your behalf during the installation process.
-
Make sure to select Full Access from the Authorization level dropdown. Submitting the form redirects you back to the installation wizard where you can proceed with the next step.
Note
The authorization duration can be very short since this is only used for installation purposes.
Tenable API Access🔗
The Tenable API access requires you to fill in the credentials given by Tenable.
It requests and stores the access token to allow the connectors to retrieve the data. The access token is stored through VDR Credentials and is visible in the Settings/Credentials view.

How to Create API Key in Tenable🔗
- Log in to Tenable.
- Click on the profile icon in the upper right-hand corner.
- Select API Keys.
- Click Generate and collect the key information to enter in the Tenable Data Connector wizard.
Configuration🔗
The Configuration step requires you to select a team for the assets. In the case of the teams list being empty, you’ll need to refresh the page and start anew. Enter an IP Range, a Tag, and Frequency to retrieve the Tenable data. This tag is important as it links the synchronized data to its source.
Note
You should remember the Tag that you create since you will likely have to re-use it to configure third-party scanner ranges or assets with this special tag.
After submitting the form, we will create all of these for you.
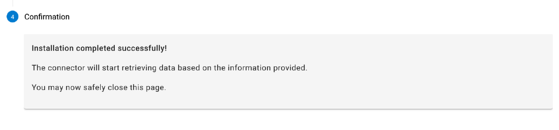
If everything was created properly, the Confirmation step displays a success message.
You can close this tab and you will be brought back to the Integration Connectors panel to see your new connector.
Important
It is important to save the Client ID/Client Secret in a password manager on your end.
Confirmation🔗
Note
Now is a good time to configure a third-party scanner range in VDR to start fetching assets and their vulnerabilities through this connector.