Salesforce Real-Time Event Monitoring Integration Guide🔗
The following instructions are for configuring the Salesforce Real-Time Event Monitoring integration to facilitate log ingestion into Secureworks® Taegis™ XDR. XDR consumes logs from the Salesforce Real-Time Event Monitoring feature.
Note
Real-Time Event Monitoring is available in the Enterprise, Unlimited, and Developer Editions and requires Salesforce Shield or Salesforce Event Monitoring add-on subscriptions.
Data Provided from Integration🔗
Log Types Normalized by XDR🔗
- ApiEventStream
- CredentialStuffingEvent
- FileEvent
- GuestUserAnomalyEvent
- LightningUriEventStream
- ListViewEventStream
- LoginAsEventStream
- LoginEventStream
- LogoutEventStream
- PermissionSetEvent
- ReportAnomalyEvent
- ReportEventStream
- SessionHijackingEvent
- UriEventStream
| Normalized Data | Out-of-the-Box Detections | Vendor-Specific Detections | |
|---|---|---|---|
| Salesforce Real-Time Event Monitoring | Auth, CloudAudit, HTTP, Thirdparty | Thirdparty |
Note
XDR detectors are not guaranteed to be triggered, even if a data source's logs are normalized to a schema associated with a given detector. However, you can create Custom Detection Rules to generate detections based on normalized data from a data source.
Configure Real-Time Event Monitoring🔗
Information Required to Complete Integration🔗
- Domain URL — Domain URL of org (e.g., https://mycompany.my.salesforce.com)
- Consumer Key — Connected App’s key
- Consumer Secret — Connected App’s secret
Create a Connected App🔗
- Reference the vendor’s documentation to create an External Client App.
- Select New External Client App.
-
Fill in the Basic Information:
- External Client App Name: Enter any descriptive string.
- Enter the Contact Email.
- The remaining fields can be left at their default values.
-
Reference the vendor's documentation to configure the External Client App OAuth Settings.
-
Fill in the OAuth Settings:
- Callback URL: Enter your domain URL.
- OAuth Scopes: Select Manage user data via APIs (api).
-
Select Enable Client Credentials Flow in Flow Enablement.
- Accept the default Security settings.
- Save changes to create the app.
Enable Client Credentials User🔗
Note
Refer to the vendor's documentation for details on how the user being created is leveraged by the integration.
- Navigate to the External Client App created in the preceding steps. Configure the External Client App Policy.
-
Edit the policy for the External Client App:
- Select Enable Client Credentials Flow.
- Enter the execution user's username. This user must have the following permissions: Enable Access to Real-Time Event Monitoring.
-
Save the policy.
Collect the External Client App Credentials🔗
- Navigate to the External Client App created in the preceding steps.
- Navigate to the Settings tab.
- Scroll down to Oauth Settings and click on the Consumer Key and Secret buttons.
- Note these values, as they are required for the integration in XDR.
Enable Streaming of All Events🔗
To enable streaming in the Event Manager, follow these steps:
Important
XDR can only receive the events for which streaming is enabled.
- From Setup, in the Quick Find box, enter Event Manager, then select it.
- Next to the event for which you want to enable streaming, click the dropdown menu.
- Select Enable streaming.
Add Integration in XDR🔗
- From the Taegis Menu, select Integrations → Cloud APIs.
- Select Add an Integration from the top of the page.
-
From the Optimized tab, select Salesforce.
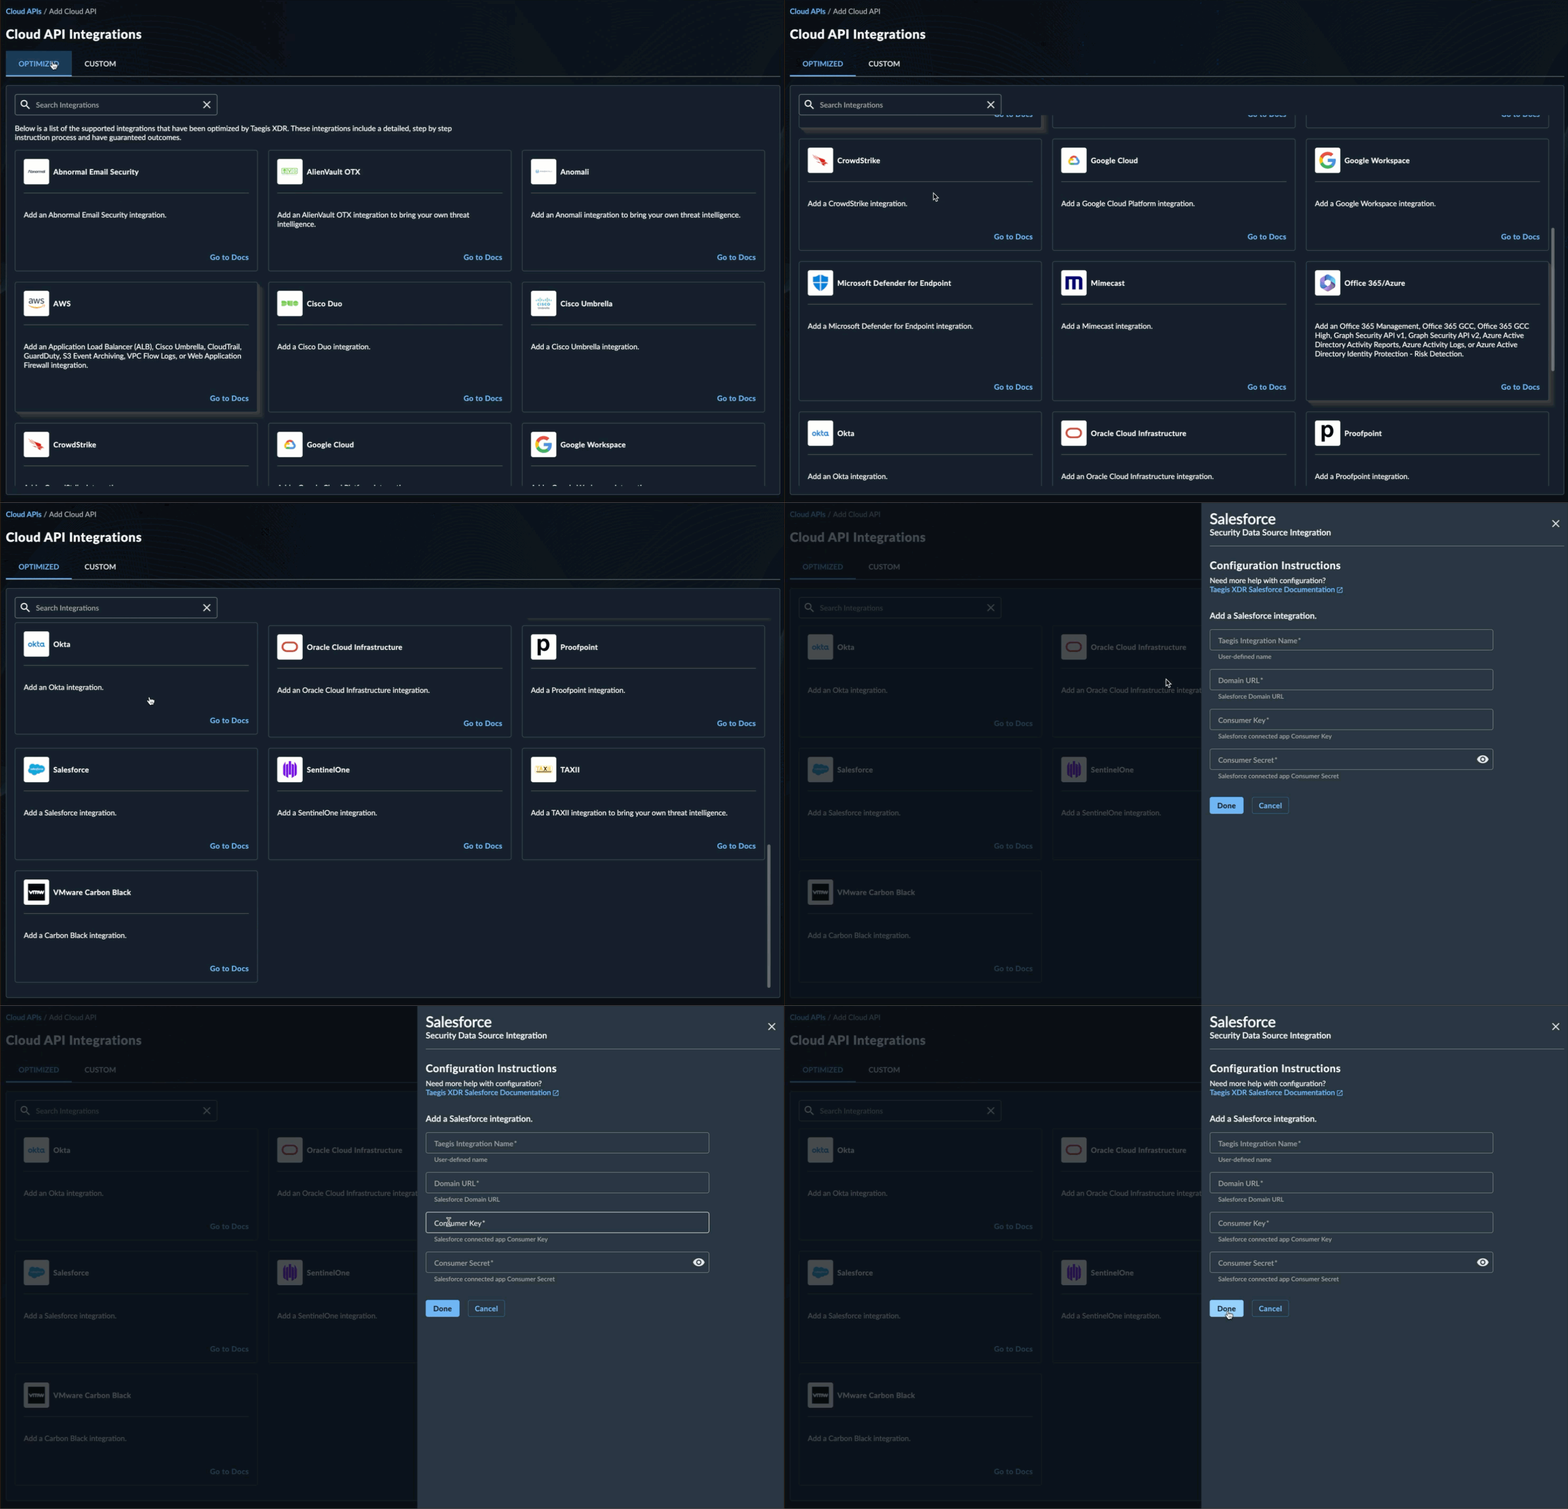
Create a New Salesforce integration -
Enter the following values:
- Name — This serves as a unique name for your integration, which can include any valid values up to 100 characters.
- Domain URL
- Consumer Key
- Consumer Secret
-
Select Done. The Cloud API Integrations page displays with the successfully added Salesforce integration.