Taegis Endpoint Agent for macOS Installation🔗
Prerequisites🔗
Prior to installation, review requirements and follow prerequisite steps on Taegis™ XDR Endpoint Agent Information and Prerequisites.
Data Provided from Integration🔗
| Detections | Auth | DNS | File Collection | HTTP | NIDS | Netflow | Process | File Modification | API Call | Registry | Scriptblock | Management | Persistence | Thread Injection | Detection Finding | Technique Finding | Software Info | Generic | |
|---|---|---|---|---|---|---|---|---|---|---|---|---|---|---|---|---|---|---|---|
| Taegis macOS Endpoint Agent | ✓ | ✓ | ✓ | ✓ | ✓ | ✓ | ✓ |
Installation🔗
To install the Taegis Endpoint Agent for macOS using the UI, see UI Deployment.
To install the Taegis Endpoint Agent for macOS using MDMs, see MDM Deployment.
UI Deployment🔗
-
Open the .pkg file and the Secureworks Agent installer opens.
-
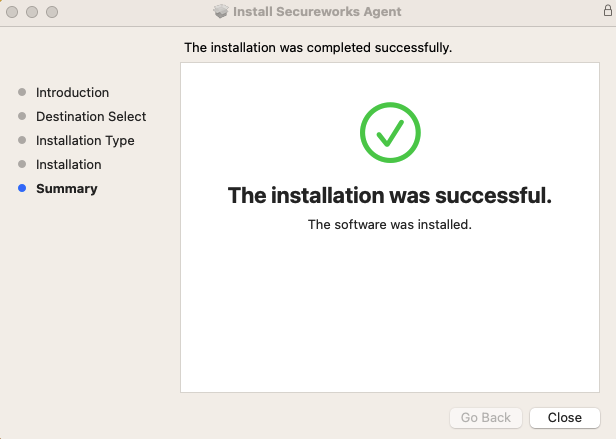
Select Continue followed by Install and enter your password if prompted.

macOS Agent Install Wizard -
The System Extensions Setup screen displays. Enter the registration key and server name copied during the prerequisite steps in the System Extensions Setup prompt and select Start.
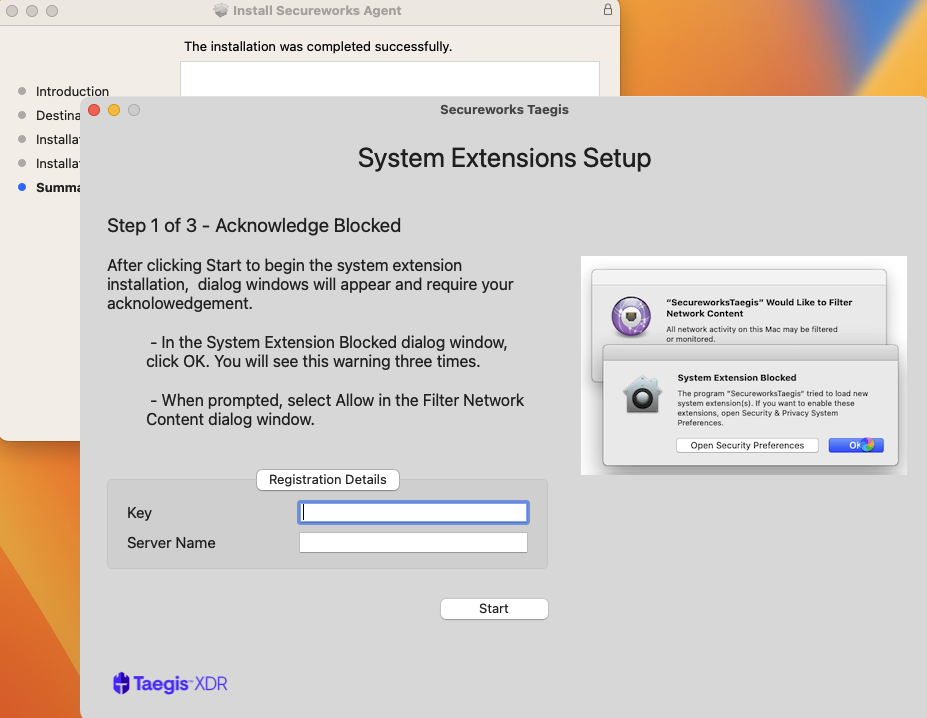
Enter Registration Key & Registration Server -
A message informing that background items have been added can be closed if desired.
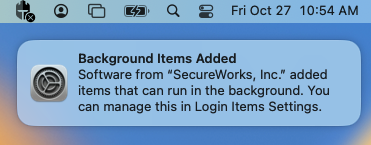
Dismiss Background Items Message -
Two system messages display: System Extension Blocked and SecureworksTaegis Would Like to Filter Network Content. Select OK from System Extension Blocked each time it displays and select Allow from Filter Network Content.
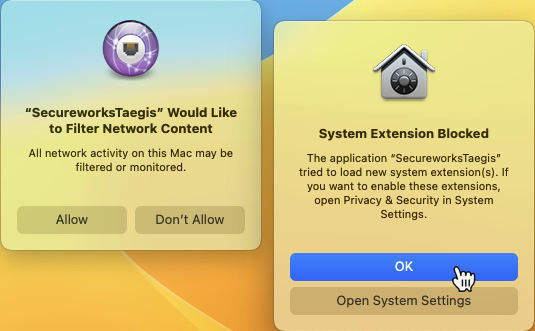
Select OK and Allow Important
Taegis Endpoint Agent installation on macOS Sequoia requires Network Extension approval to proceed with the installation.
Network Extension approval may not occur automatically during installation. You must manually enable the extension for the agent to function properly:
-
Navigate to System Settings > General > Endpoint Security Extensions > Network Extensions.
-
Locate the entry for
SecureworksTaegis.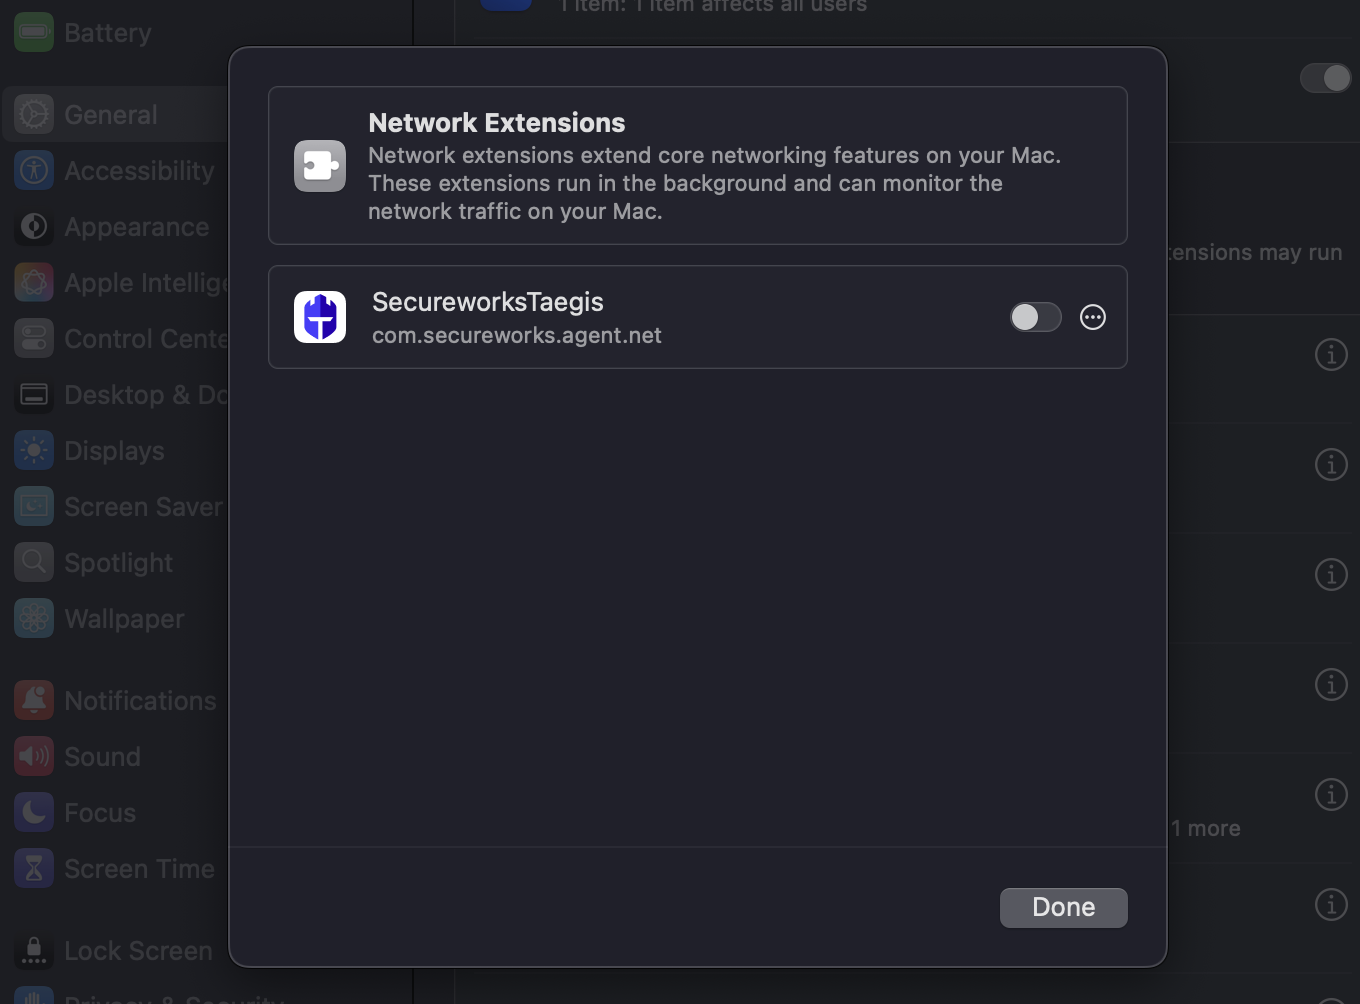
Enable Network Extensions -
If the toggle is
OFF, switch it toONto approve the network extension.
-
-
Step 2 of the System Extensions Setup screen displays and System Settings opens to Privacy & Security. Select Details from the message in Privacy & Security settings that reads Some system software requires your attention before it can be used.

Select Details to Enable Extensions -
Enter password if prompted, select to enable the toggles for the three SecureworksTaegis.app items, and select OK.
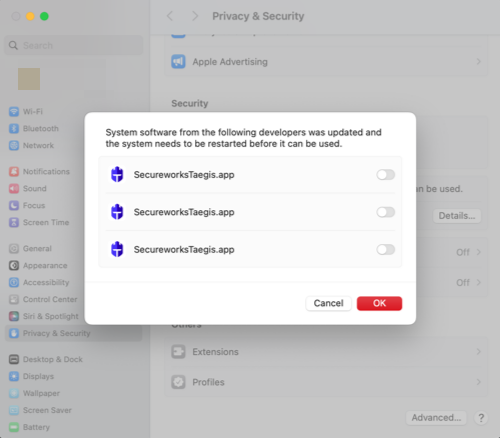
Enable Extensions Note
Screen Sharing disconnects when enabling the system extensions. If you are accessing your Mac via Screen Sharing during the installation, you may have to reconnect to the Screen Share session.
-
Step 3 of the System Extensions Setup screen displays and System Settings opens to Full Disk Access. Select to enable the toggle for SecureworksTaegis.
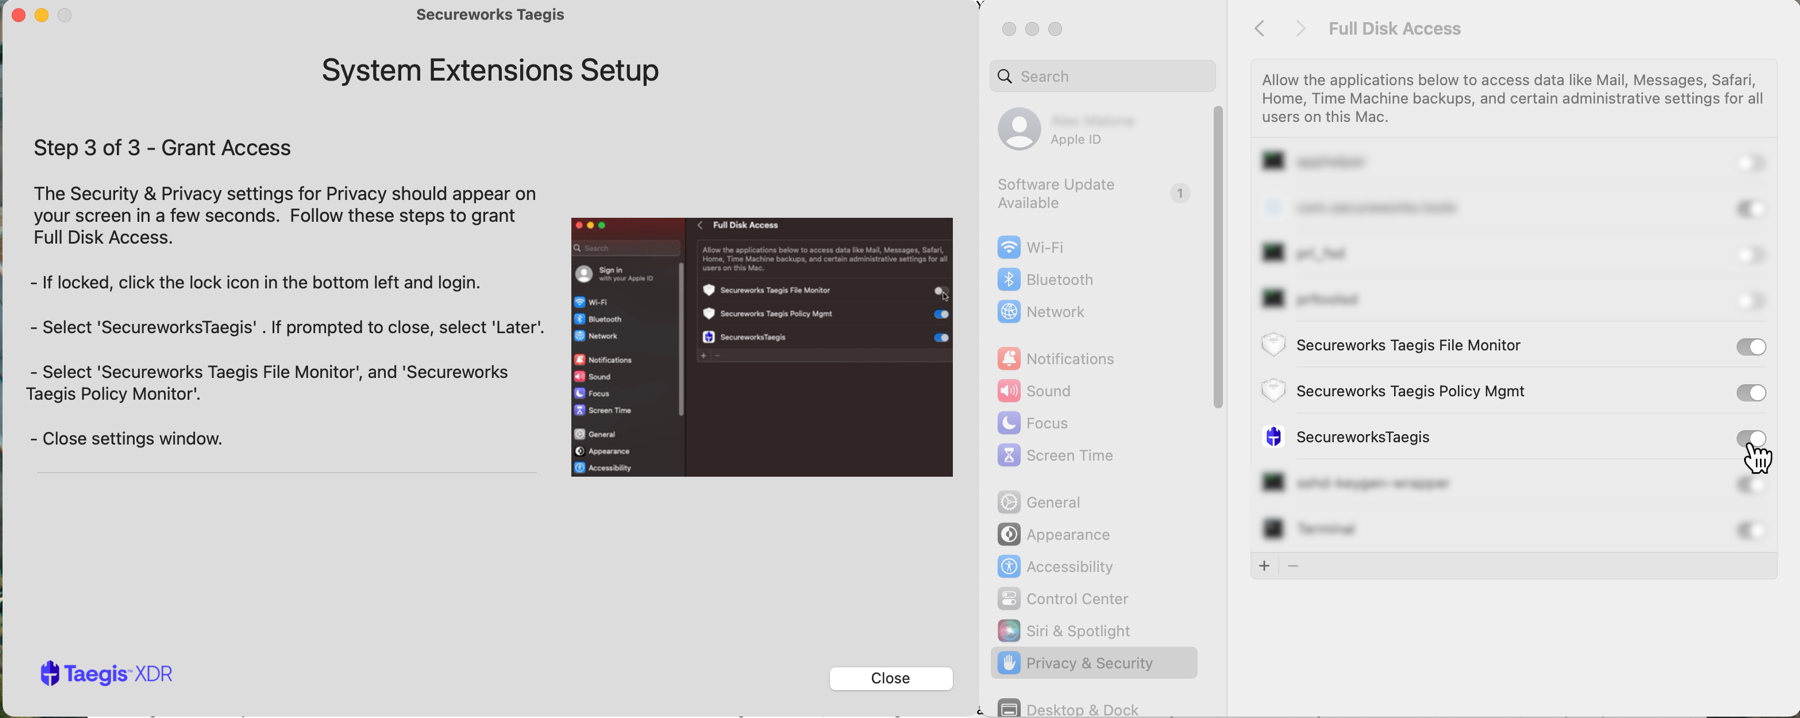
Enable Full Disk Access -
Choose Later if prompted to quit.
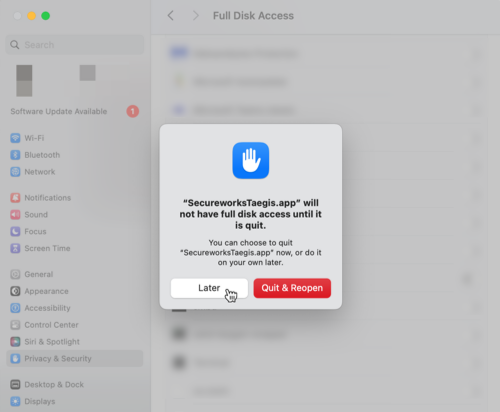
Choose Later -
Select to enable the toggles for Secureworks Taegis File Monitor and Secureworks Taegis Policy Mgmt.
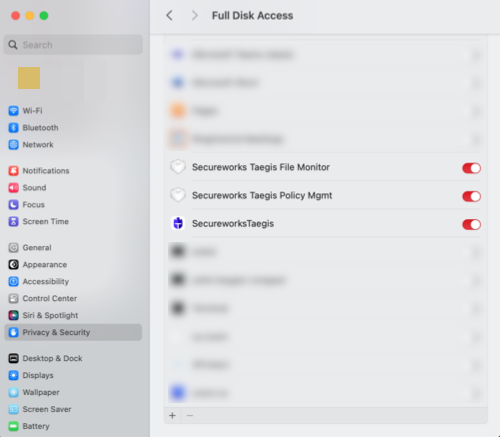
Complete Full Disk Access -
Close System Settings and then select Close from the System Extensions Setup screen.
-
The Agent Status displays. If the Connection Status shows as Not Connected, select Register and re-enter the registration key and server name copied during the prerequisite steps.

Re-register Agent -
Close the installer and complete the following Validate Installation steps to ensure a successful installation.
Close Installer
MDM Deployment🔗
- For deployment using Workspace ONE UEM (WS1) for macOS workstations, see the following Knowledge Base article: Deploy Taegis Agent for Mac with Workspace ONE.
- For deployment using Intune for macOS workstations, see the following Knowledge Base article: Deploy Taegis Agent for Mac with Intune.
- For deployment using JAMF Pro for macOS workstations, see the following Knowledge Base article: Deploy Taegis Agent for Mac with JAMF.
Validate Installation🔗
-
Select the Taegis icon and select Open Secureworks Taegis.
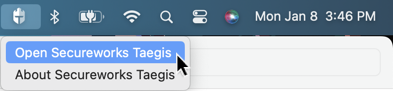
Open Secureworks Taegis -
Confirm the following options are GREEN:
- Process Monitoring
- File Monitoring
- Network Monitoring
- Full Disk Access
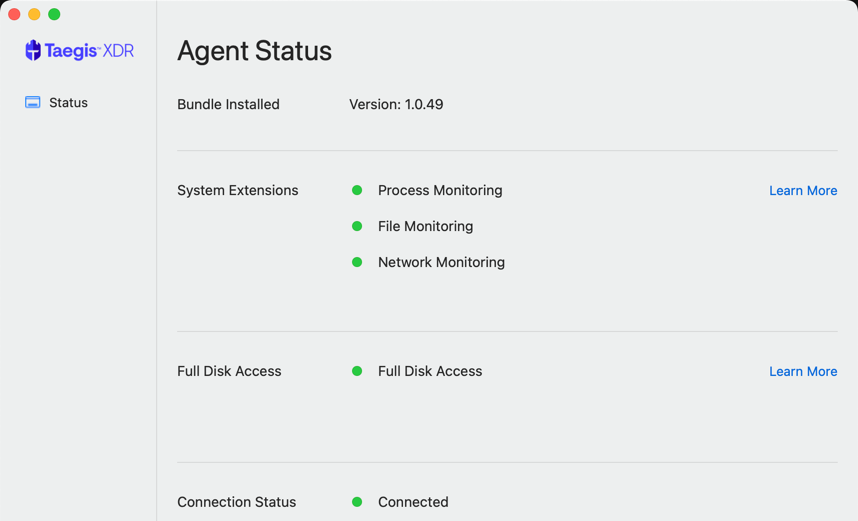
Confirm Agent Setup -
Open Terminal, enter the following command, and verify that the device token file
.device.tokis present in the output: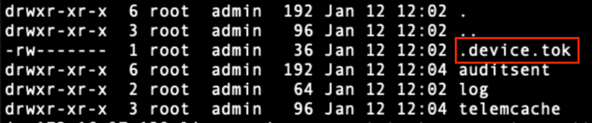
Verify Device Token File -
Open Terminal and enter the following command to check launch control to verify services are up and running:
Verify the following is present in the output:
Verify Services
Review Endpoint Agents Summary🔗
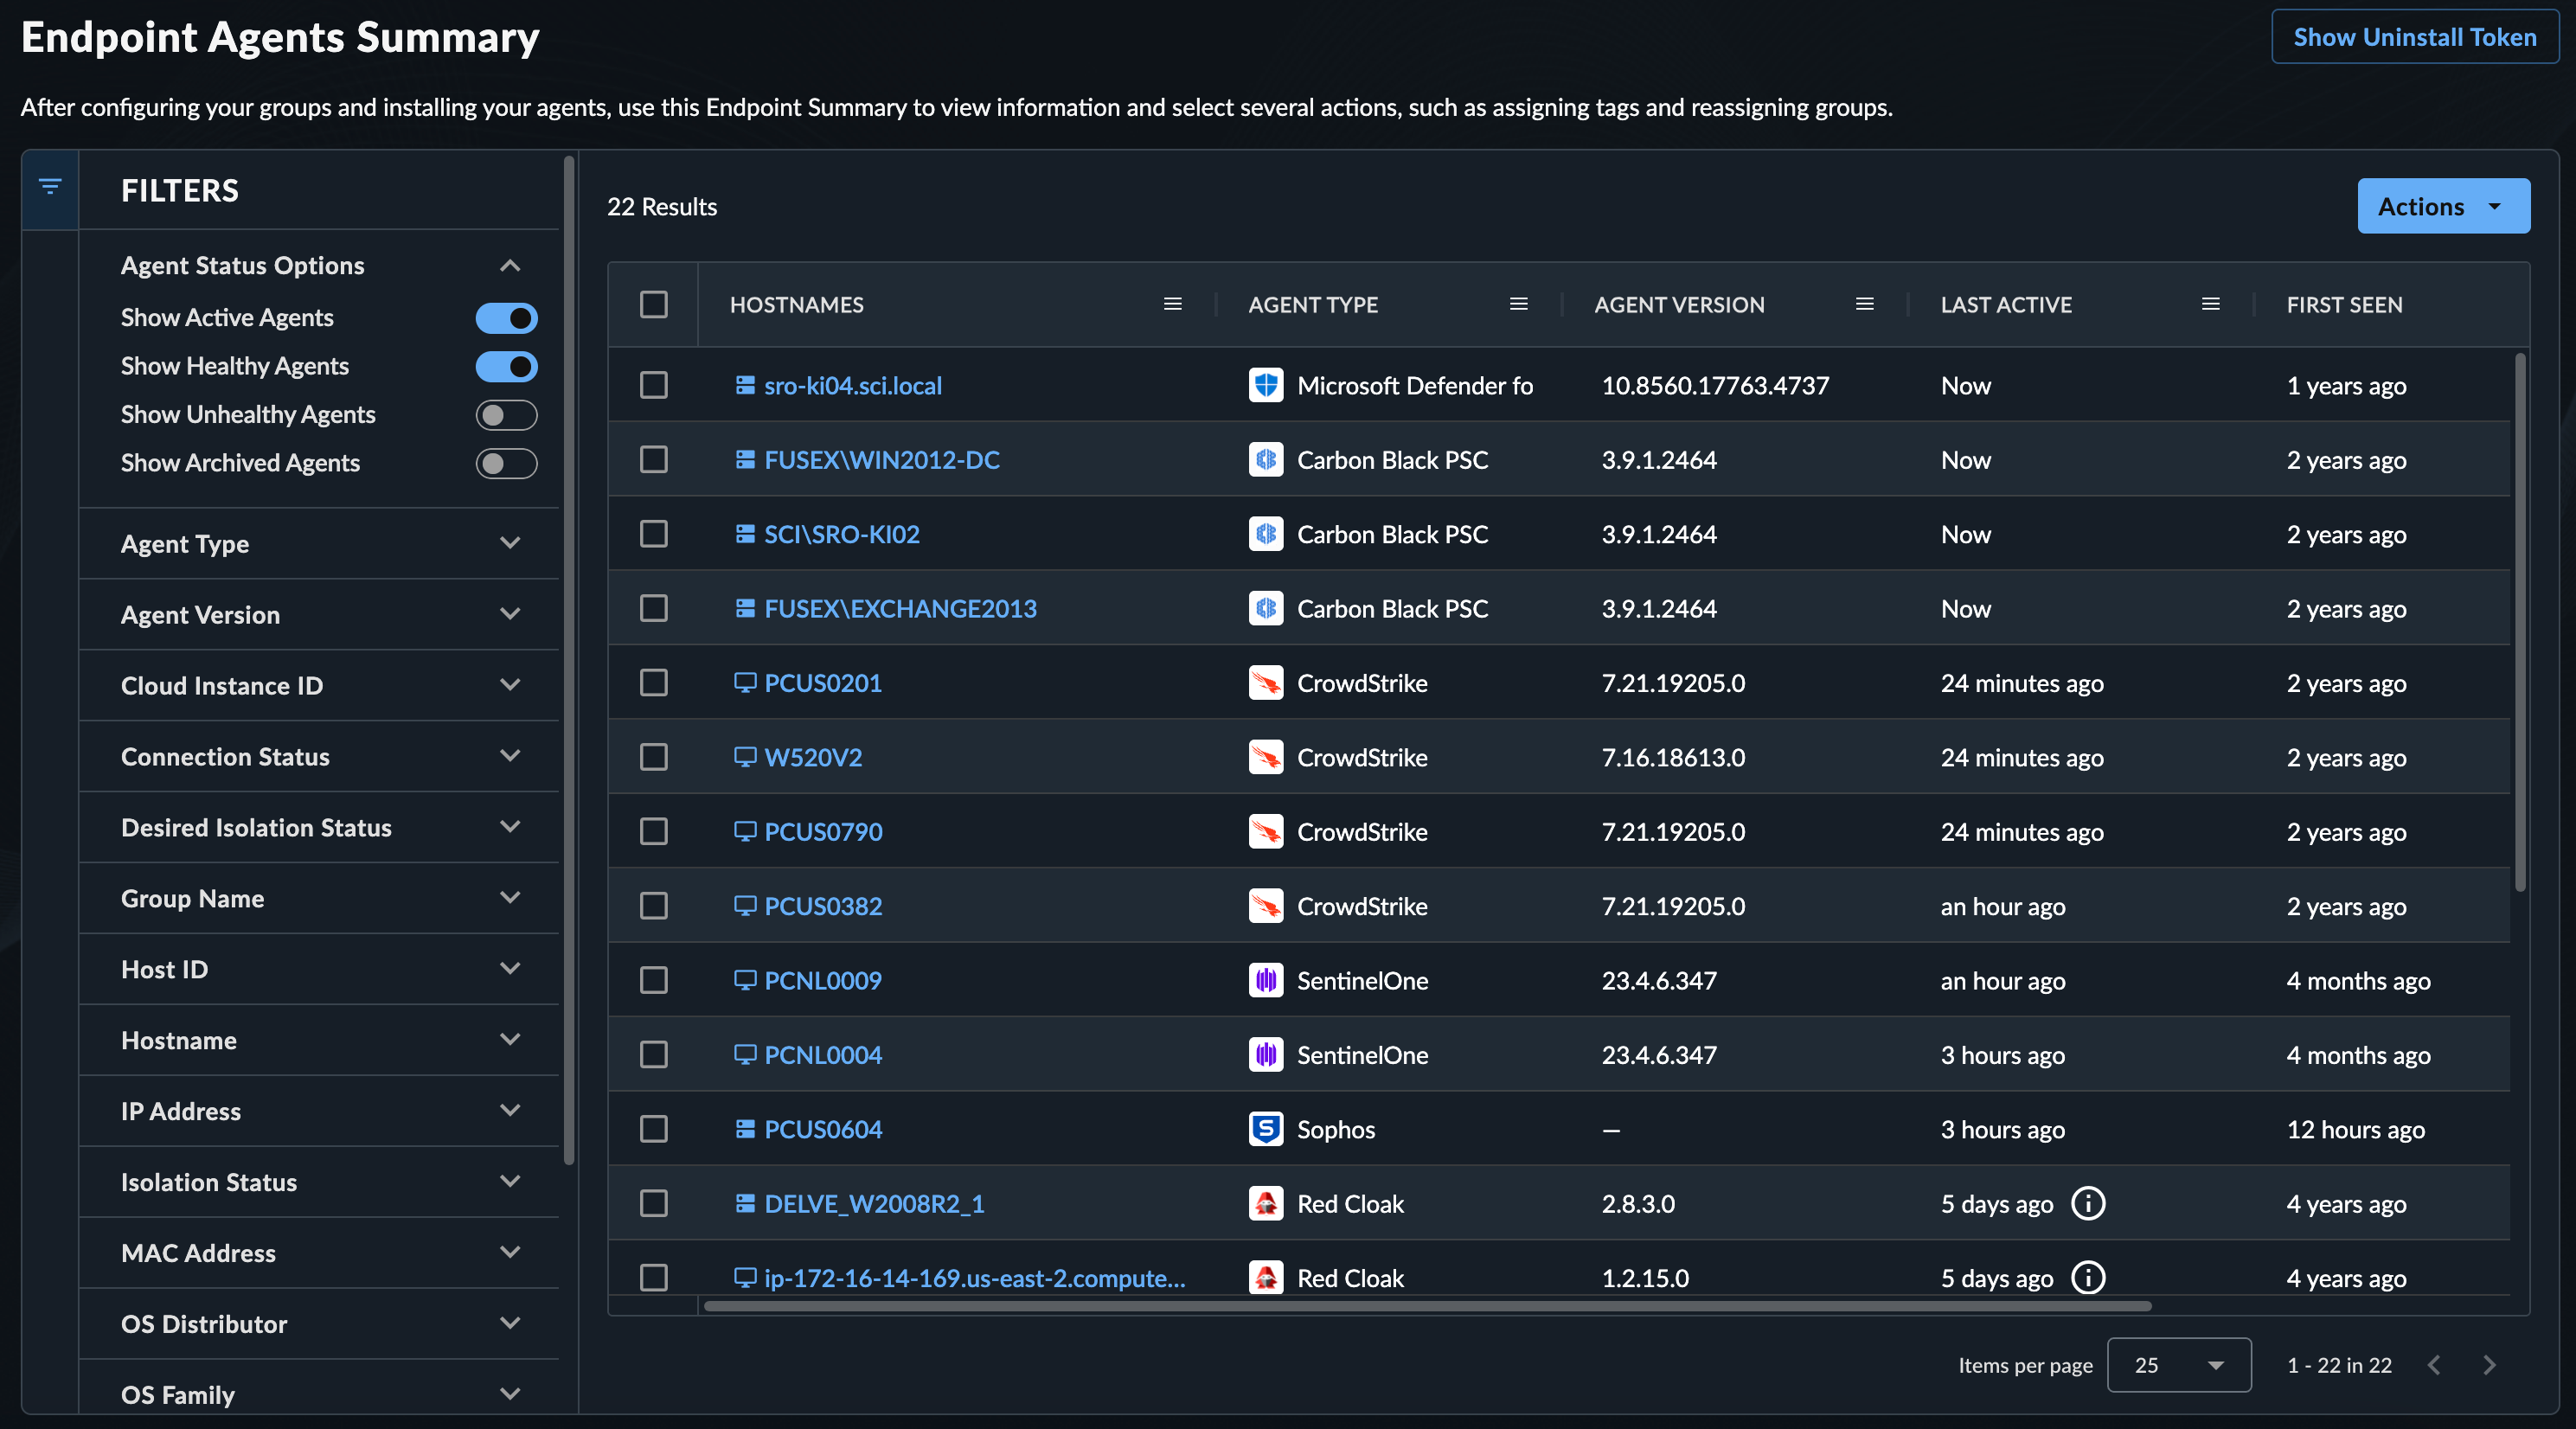
As XDR processes endpoint telemetry, a list of endpoints is generated. Review these by navigating to Endpoint Agents → Summary from the Taegis XDR menu. For more information, see Manage Endpoint Agents.