Sophos Endpoint Agent Groups🔗
Use Sophos Central to create Device Groups and People Groups. An SSO connection from Secureworks® Taegis™ XDR lets you access Sophos Central and perform additional management tasks on your Sophos Endpoint Agent endpoints.
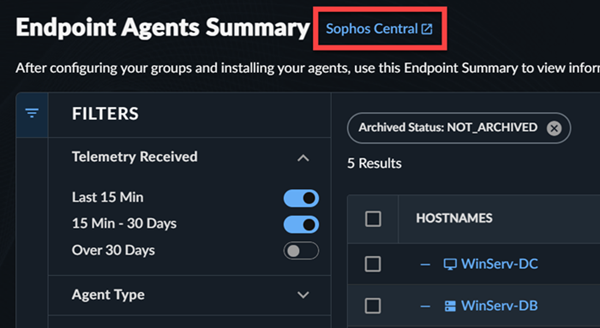
Access Sophos Central from various links throughout your XDR tenant. The easiest way is to use the Taegis Menu to navigate to Endpoint Agents > Summary, then select the Sophos Central link next to the page title. Note that the active tenant in Taegis must be a customer tenant in Sophos Central for this route to work.
Note
When you access Sophos Central via SSO from your Secureworks® Taegis™ XDR tenant, your user account role maps to specific permissions in Sophos Central. For details, see the user role mappings documentation.
Device Groups🔗
Use the Computer Groups or Server Groups tabs to add or manage groups of computers or servers. You can use groups to assign policies to multiple devices at once. The sections below provide information about the groups list and instructions for adding, modifying, or deleting groups.
Note
Devices is the broader term used to refer to computers and servers in Sophos Central. You can configure devices in Computer Groups or Server Groups for easier management.
Adding a Computer Group🔗
To access the Computer Groups tab:
- Go to My Products → Endpoint → Computers.
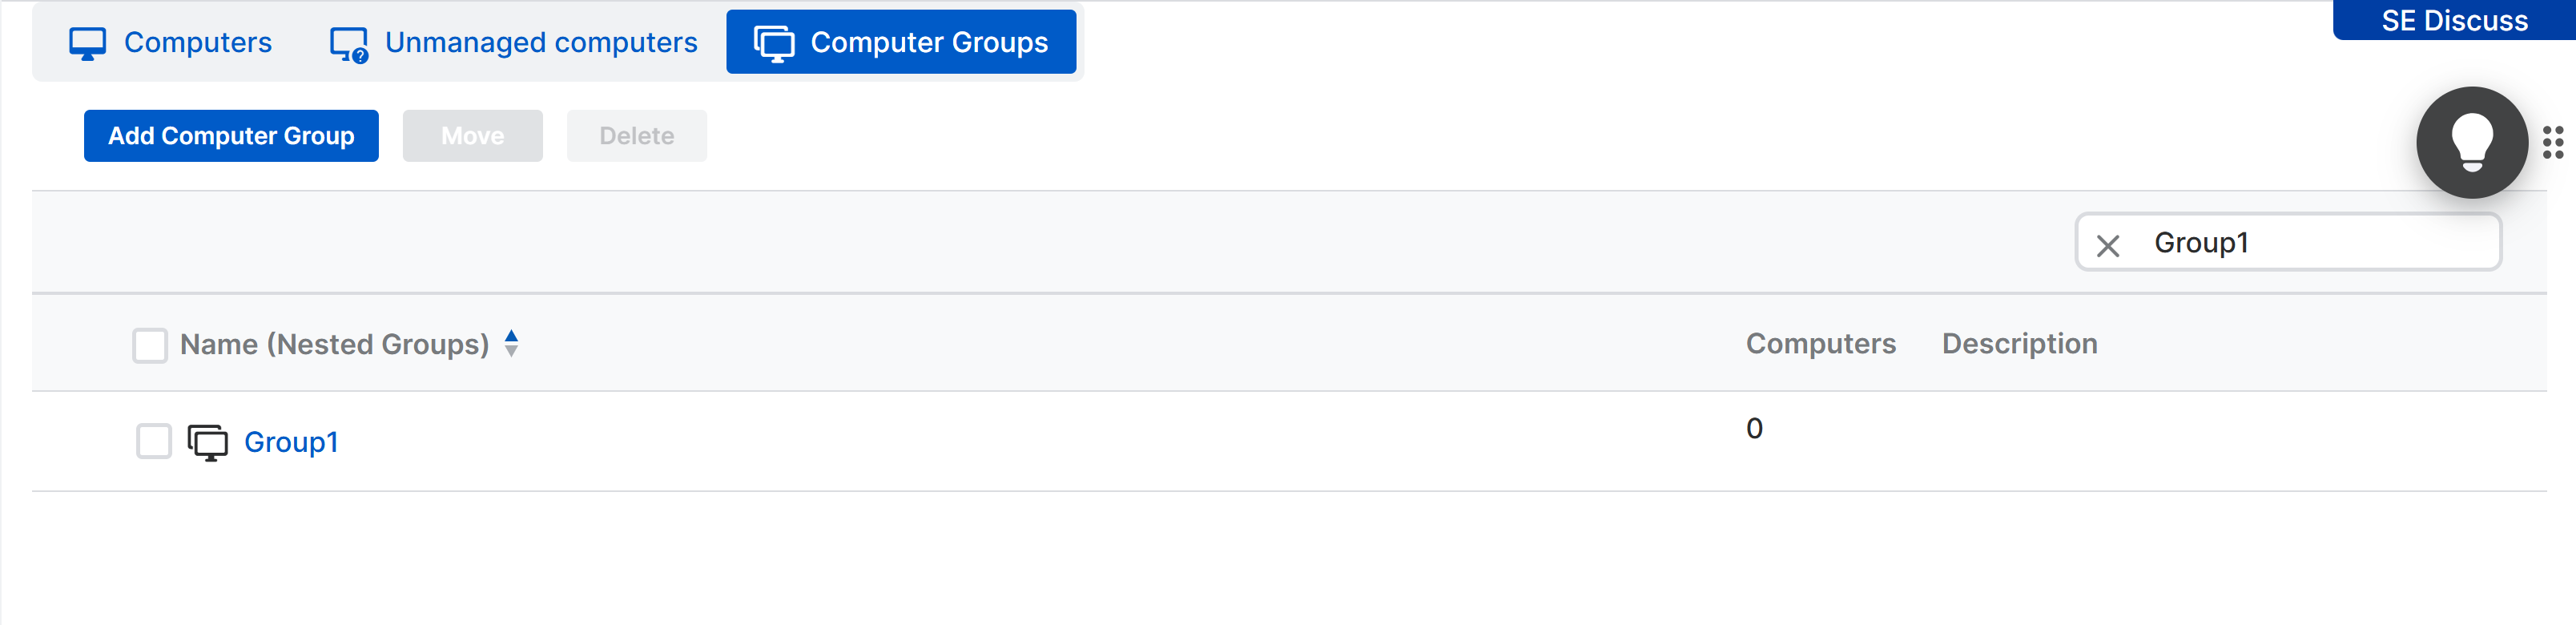
- Select the Computer Groups tab.
The current groups are listed, along with the number of computers in each group. To view full details for a group, select the group's name.
Tip
Use the Search box to filter the displayed entries by typing a name.
To add a group:
- Select Add Computer Group in the upper left of the page.
- Choose either Create new top level group or Create group within an existing group.
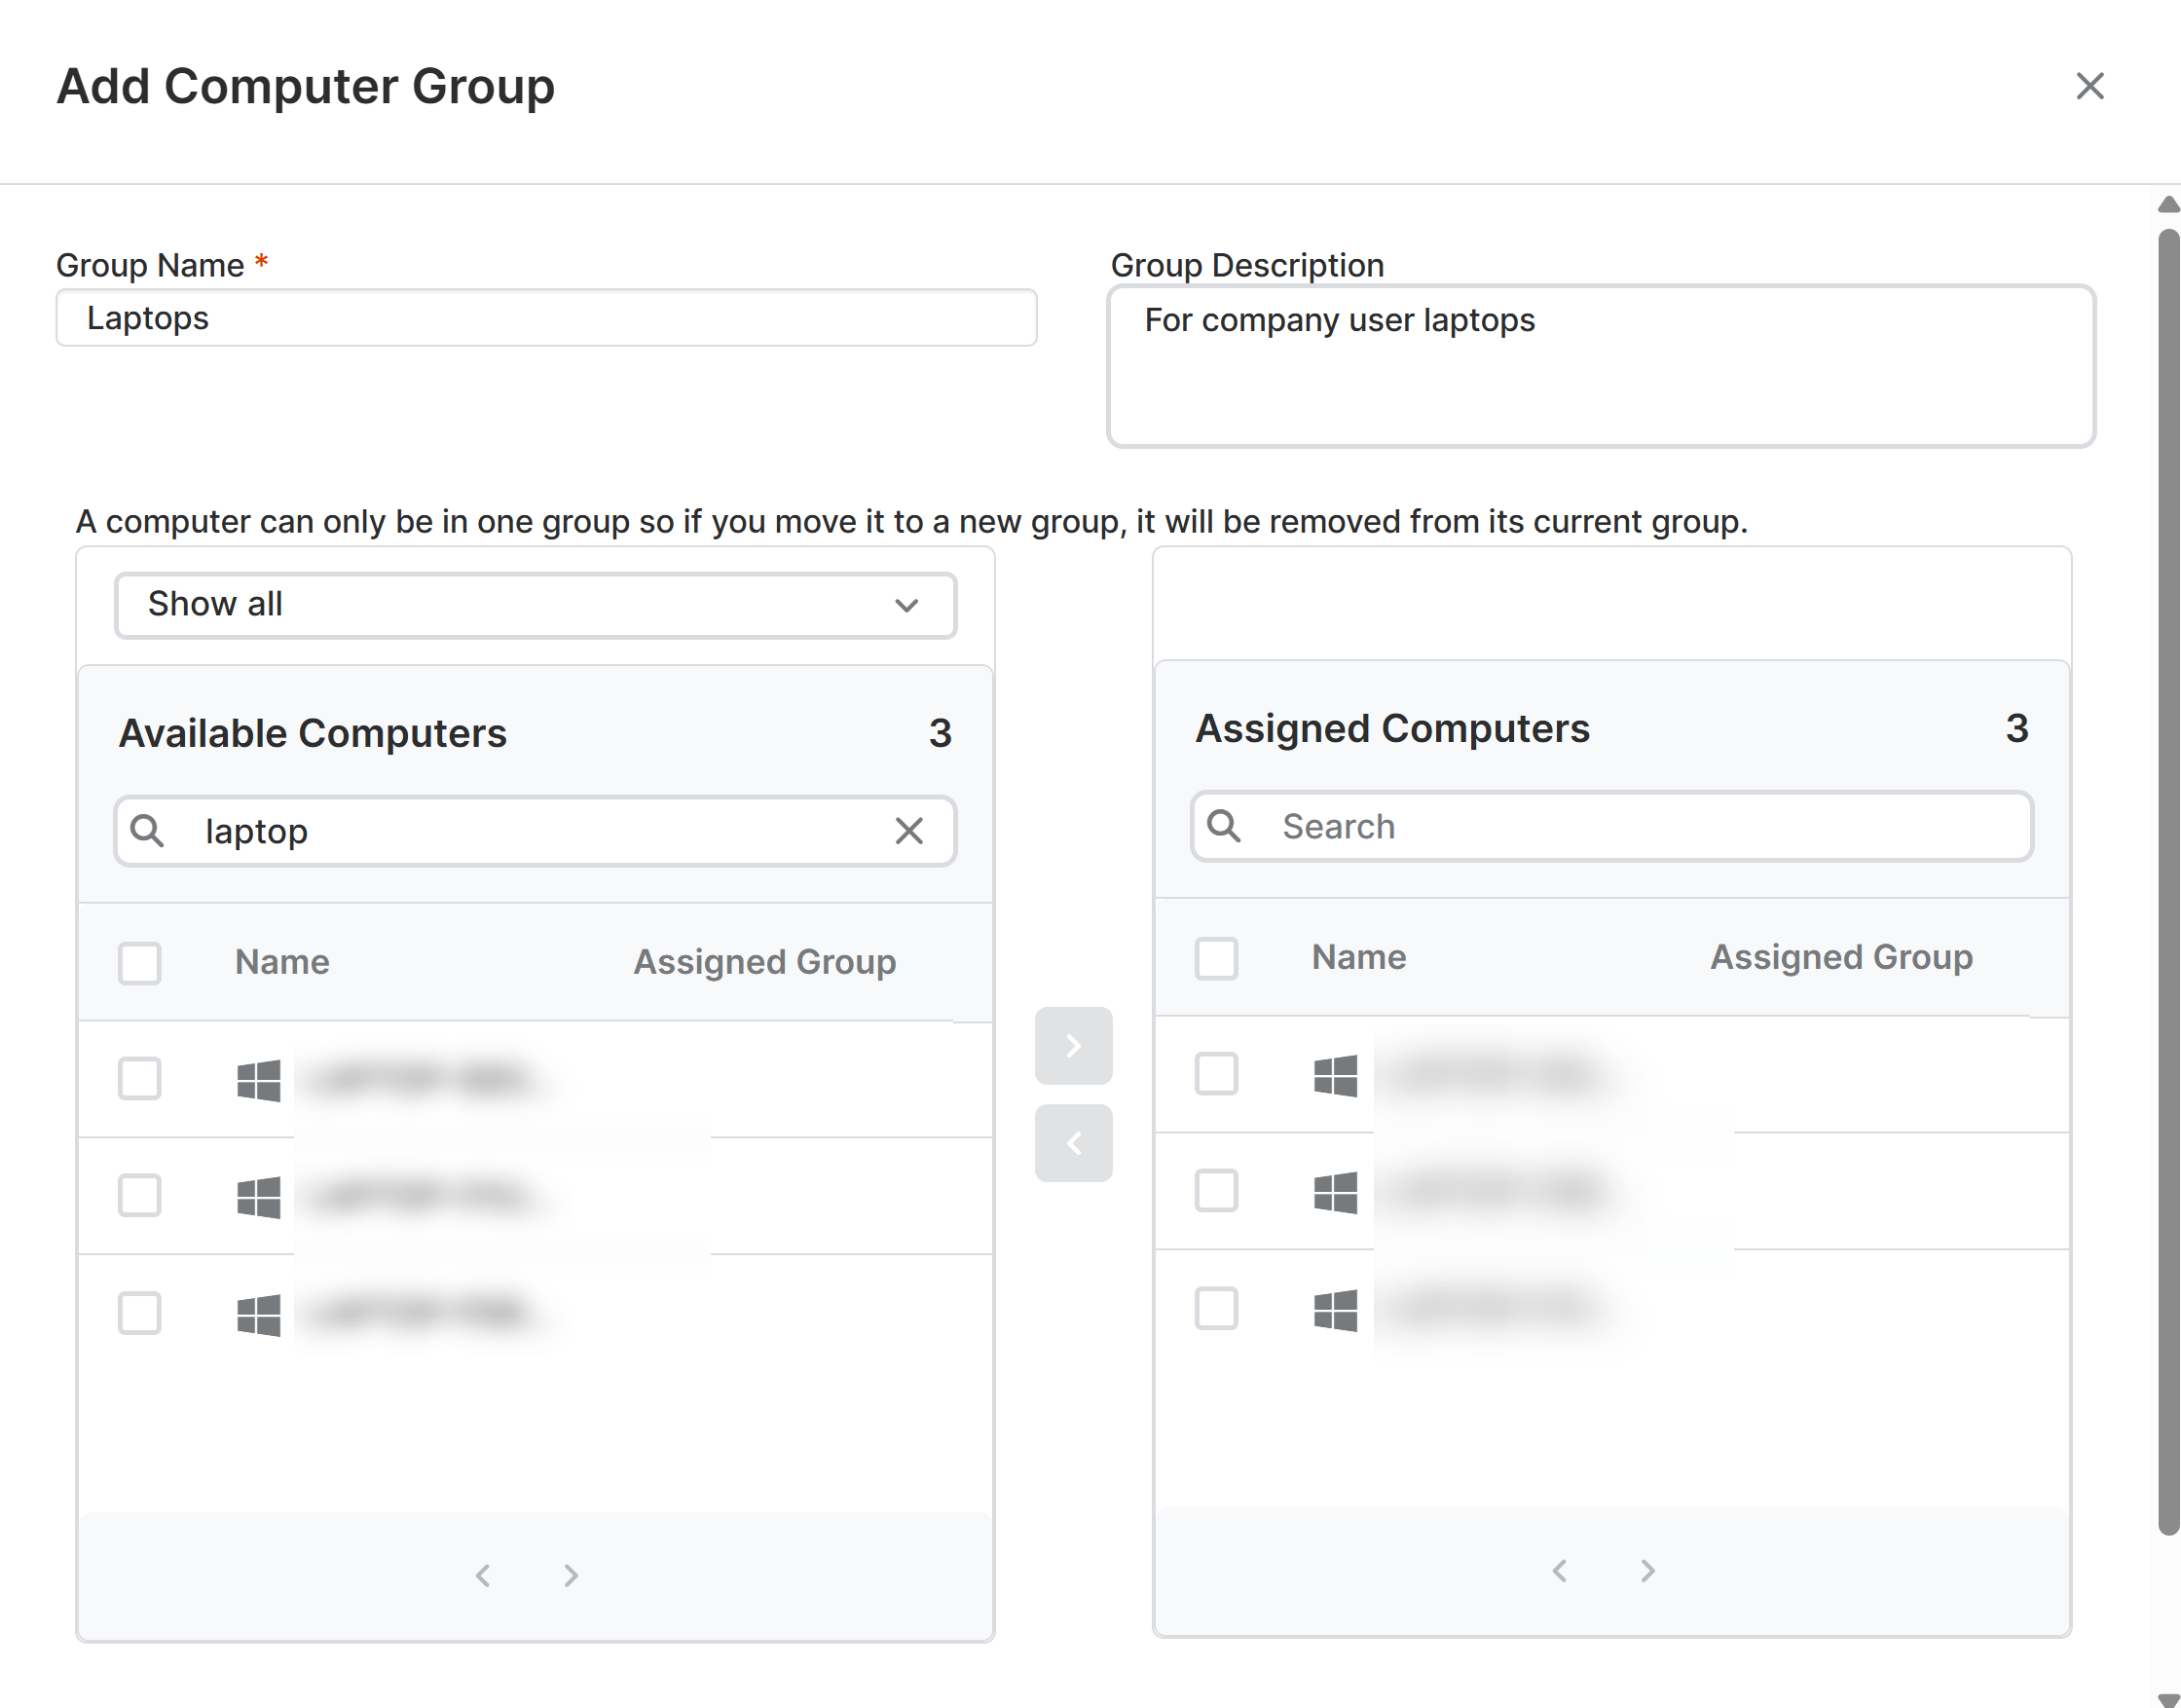
- Provide a name and description for the group.
- Assign computers to the group.
Note
A device can only be in one group. If you select a device that’s already in a group, it will be removed from its current group.
- Press Save.
Deleting a Computer Group🔗
To delete a group:
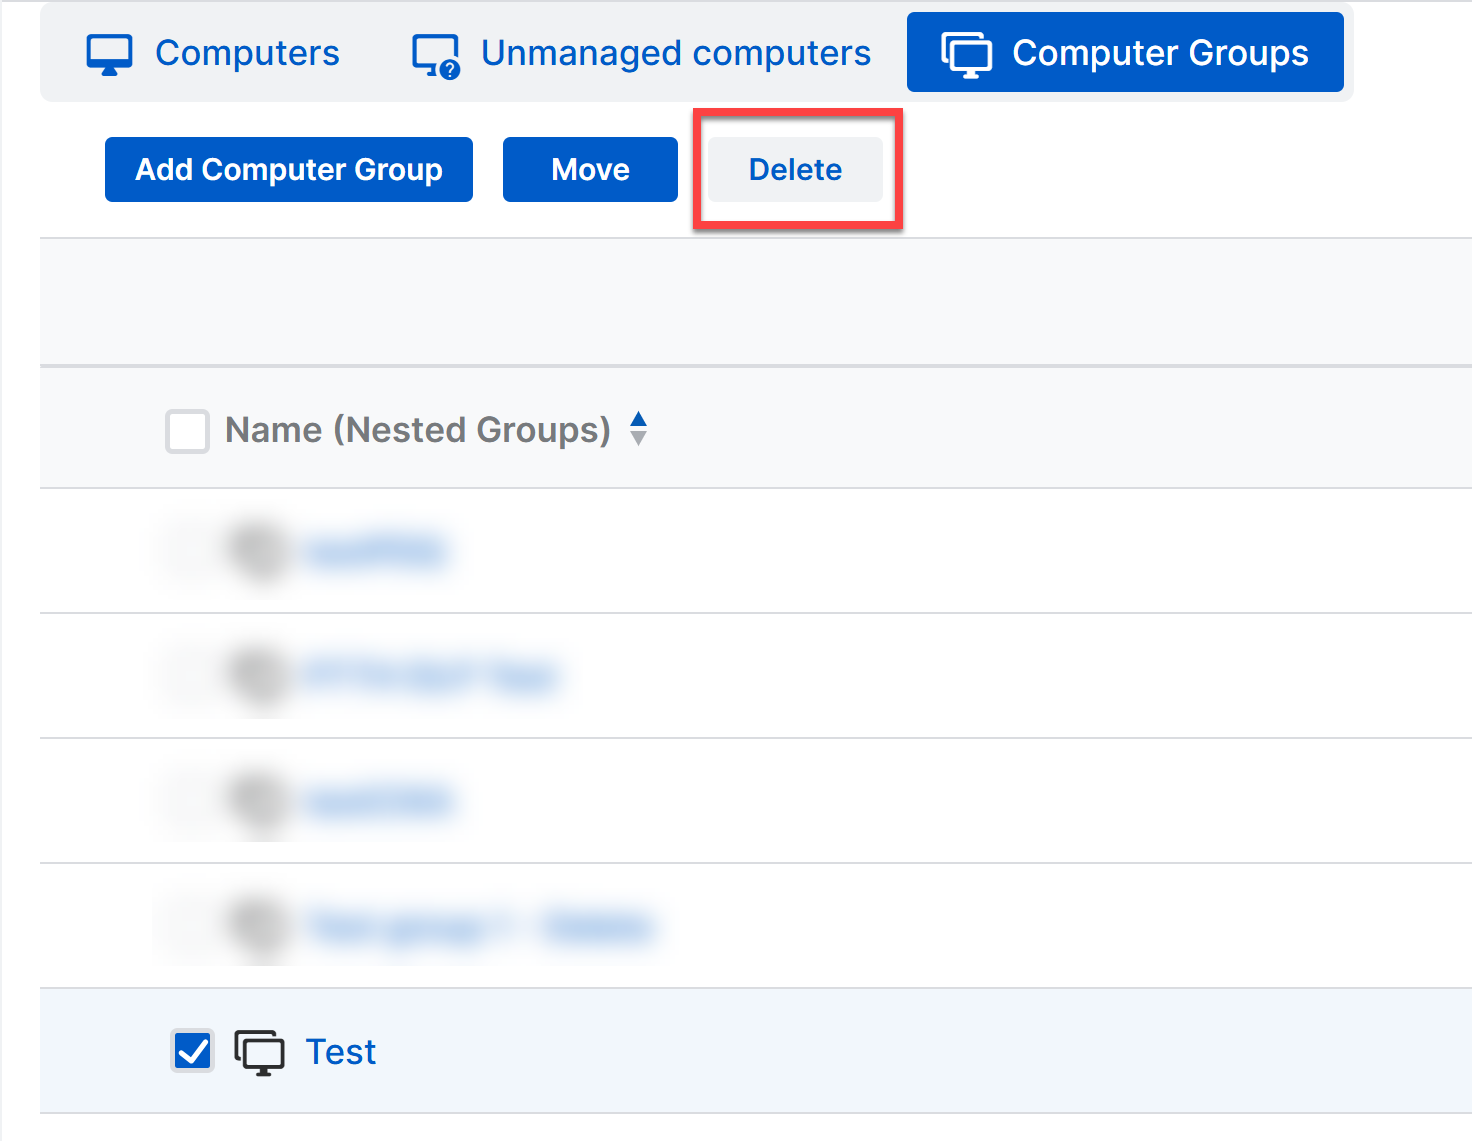
- Select the group.
-
Select Delete in the upper left of the page.
Delete Group -
Select Delete again at the confirmation prompt.
Deleting a group does not delete its computers. You can also delete a group from the group's details page by selecting the group's name to open the details.
Editing a Computer Group🔗
Note
This process applies to any of the group configurations described in this document.
Summary🔗
To edit a group, select the group's name to open the group details. The Summary tab in a group’s details lets you add or remove computers from groups. You can also delete groups.
To add or remove devices or users from the group:
-
Select Edit in the left-hand pane.
Tip
You can edit the group's name and description in this view.
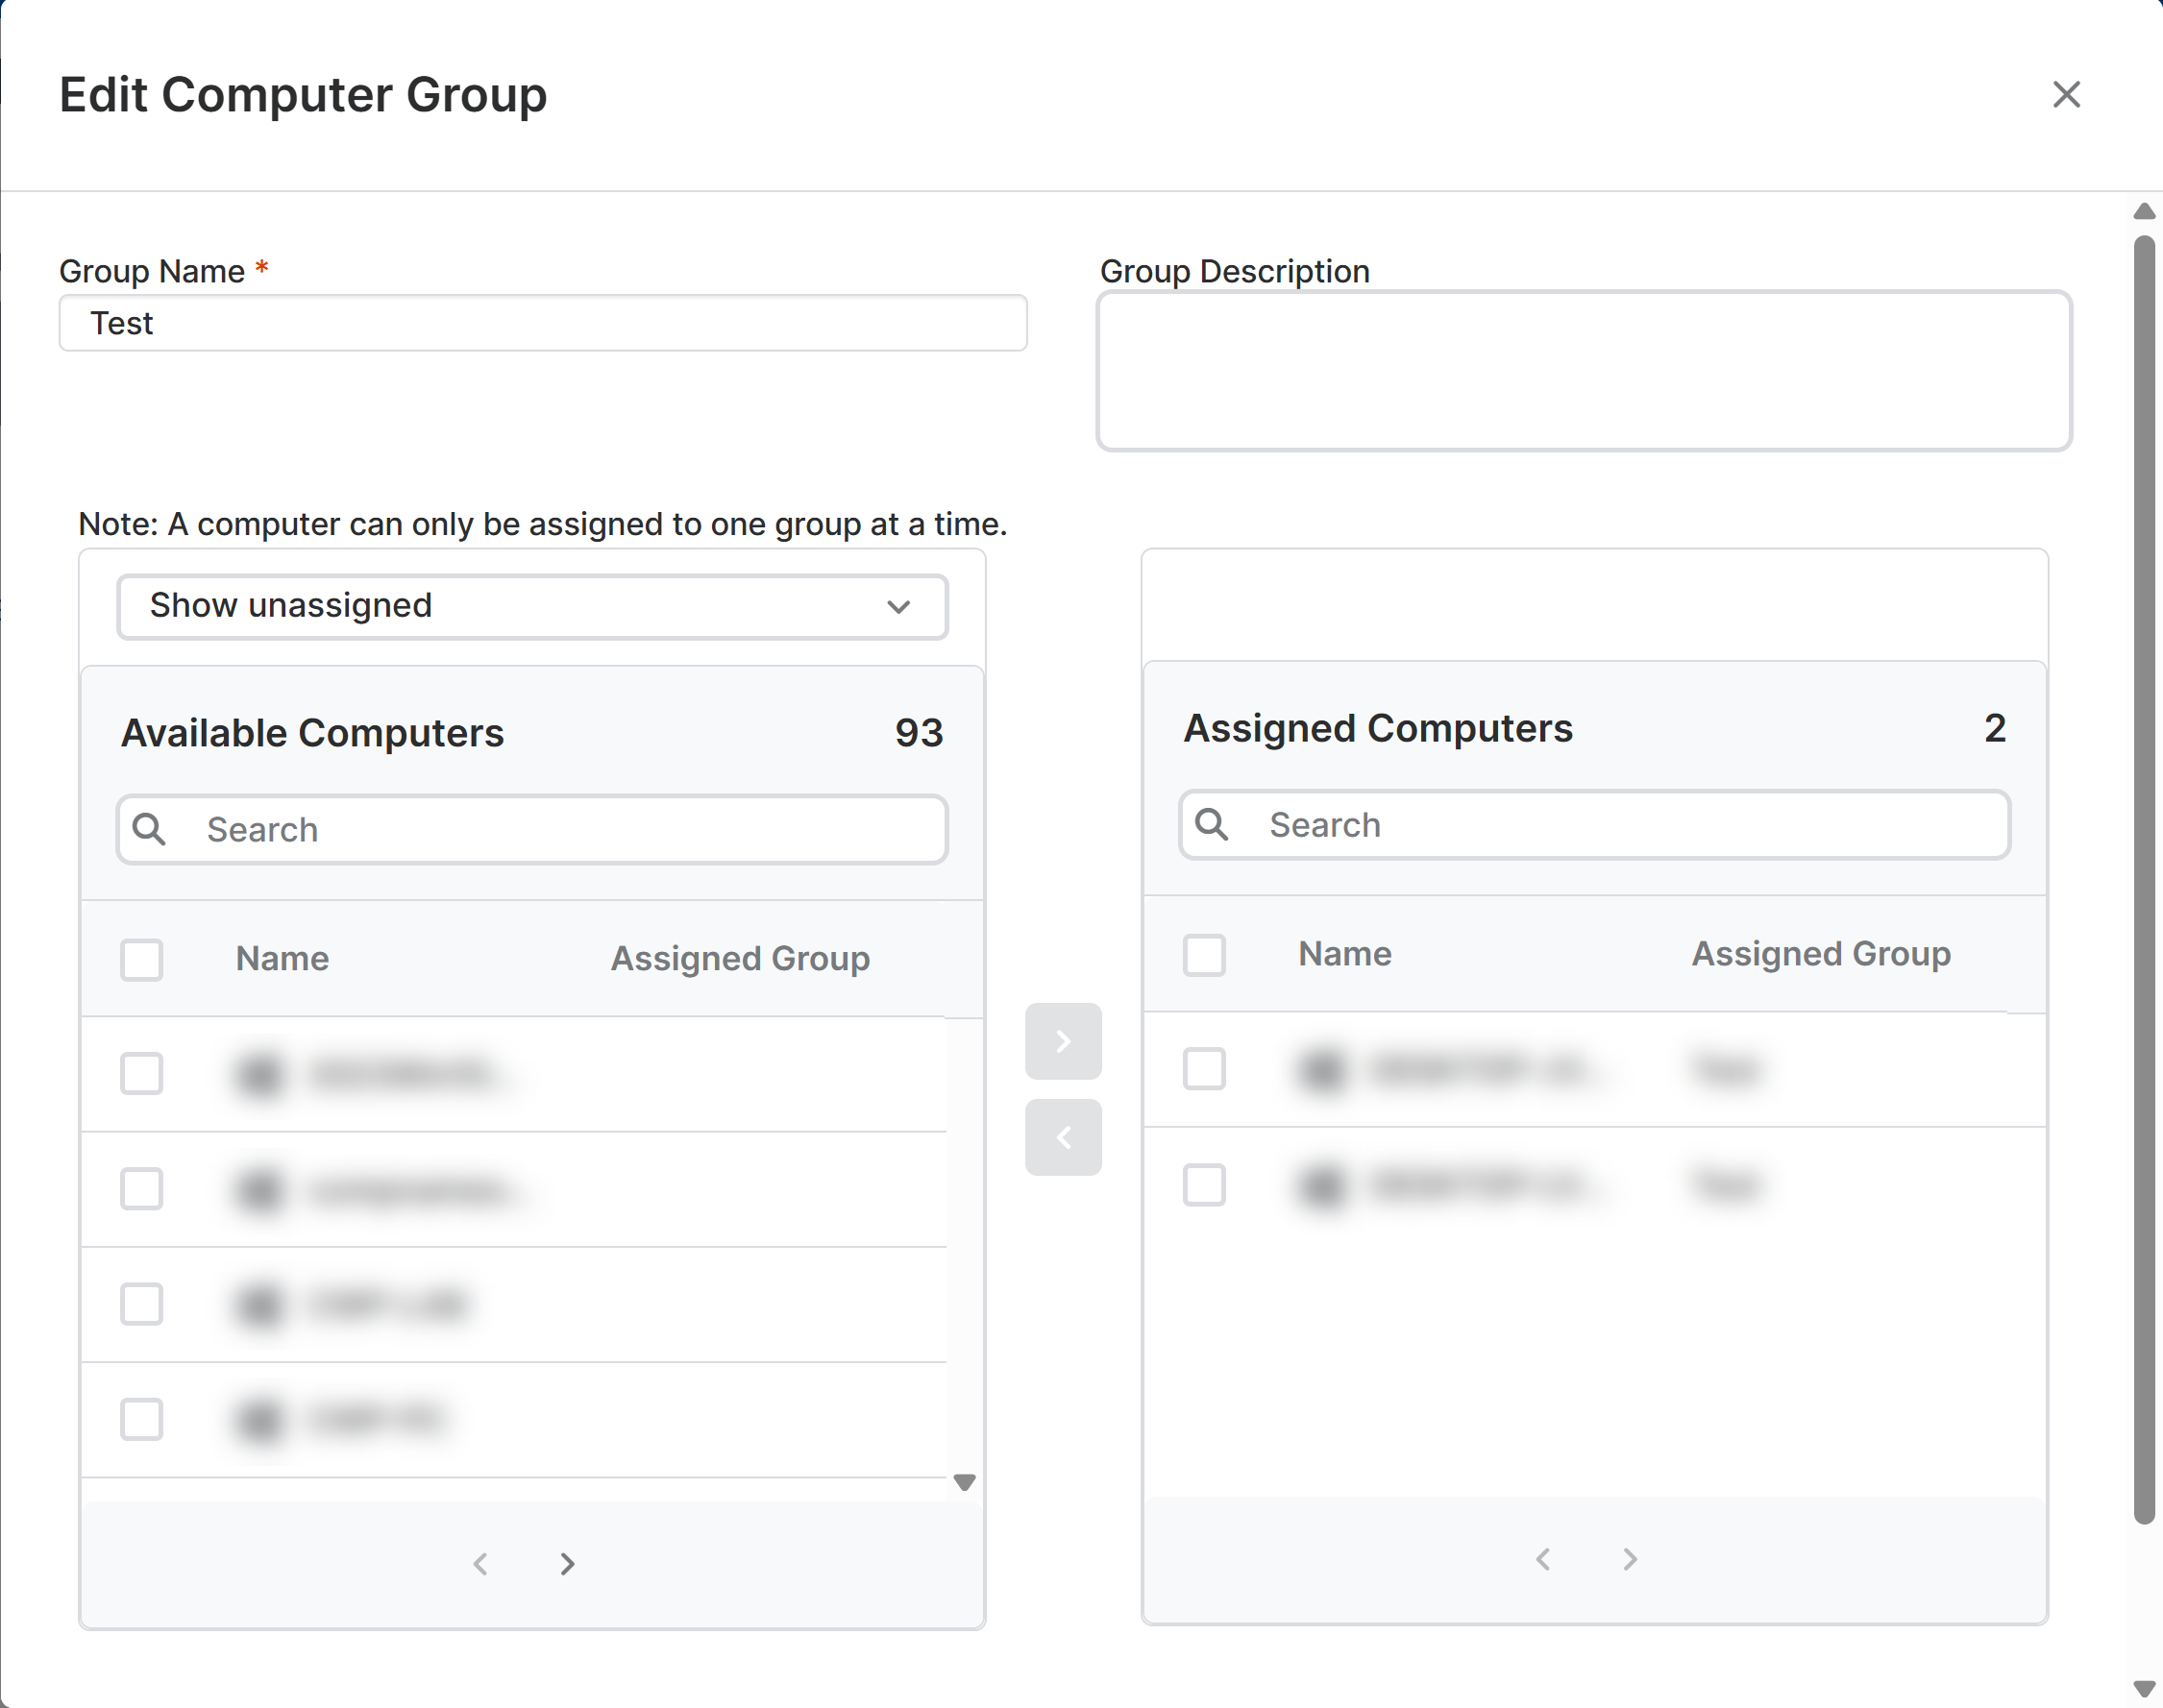
Edit Group -
Update the Assigned Computers for the group and select Save.
To delete the group, select Delete in the left-hand pane.
Note
Deleting a Computer Group does not delete its devices.
Policies🔗
The Policies tab in a group's details page lets you view the policies that are enabled and applied to the group. To edit a group's policies, select a policy name to view and edit the policy details.
Note
Editing the policy affects all groups to which this policy is applied.
Adding a Server Group🔗
To access the Server Groups tab:
- Go to My Products → Server → Servers.
- Select the Server Groups tab.
The current groups are listed, along with the number of servers in each group. To view full details for a group, select the group's name.
Tip
Use the Search box to filter the displayed entries by typing a name.

To add a group:
- Select Add Server Group in the upper left of the page.
- Choose either Create new top level group or Create group within an existing group.
- Provide a name and description for the group.
-
Assign computers to the group.

Assign Servers to Group -
Press Save.
Deleting a Server Group🔗
To delete a group:
- Select the group.
-
Select Delete in the upper left of the page.
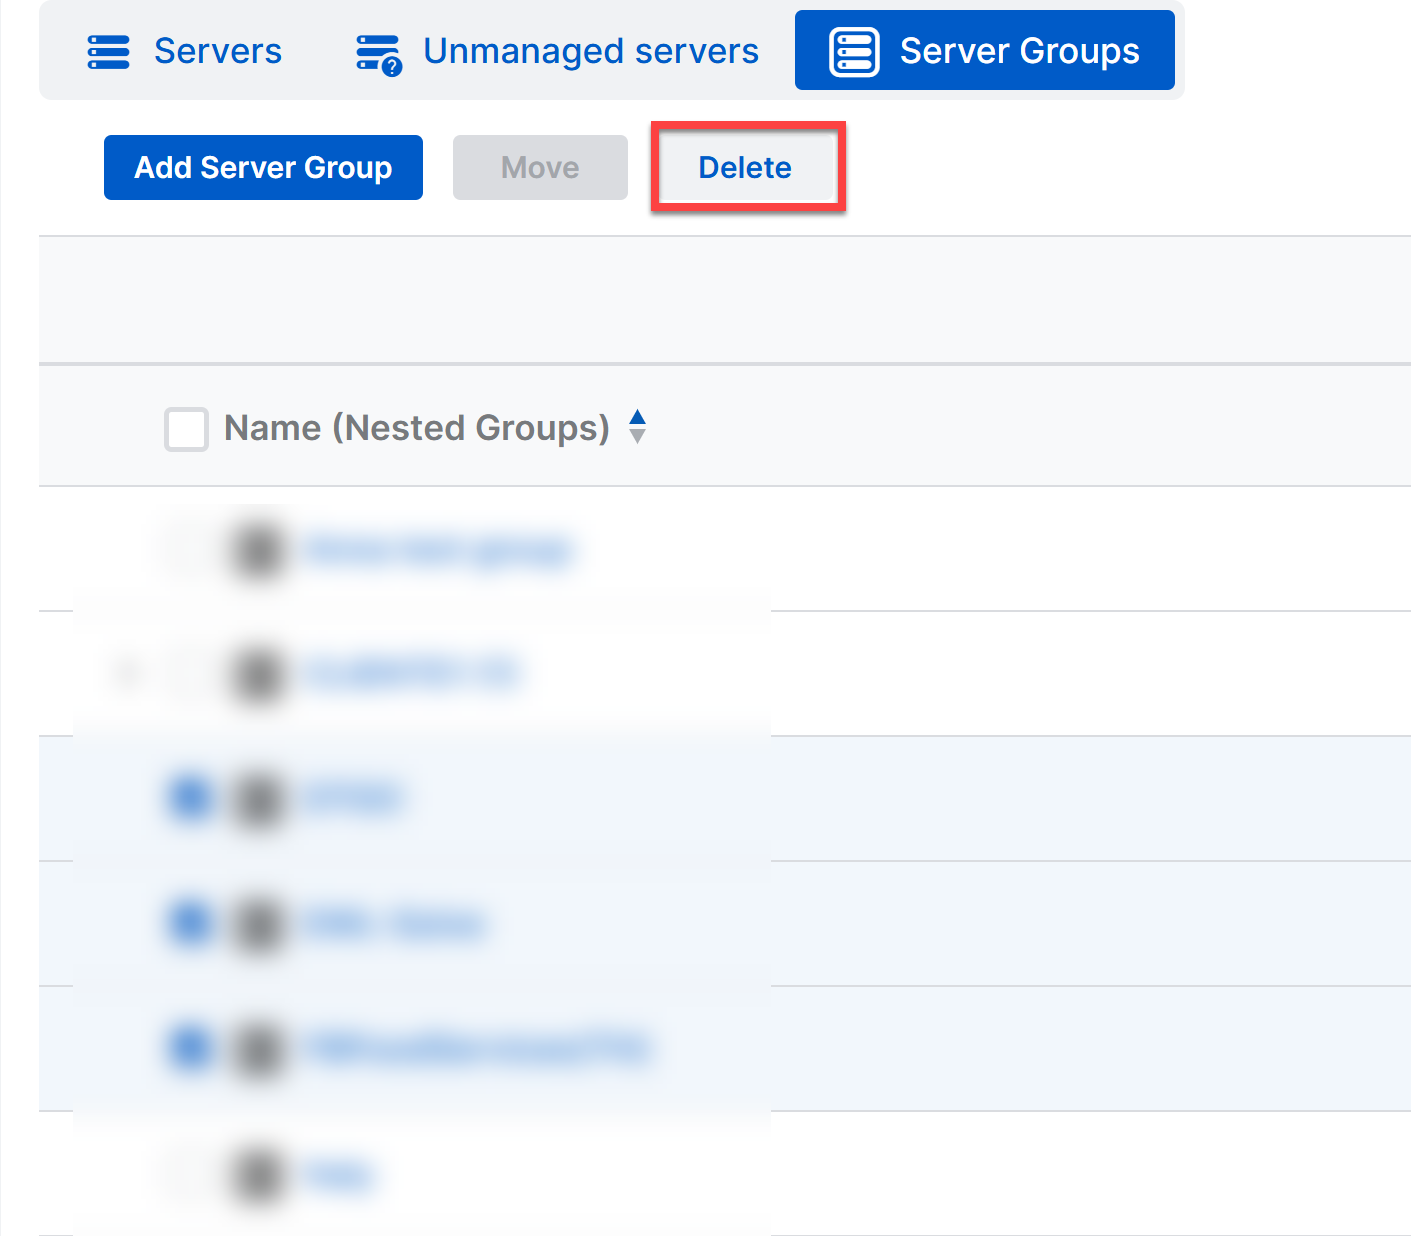
Delete Group -
Select Delete again at the confirmation prompt.
Deleting a group does not delete its servers. You can also delete a group from the group's details page by selecting the group's name to open the details.
Editing a Server Group🔗
Note
This process applies to any of the group configurations described in this document.
Summary🔗
To edit a group, select the group's name to open the group details. The Summary tab in a group’s details lets you add or remove servers from groups. You can also delete groups.
To add or remove devices or users from the group:
-
Select Edit in the left-hand pane.
Tip
You can edit the group's name and description in this view.
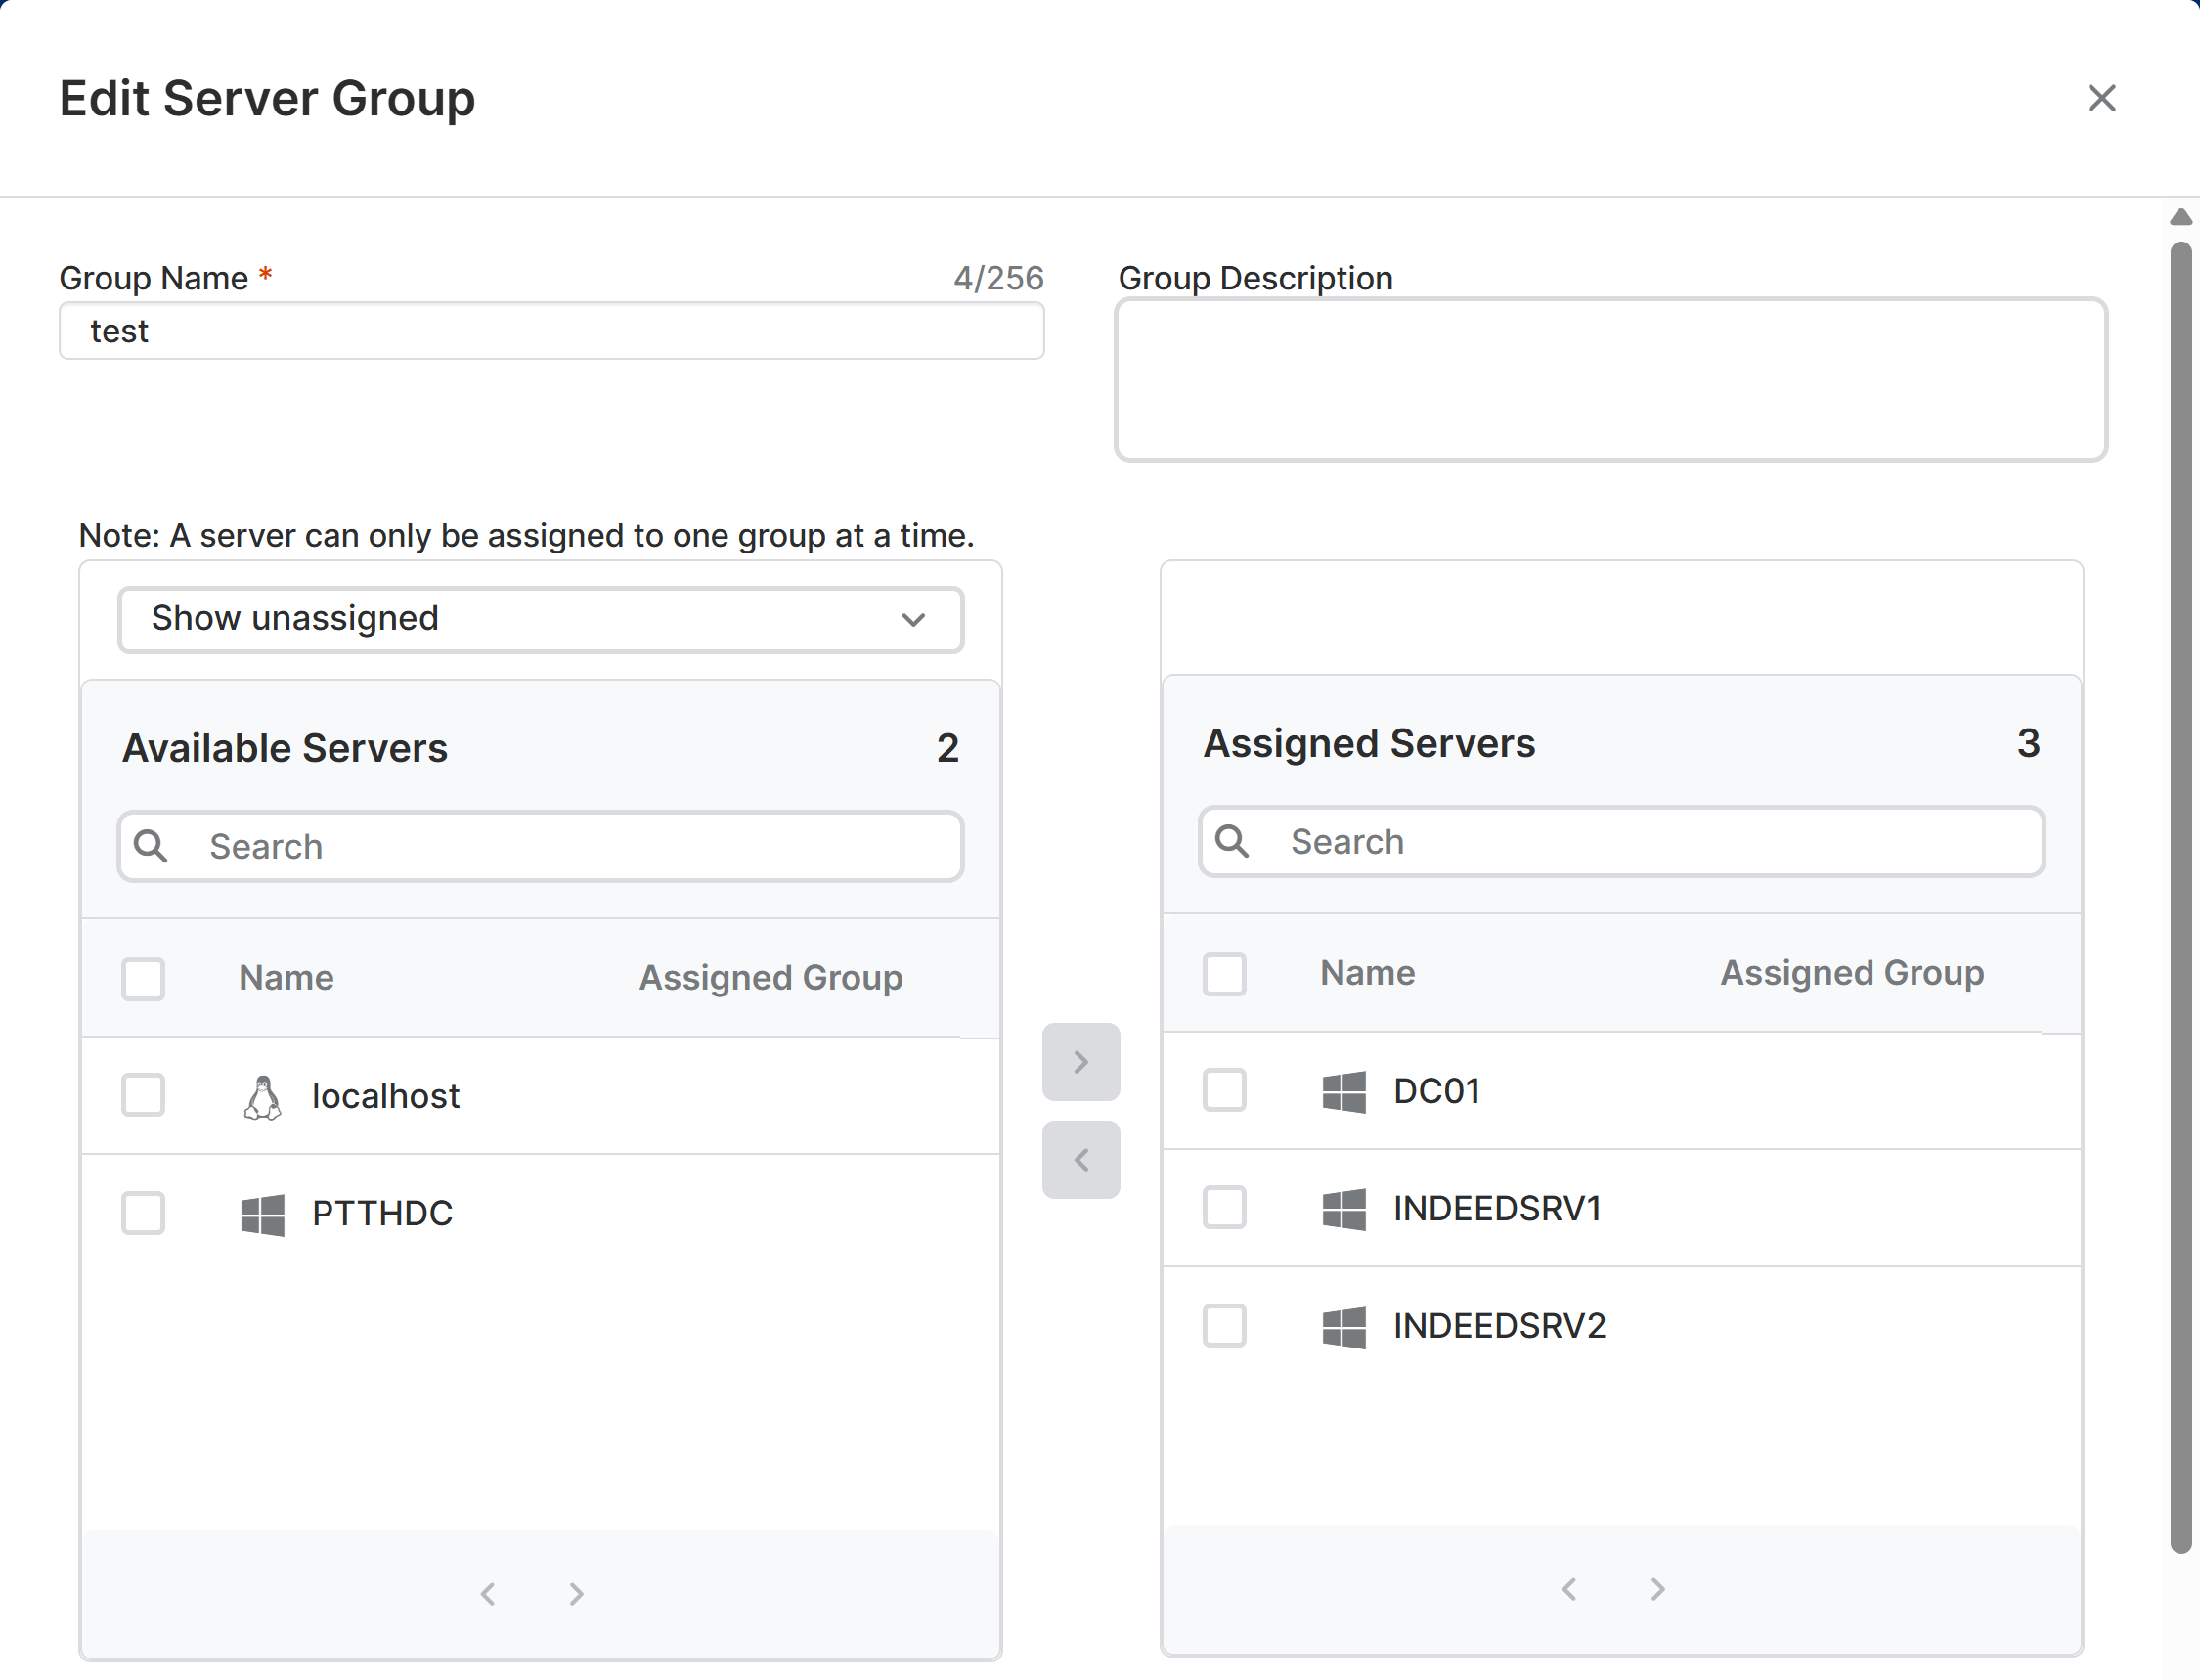
Edit Group -
Update the Assigned Servers for the group and select Save.
To delete the group, select Delete in the left-hand pane.
Note
Deleting a Server Group does not delete its devices.
Policies🔗
The Policies tab in a group's details page lets you view the policies that are enabled and applied to the group. To edit a group's policies, select a policy name to view and edit the policy details.
Note
Editing the policy affects all groups to which this policy is applied.
People and People Groups🔗
You can manually add people in Sophos Central and organize them into People Groups for easier management. By using People Groups, you can assign policies that automatically follow users, even when they access multiple devices.
Tip
You can manually define People and People Groups in Sophos Central, but it’s common practice to synchronize people and groups from directory services such as Microsoft Active Directory (AD), Microsoft Entra ID, and Google Directory. For more details on setting up directory synchronization, see the Sophos Directory Service documentation.
Adding People🔗
To access the Users tab, go to My Products → Endpoint → People.
When viewing the Users tab, all users are listed by default, along with their Health Status and associated metadata. To view full details for a user, select the user's name.
Tip
Use the Search box to filter the displayed entries by typing a name.
To add a new user:
- Select Add in the upper left of the page.
-
Choose to Add User.
Tip
You can also choose to Import users from CSV. By adding users from CSV, you can import a list of users using a CSV file allowing you to add users in bulk without using a directory service. For more information, see the Sophos documentation on importing users from a CSV file
-
In the Add User dialog, enter the following parameters.
| Option | Description |
|---|---|
| First & Last Name | Enter the name of the user. Do not include a domain name. When you add a user using a directory service, "First and Last Name" displays the "Display Name" from the directory service, which might not conform to this format. |
| Role | Select an administration role for the user. A user assigned an administration role will receive an email with instructions to set up their administration account. A User role grants access only to the Self Service Portal. |
| Manager | Enter the name of the user's manager. |
| Email Address | Enter the email address of the user. |
| Exchange Login | Enter the username or email used to sign in to Exchange Server. |
| Add to groups (optional) | Select a user group and use the picker arrows to assign it. Start typing in the search box to filter groups. |
| Email Setup Link | Select this to send the user an email with links to set up device protection. If multiple protection types exist, select those needed. The user needs admin privileges and internet access to protect their computer. |
In the Users tab, select a user to view all the details for the user. For more information on user details, see the user details Sophos documentation.
Adding People Groups🔗
To access the Groups tab:
- Go to My Products → Endpoint → People.
- Select the Groups tab.
When viewing the Groups tab, all groups are listed by default. To view the full details for a group, select the group's name.
Tip
Use the Search box to filter the displayed entries by typing a name.
To add a new group:
- Select Add Group in the upper left of the page.
- Provide a name and description for the group.
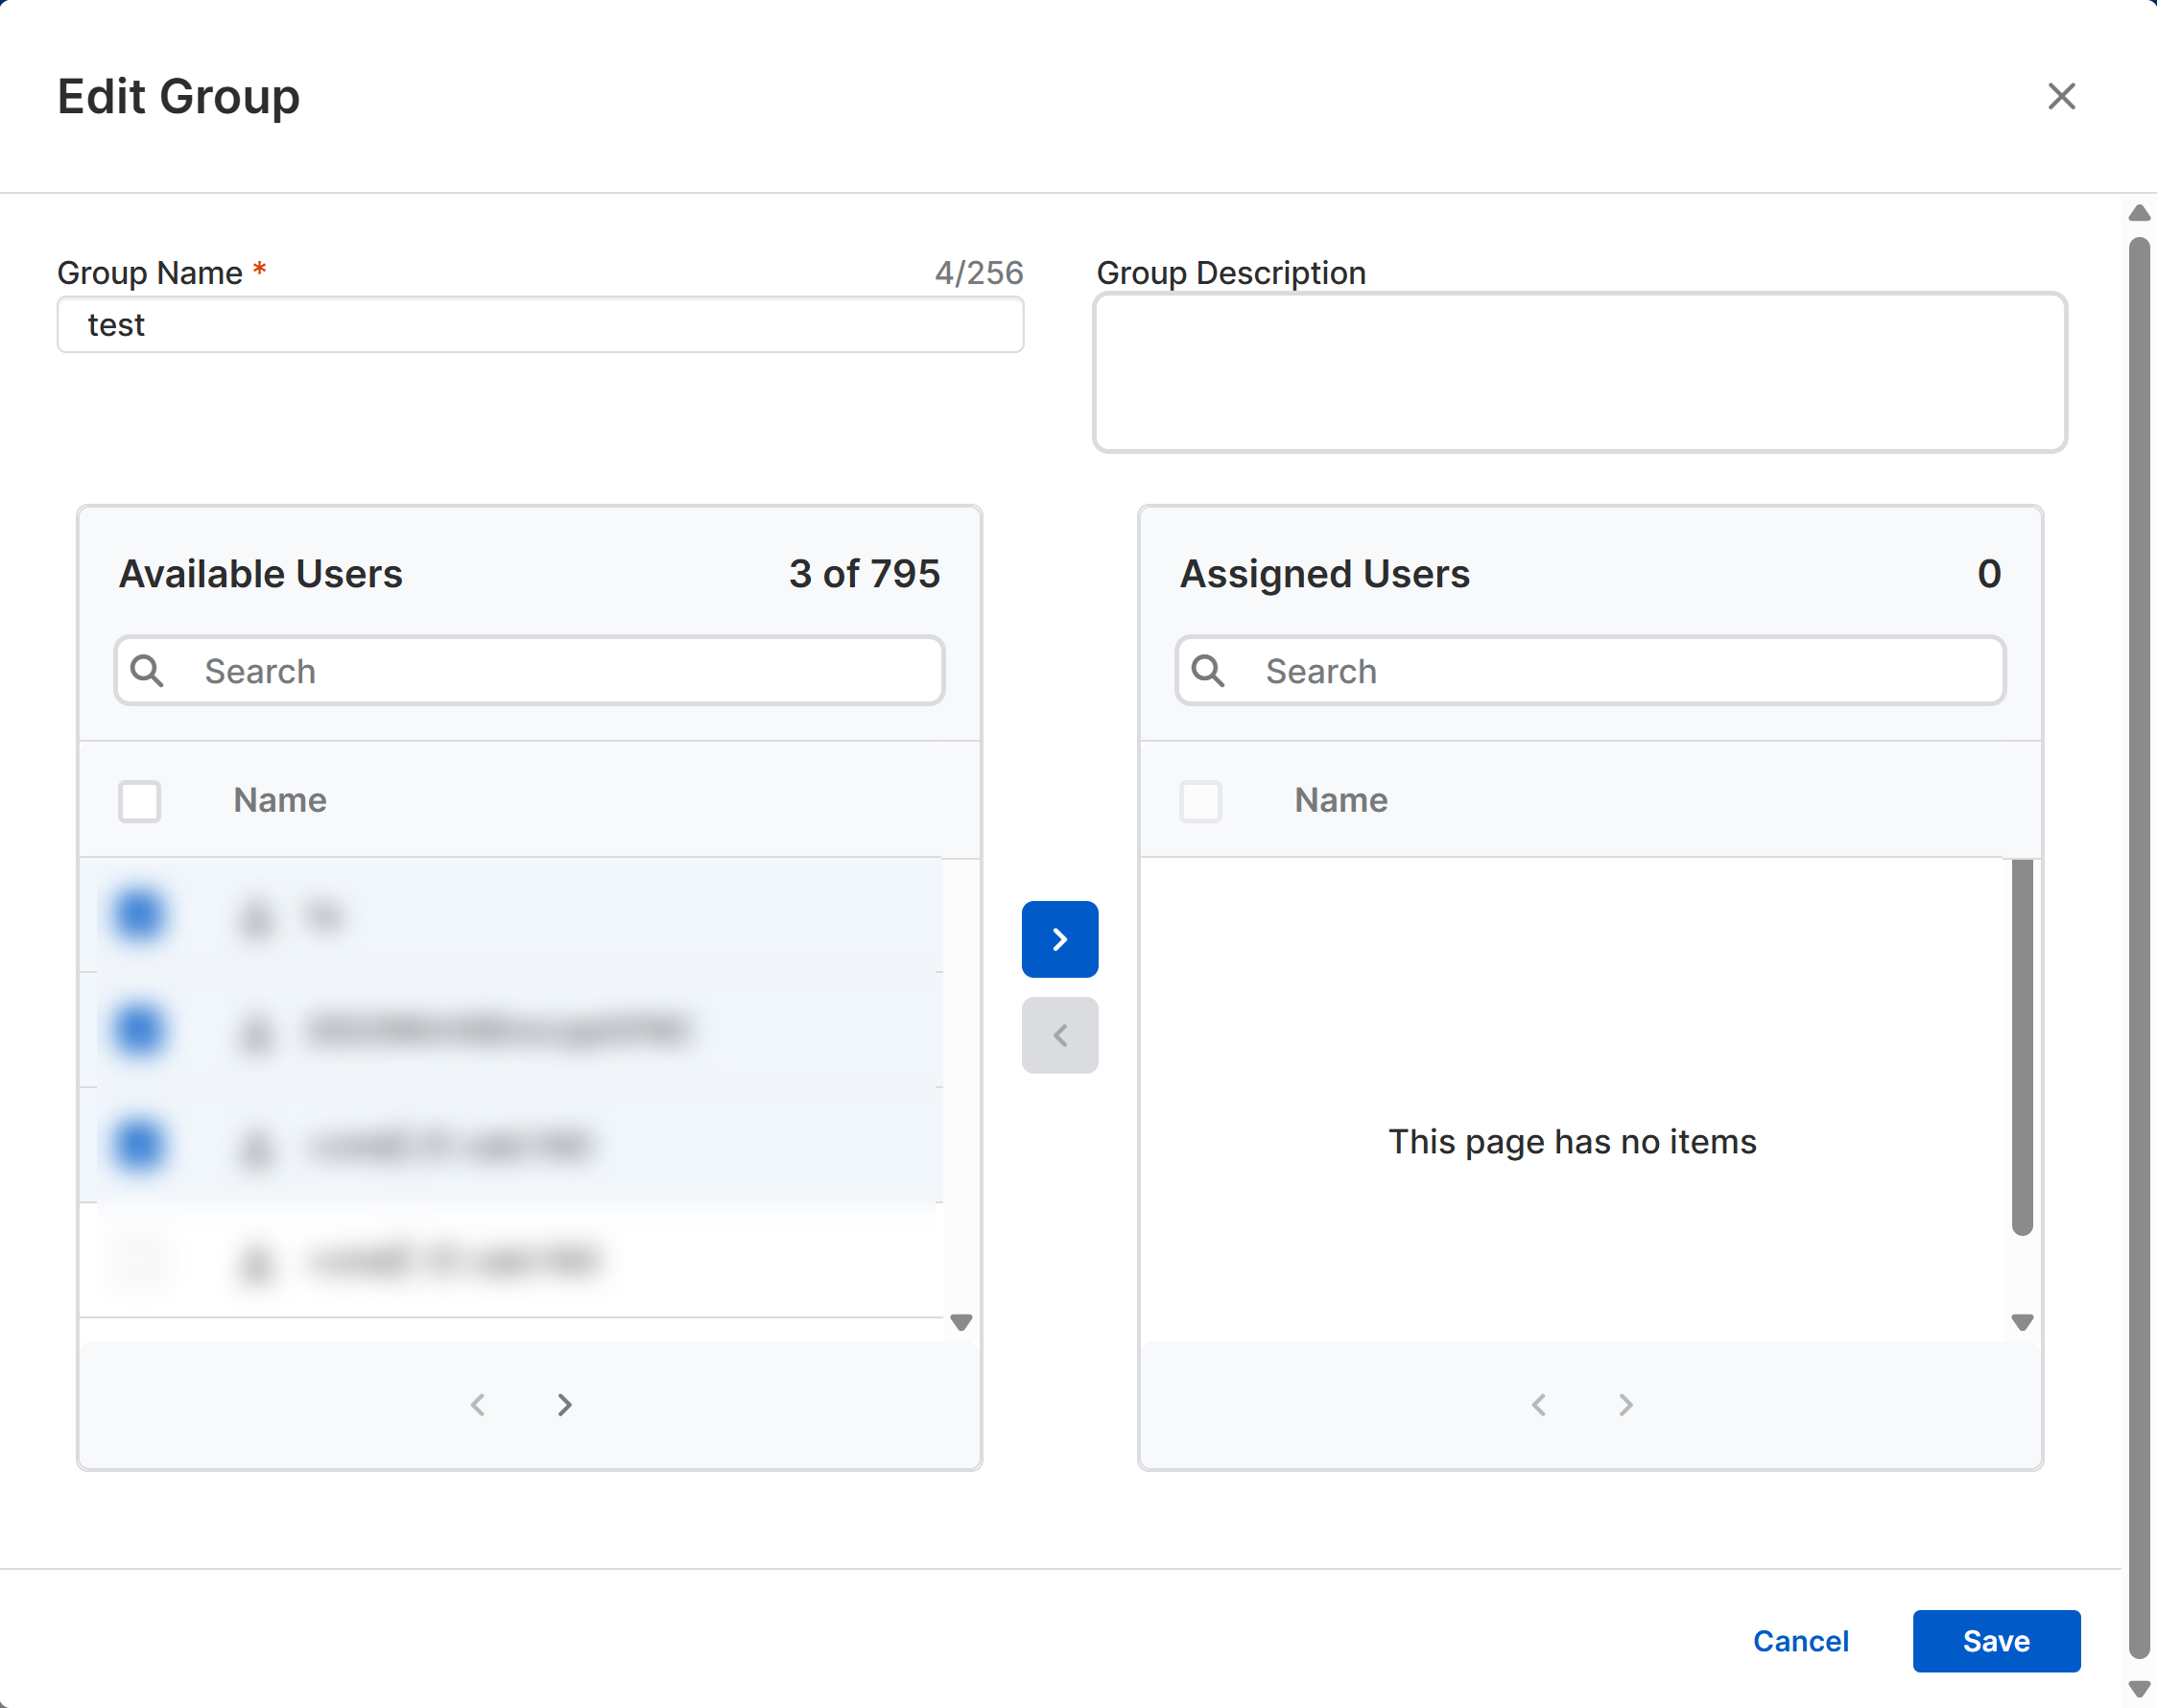
-
Assign users to the group.
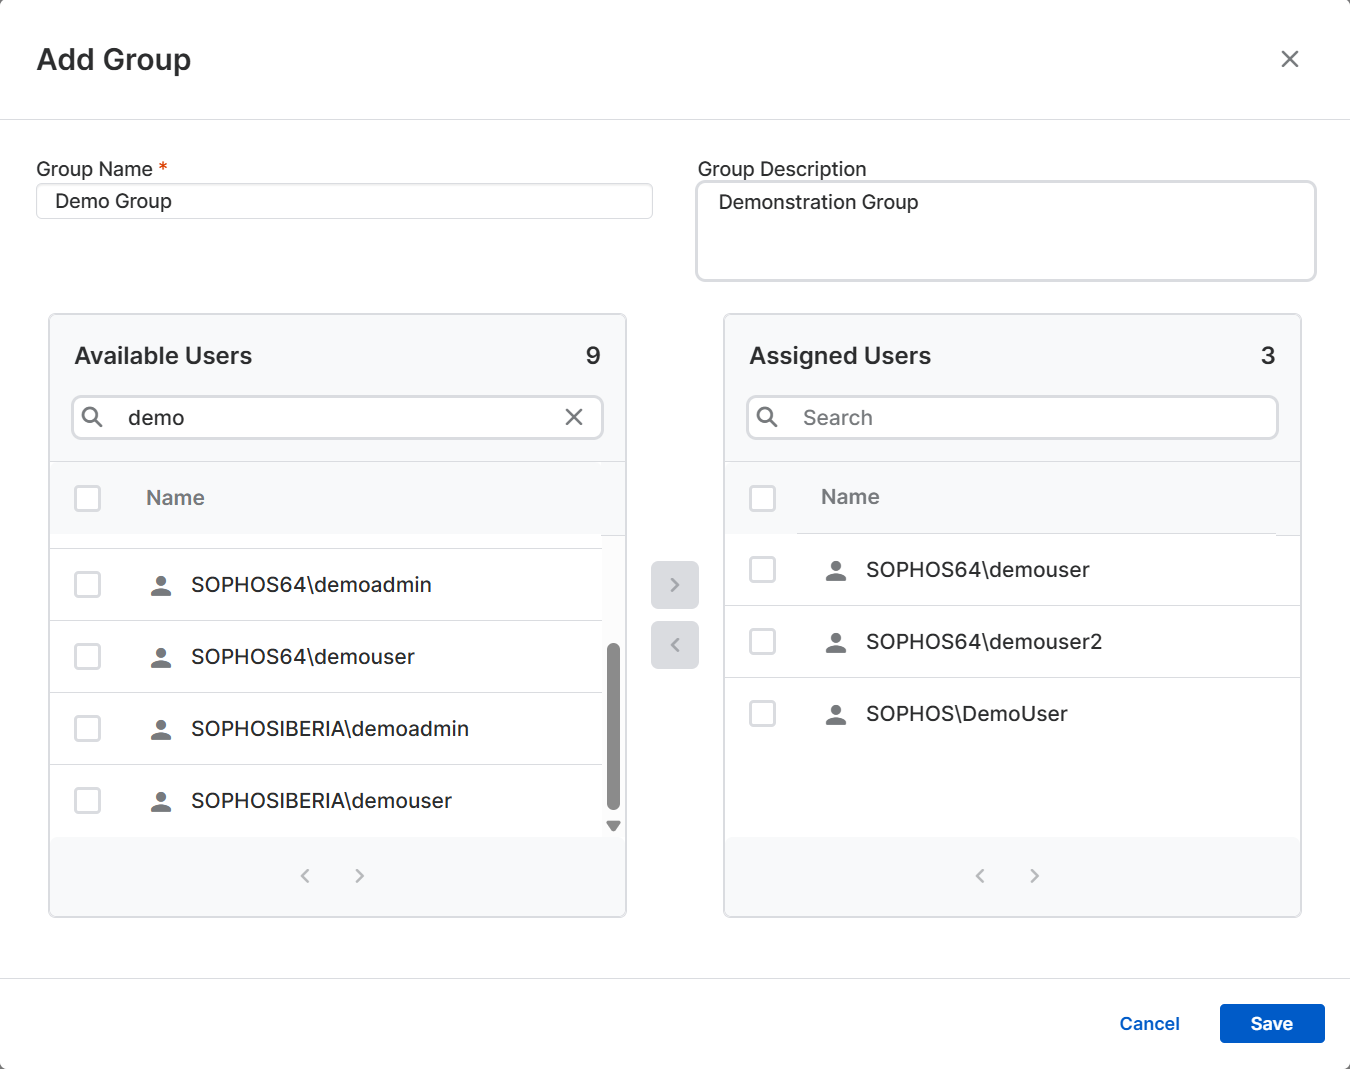
Assign Users to Group -
Press Save.
Deleting People Groups🔗
To delete a group:
- Select the group.
-
Select Delete in the upper left of the page.
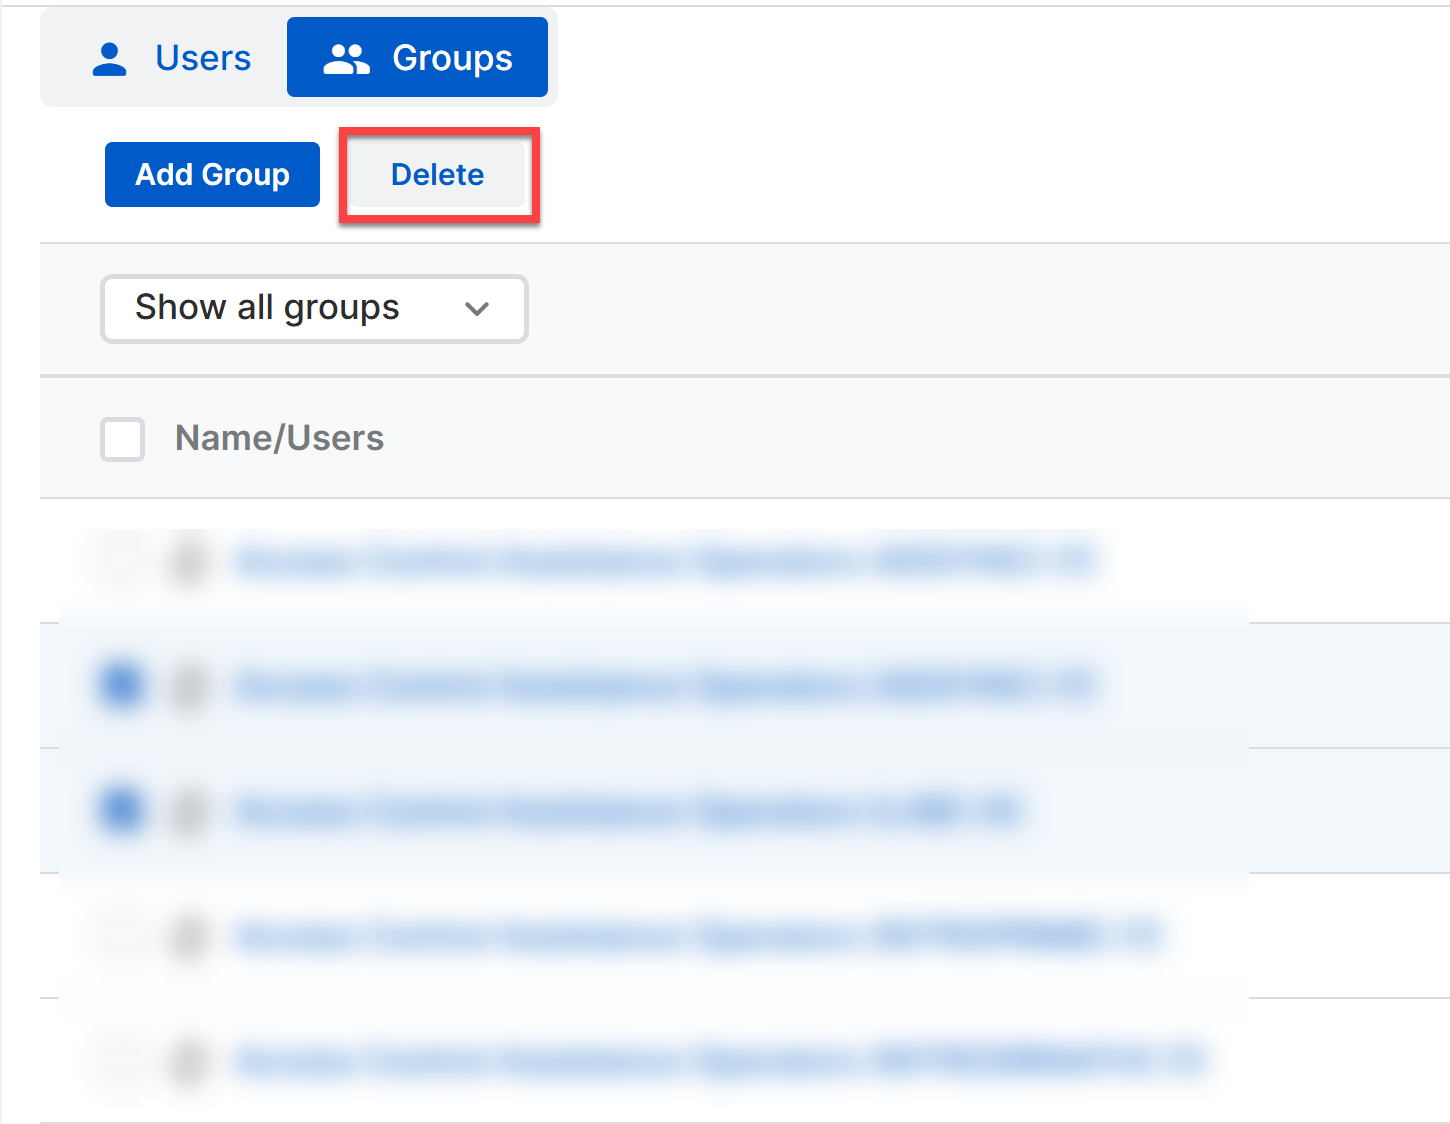
Delete Group -
Select Delete again at the confirmation prompt.
Deleting a group does not delete its devices or people. You can also delete a group from the group's details page by selecting the group's name to open the details.
Editing People Groups🔗
Summary🔗
To edit a group, select the group's name to open the group details. The Summary tab in a group’s details lets you add or remove people from groups. You can also delete groups.
To add or remove users from the group:
-
Select Edit in the left-hand pane.
Tip
You can edit the group's name and description in this view.
- Update the Assigned People for the group and select Save.
To delete the group, select Delete in the left-hand pane.
Note
Deleting a People Group does not delete its users.
Policies🔗
The Policies tab in a device or people group's details page lets you view the policies that are enabled and applied to the group. To edit a group's policies, select a policy name to view and edit the policy details.
Note
Editing the policy affects all groups to which this policy is applied.