Data Lake Search🔗
Data Lake Search has replaced the deprecated Advanced Search experience. For details on this enhancement, see Migration from Advanced Search.
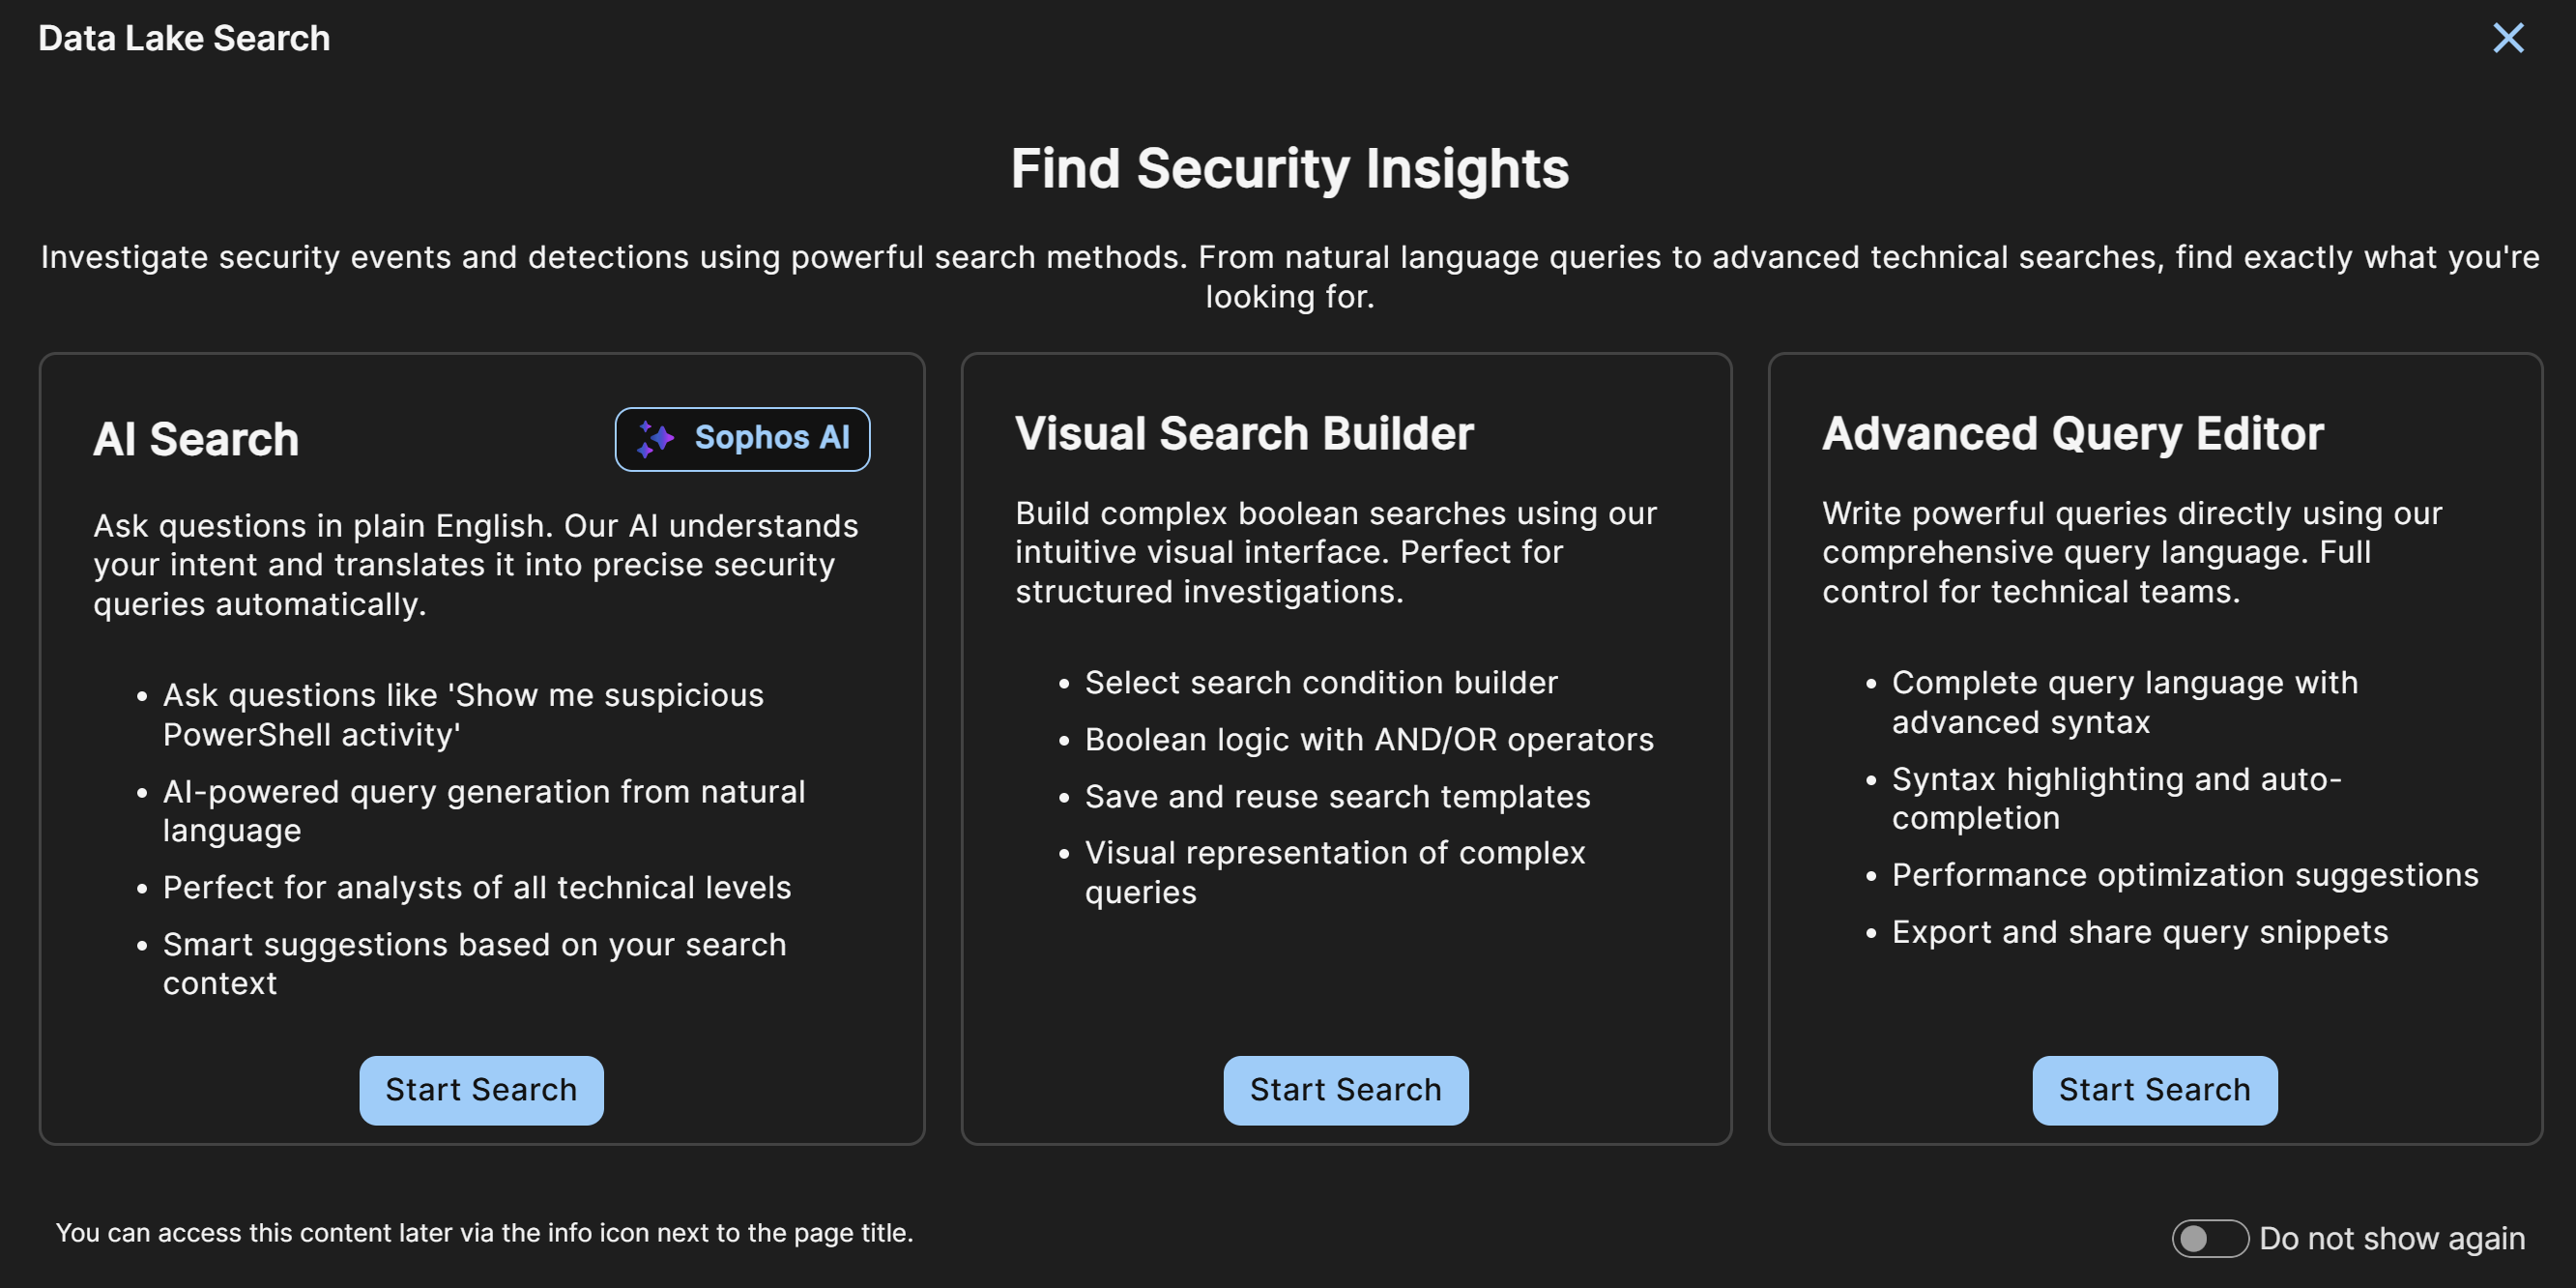
Data Lake Search is a powerful interface for querying detections and events across your tenant with the following options:
- Use AI Search to translate natural language into Secureworks® Taegis™ XDR Advanced Search query language.
- Build queries visually with Query Builder by selecting fields and operators.
- Create queries from scratch with Query Editor using Advanced Search query language syntax, schemas, and operators.
Migration from Advanced Search to Data Lake Search🔗
Data Lake Search has replaced the deprecated Advanced Search experience as of April 16, 2026. The new experience maintains the functionality of Advanced Search and adds the following:
- A single-view direct navigation to all three search methods: Natural Language (NL) AI Search, Query Builder, and Query Editor
- Significant improvements to our AI-enabled search capability with improved agent conversion from NL to query language
- New categorized searches with keyword filtering to enable domain specific queries
- New capability for tagging and saving searches with enhanced search history
As part of the migration from Advanced Search:
- Your existing saved searches and search history have been automatically migrated to Data Lake Search.
- Pivot searches and any custom code will automatically route to Data Lake Search.
Use Data Lake Search🔗
See the sections below for general guidance on running searches and saving queries for each Data Lake Search method.
You can set a search method as your default in Data Lake Search. To do so, click the Pin icon next to the method name.
All searches are automatically added to your tenant's search history upon execution. For more information, see Search History.
AI Search🔗
From the Taegis Menu, go to Advanced Search > Data Lake Search and choose AI Search.
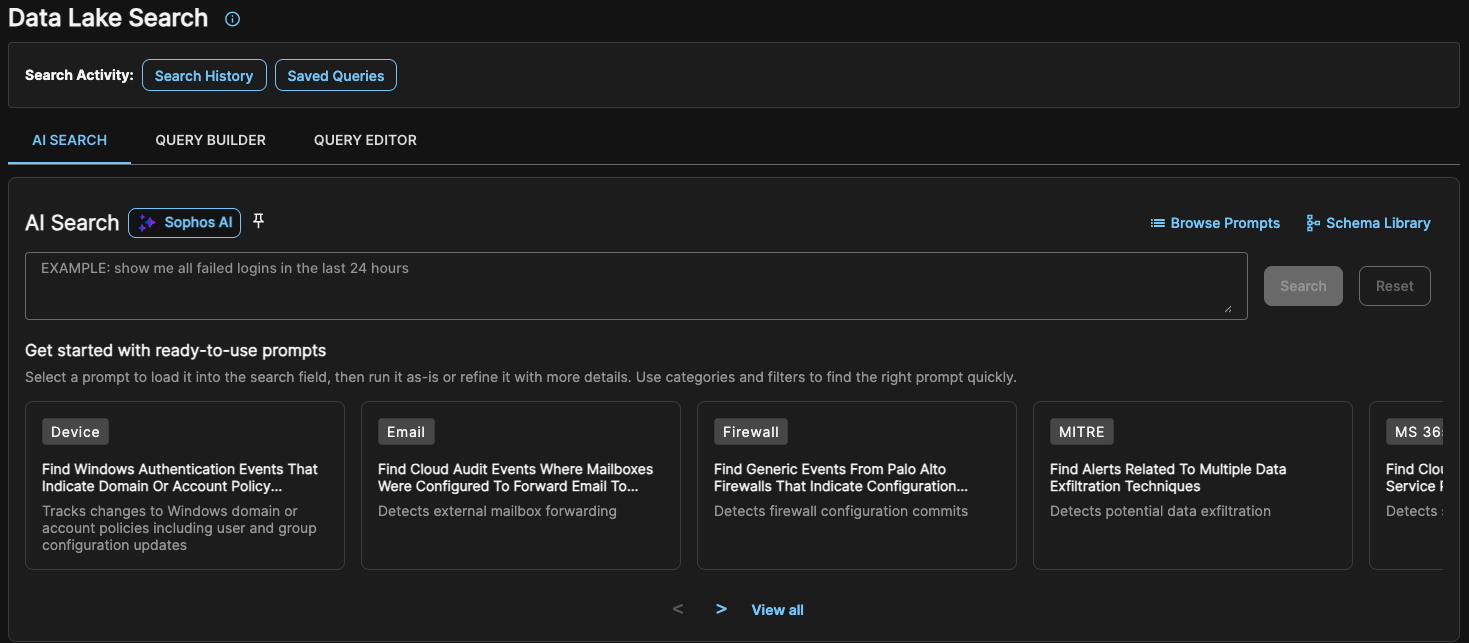
For detailed documentation, see AI Search.
Run Your AI Search Query🔗
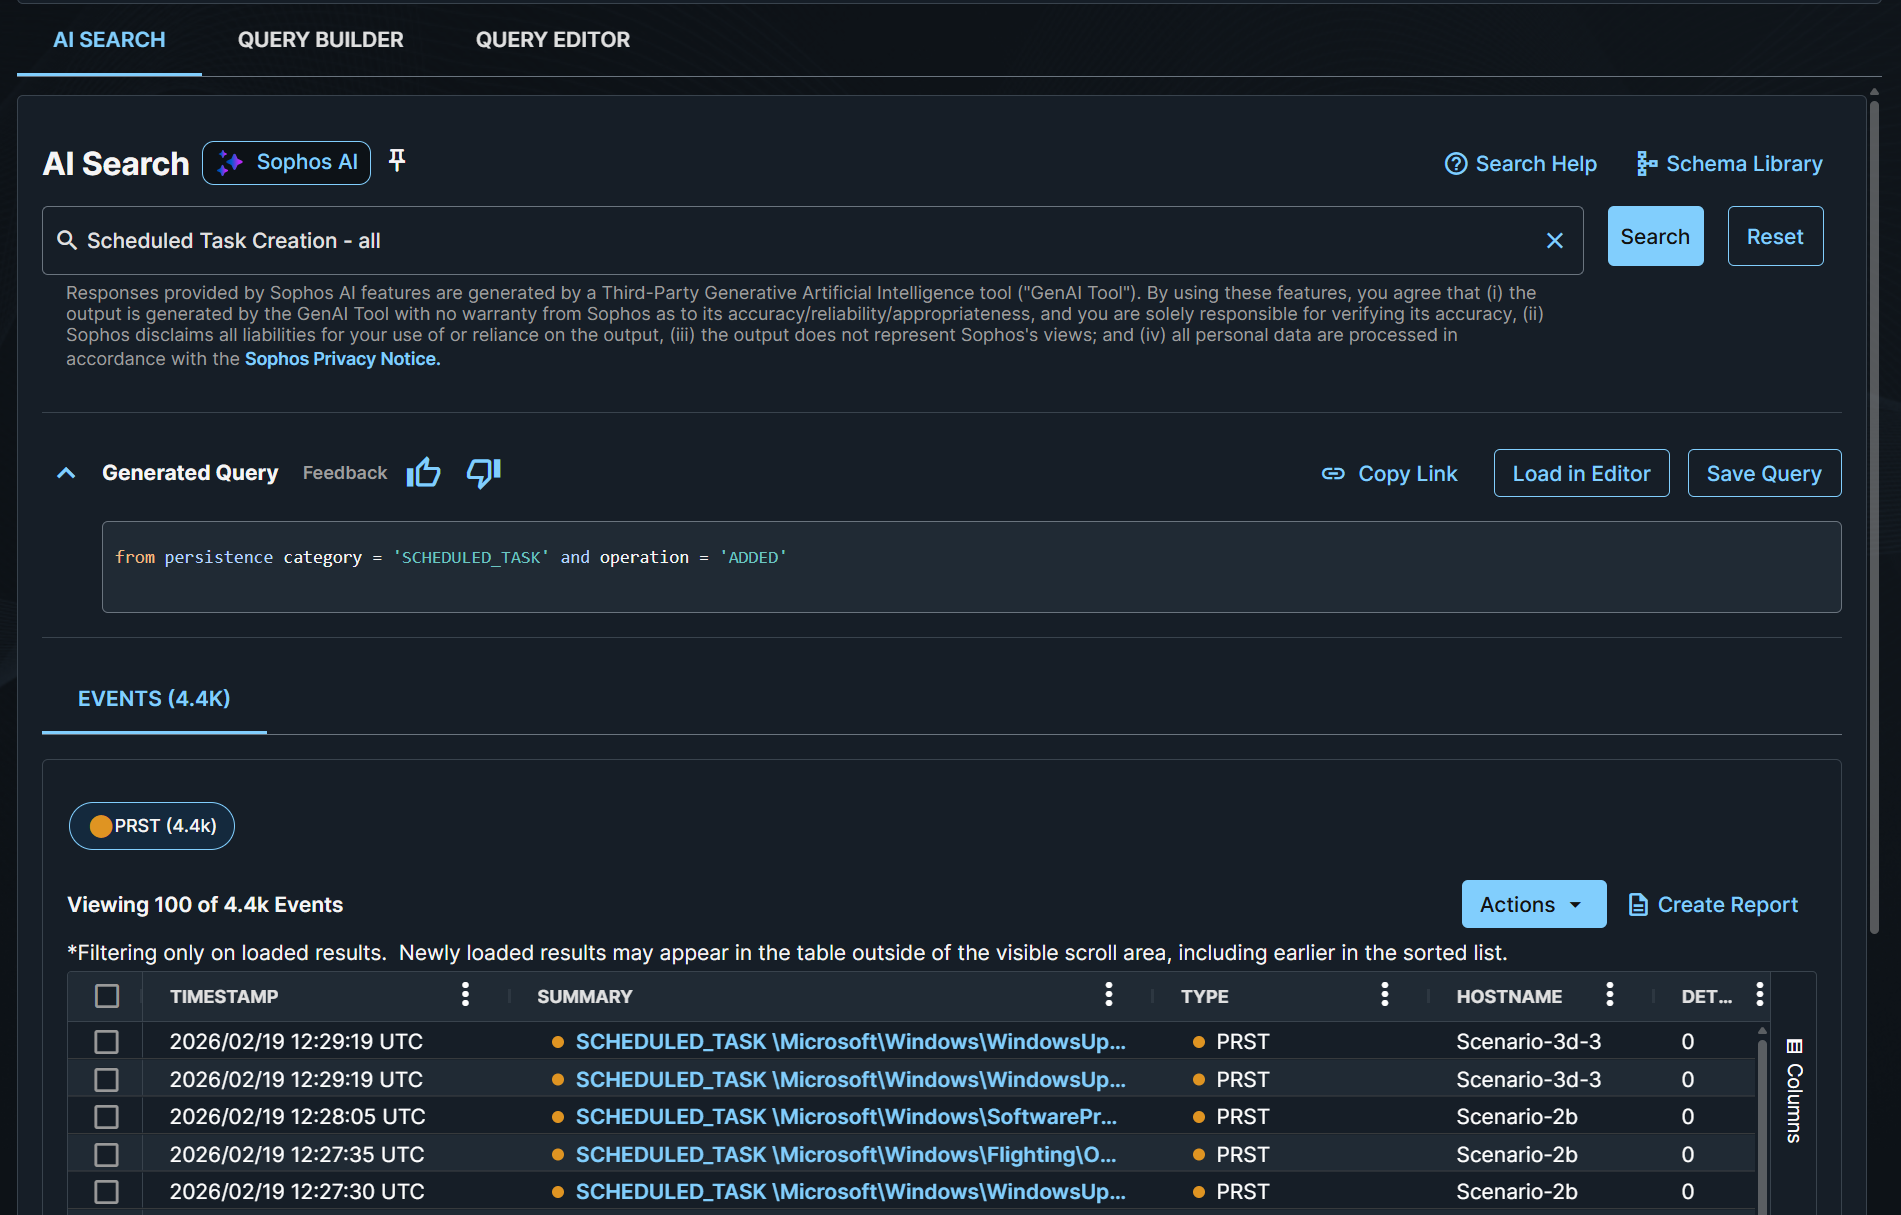
Enter a natural language query in the search field, or click a ready-to-use prompt, and then click Search.
The AI-generated query shows with the results below.
Tip
Click the Feedback icons to provide feedback on AI-generated queries.
If necessary, refine your prompt and click Search again.
Tip
Click Full Screen above the query results to see them in a larger view. For tips on adjusting the results table, see Filter and Rearrange Columns.
Save Your AI Search Query🔗
- Click Save Query.
- Enter a display name for the query.
- Select a category from the dropdown, or click Add New Category and then enter a name and optional description for the new category.
- Optionally enter a description of the query.
- Click Bookmark this Query if you want the query to appear in the My Bookmarked Queries category. For details, see Saved Queries.
- Click Save Query.
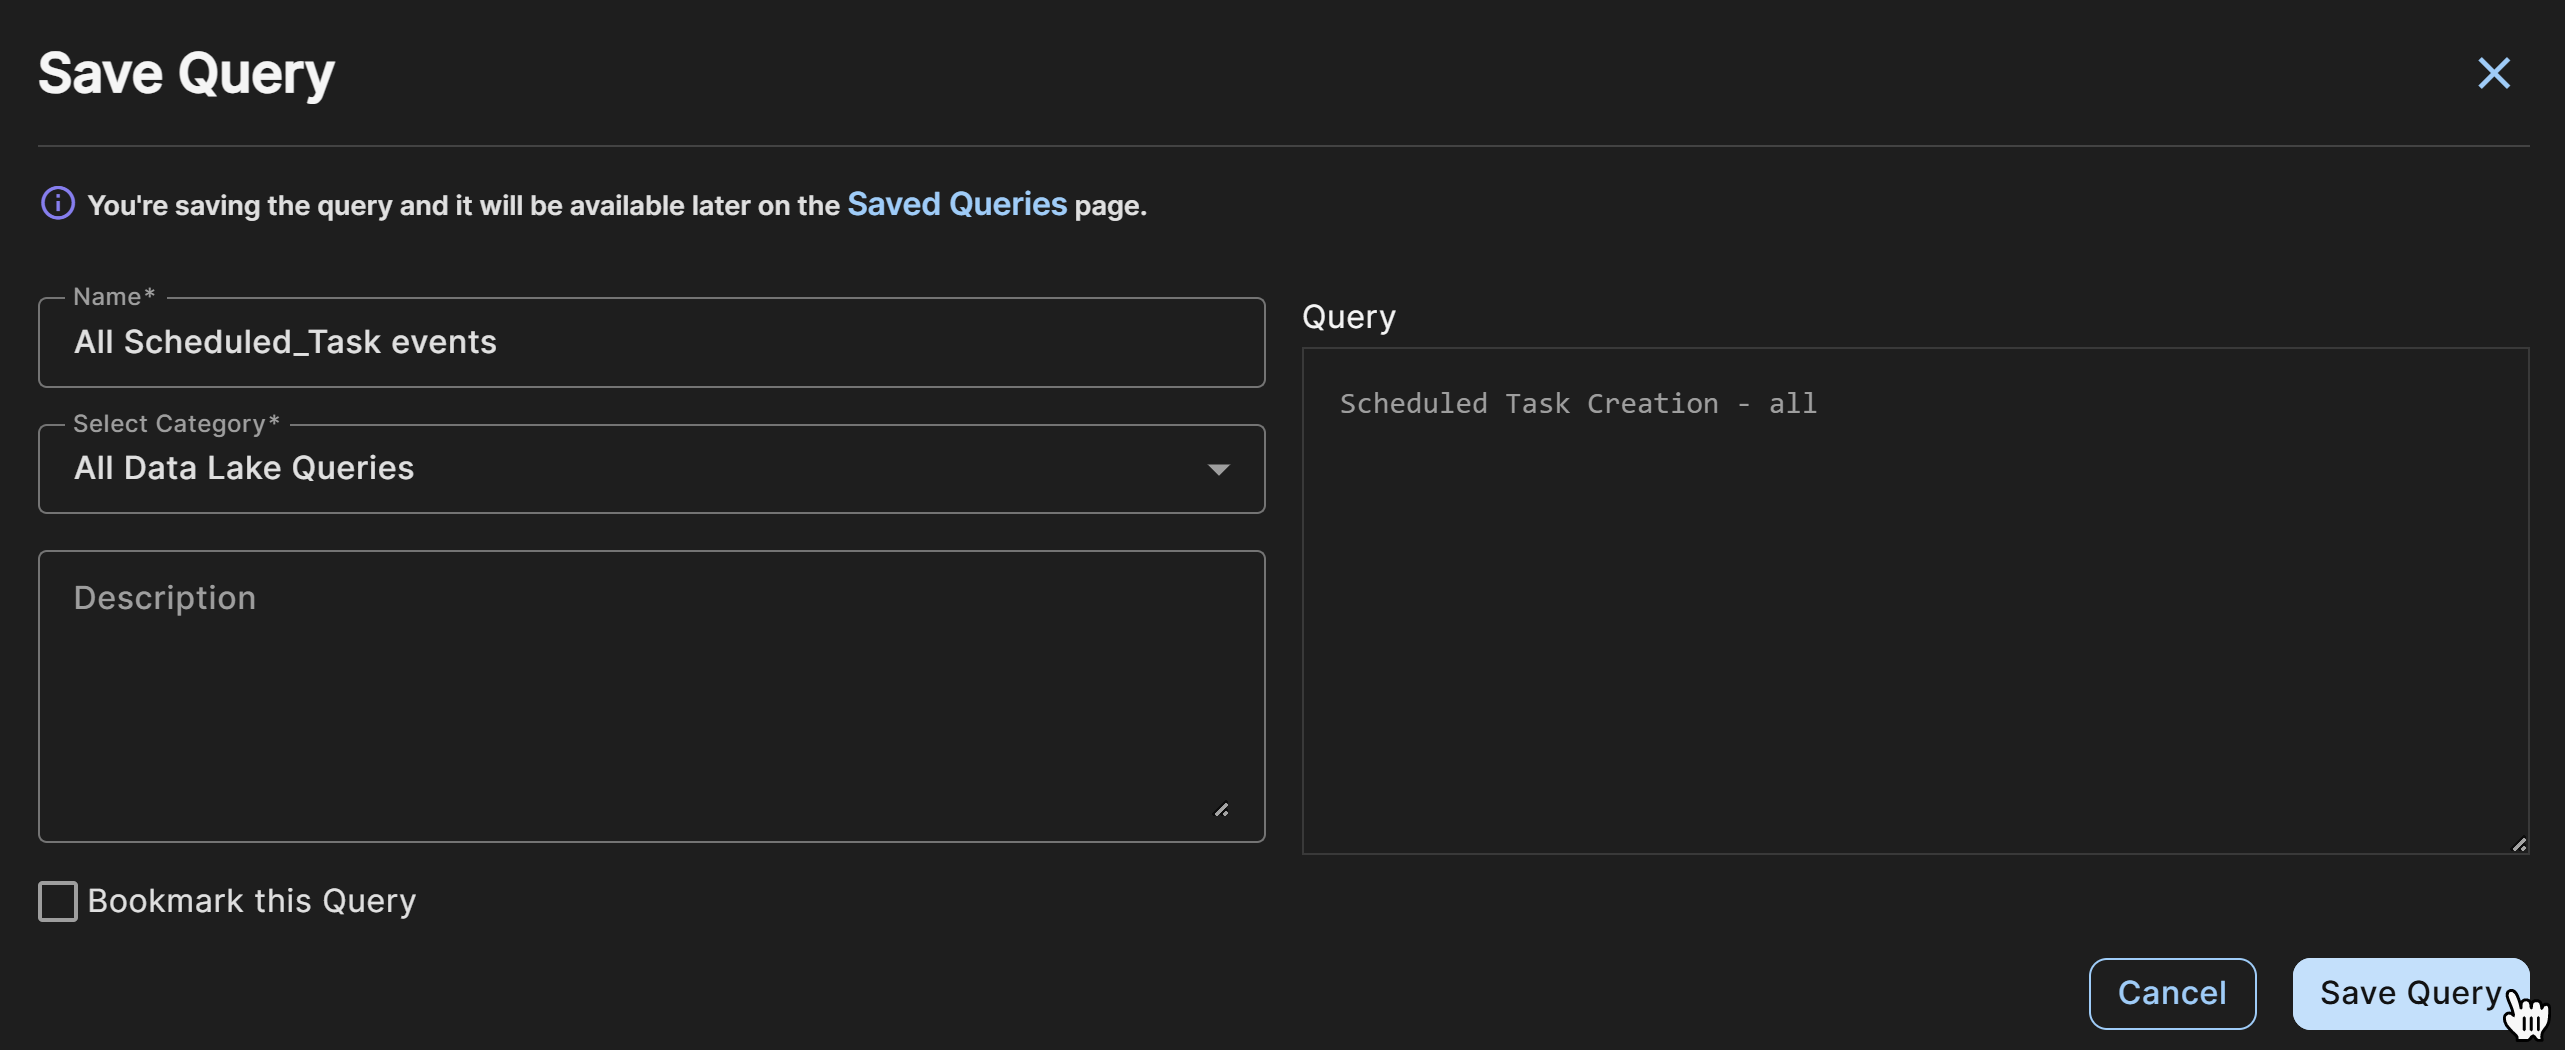
You can access saved searches by clicking Saved Queries at the top of Data Lake Search. For more information, see Saved Queries.
Query Builder🔗
From the Taegis Menu, go to Advanced Search > Data Lake Search and choose Query Builder.
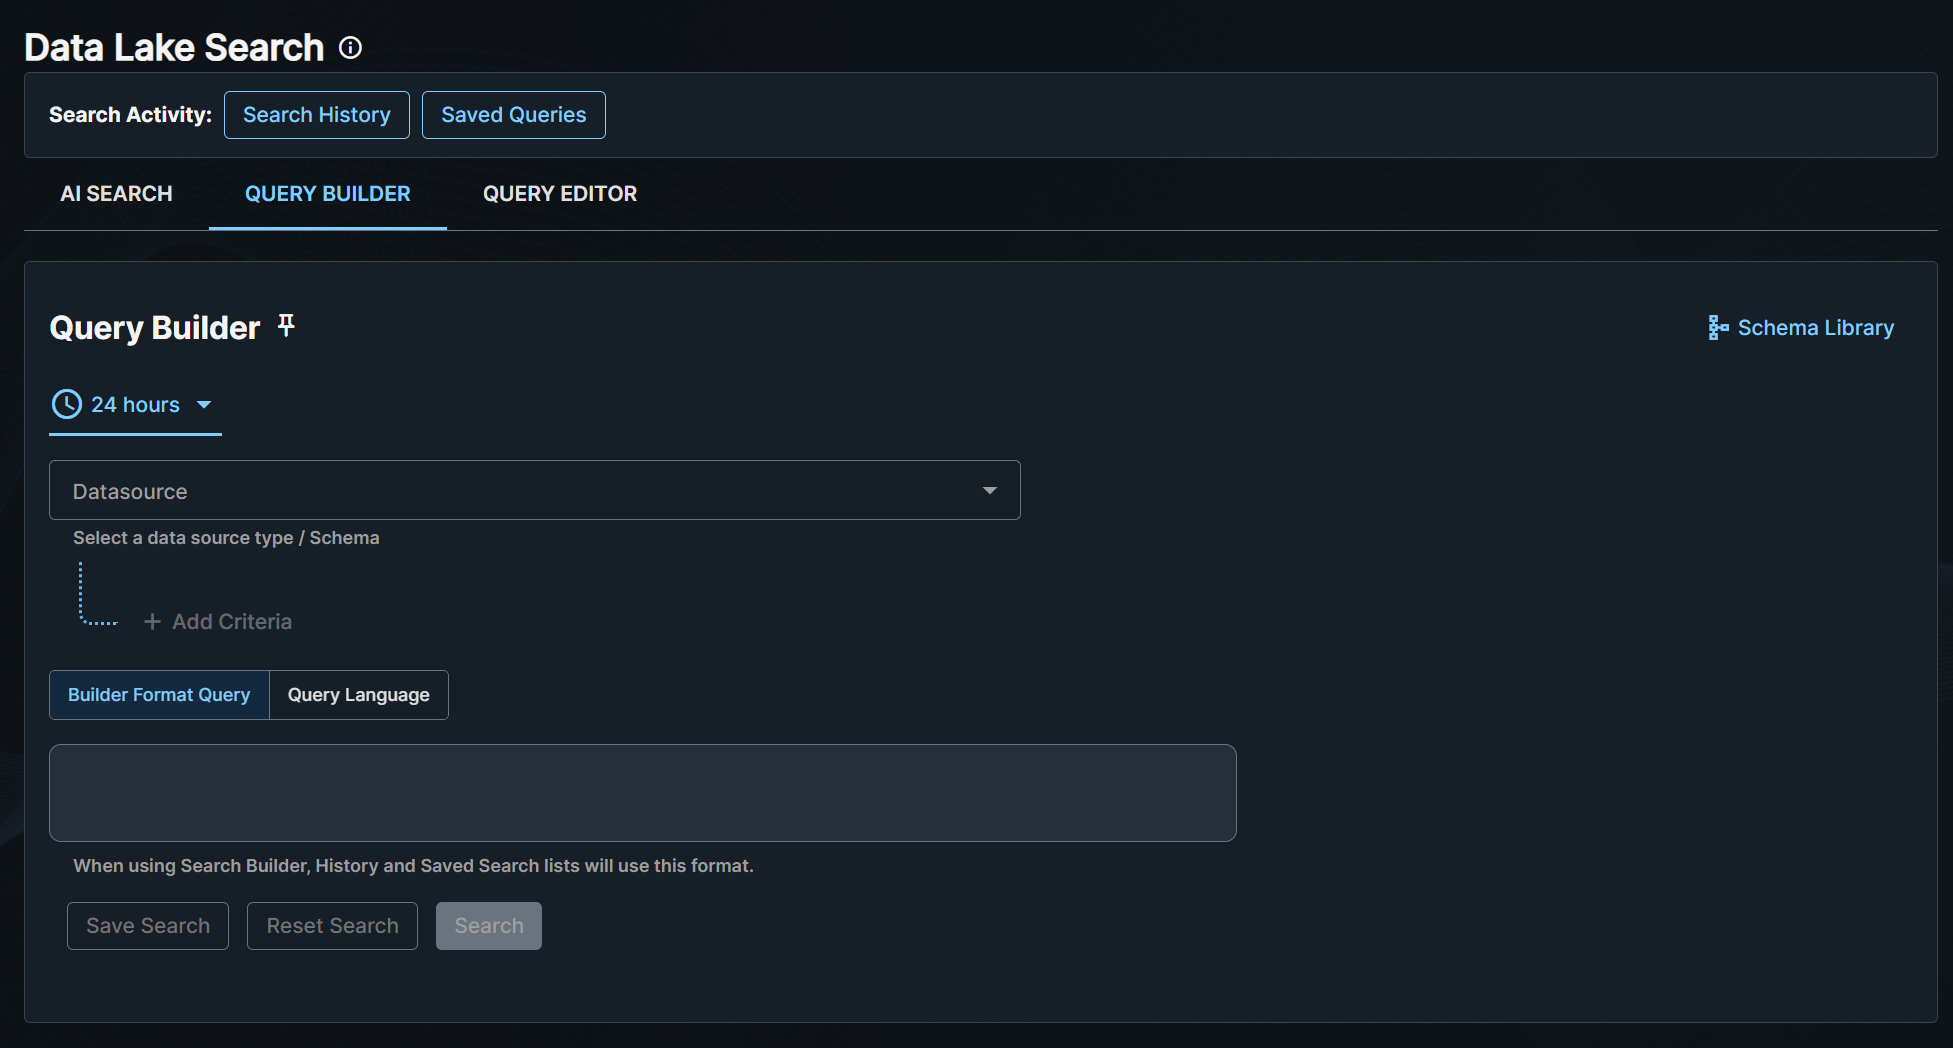
For detailed instructions on using Query Builder fields and operators, see Query Builder.
Run Your Builder Search Query🔗
When you are ready to run your query, choose the date and time range and click Search or press Shift + Enter.
Tip
Click Full Screen above the query results to see them in a larger view. For tips on adjusting the results table, see Filter and Rearrange Columns.
If necessary, refine your query and click Search again.
Save Your Builder Search Query🔗
- Click Save Search.
- Enter a display name for the query.
- Select a category from the dropdown, or click Add New Category and then enter a name and optional description for the new category.
- Optionally enter a description of the query.
- Click Bookmark this Query if you want the query to appear in the My Bookmarked Queries category. For details, see Saved Queries.
- Click Save Query.
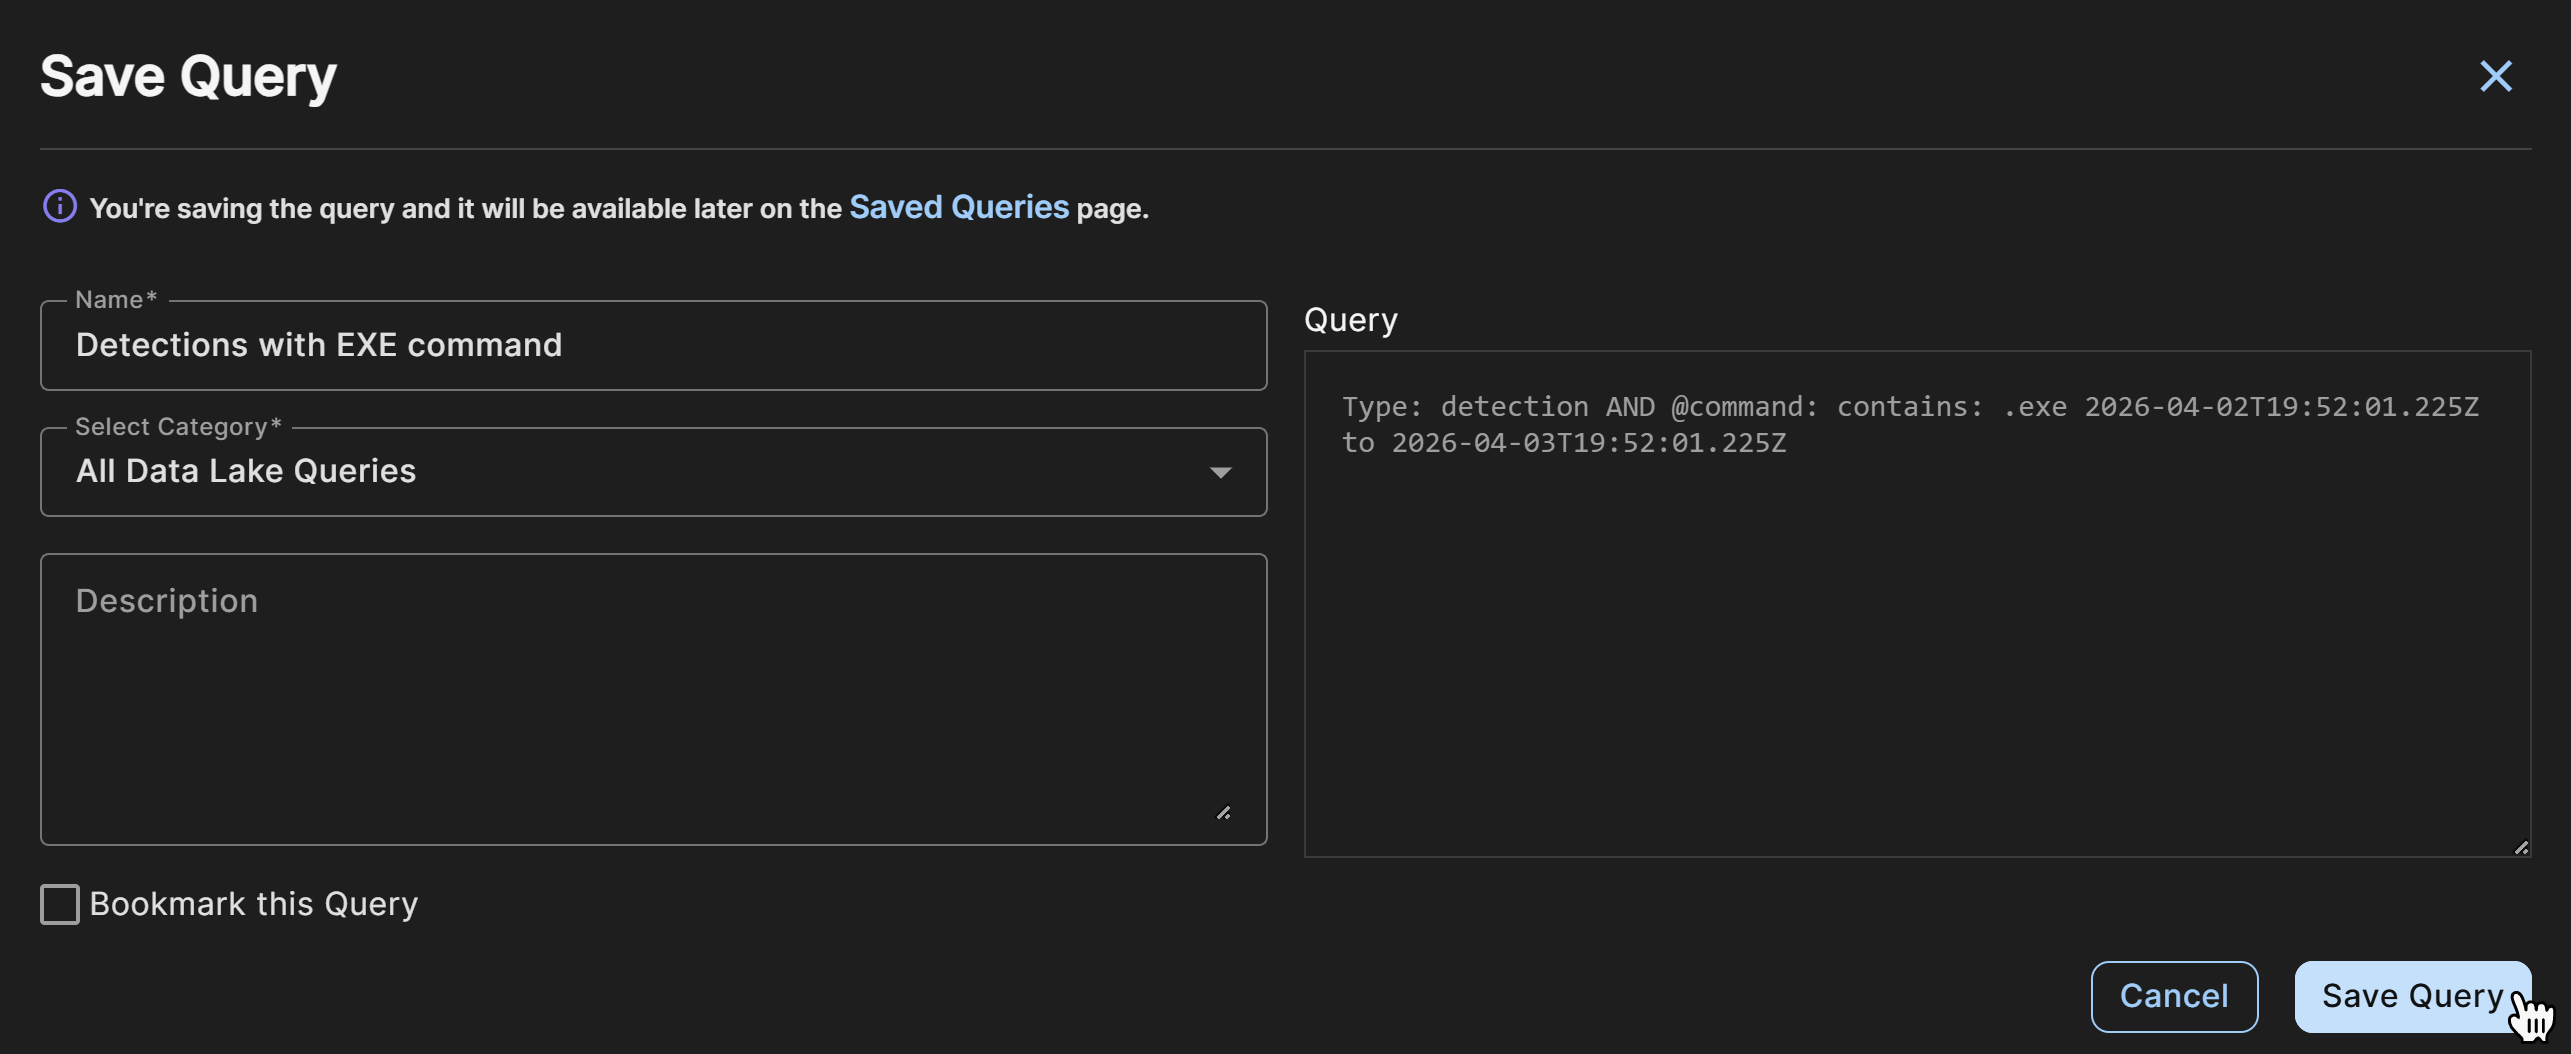
You can access saved searches by clicking Saved Queries at the top of Data Lake Search. For more information, see Saved Queries.
Query Editor🔗
From the Taegis Menu, go to Advanced Search > Data Lake Search and choose Query Editor.
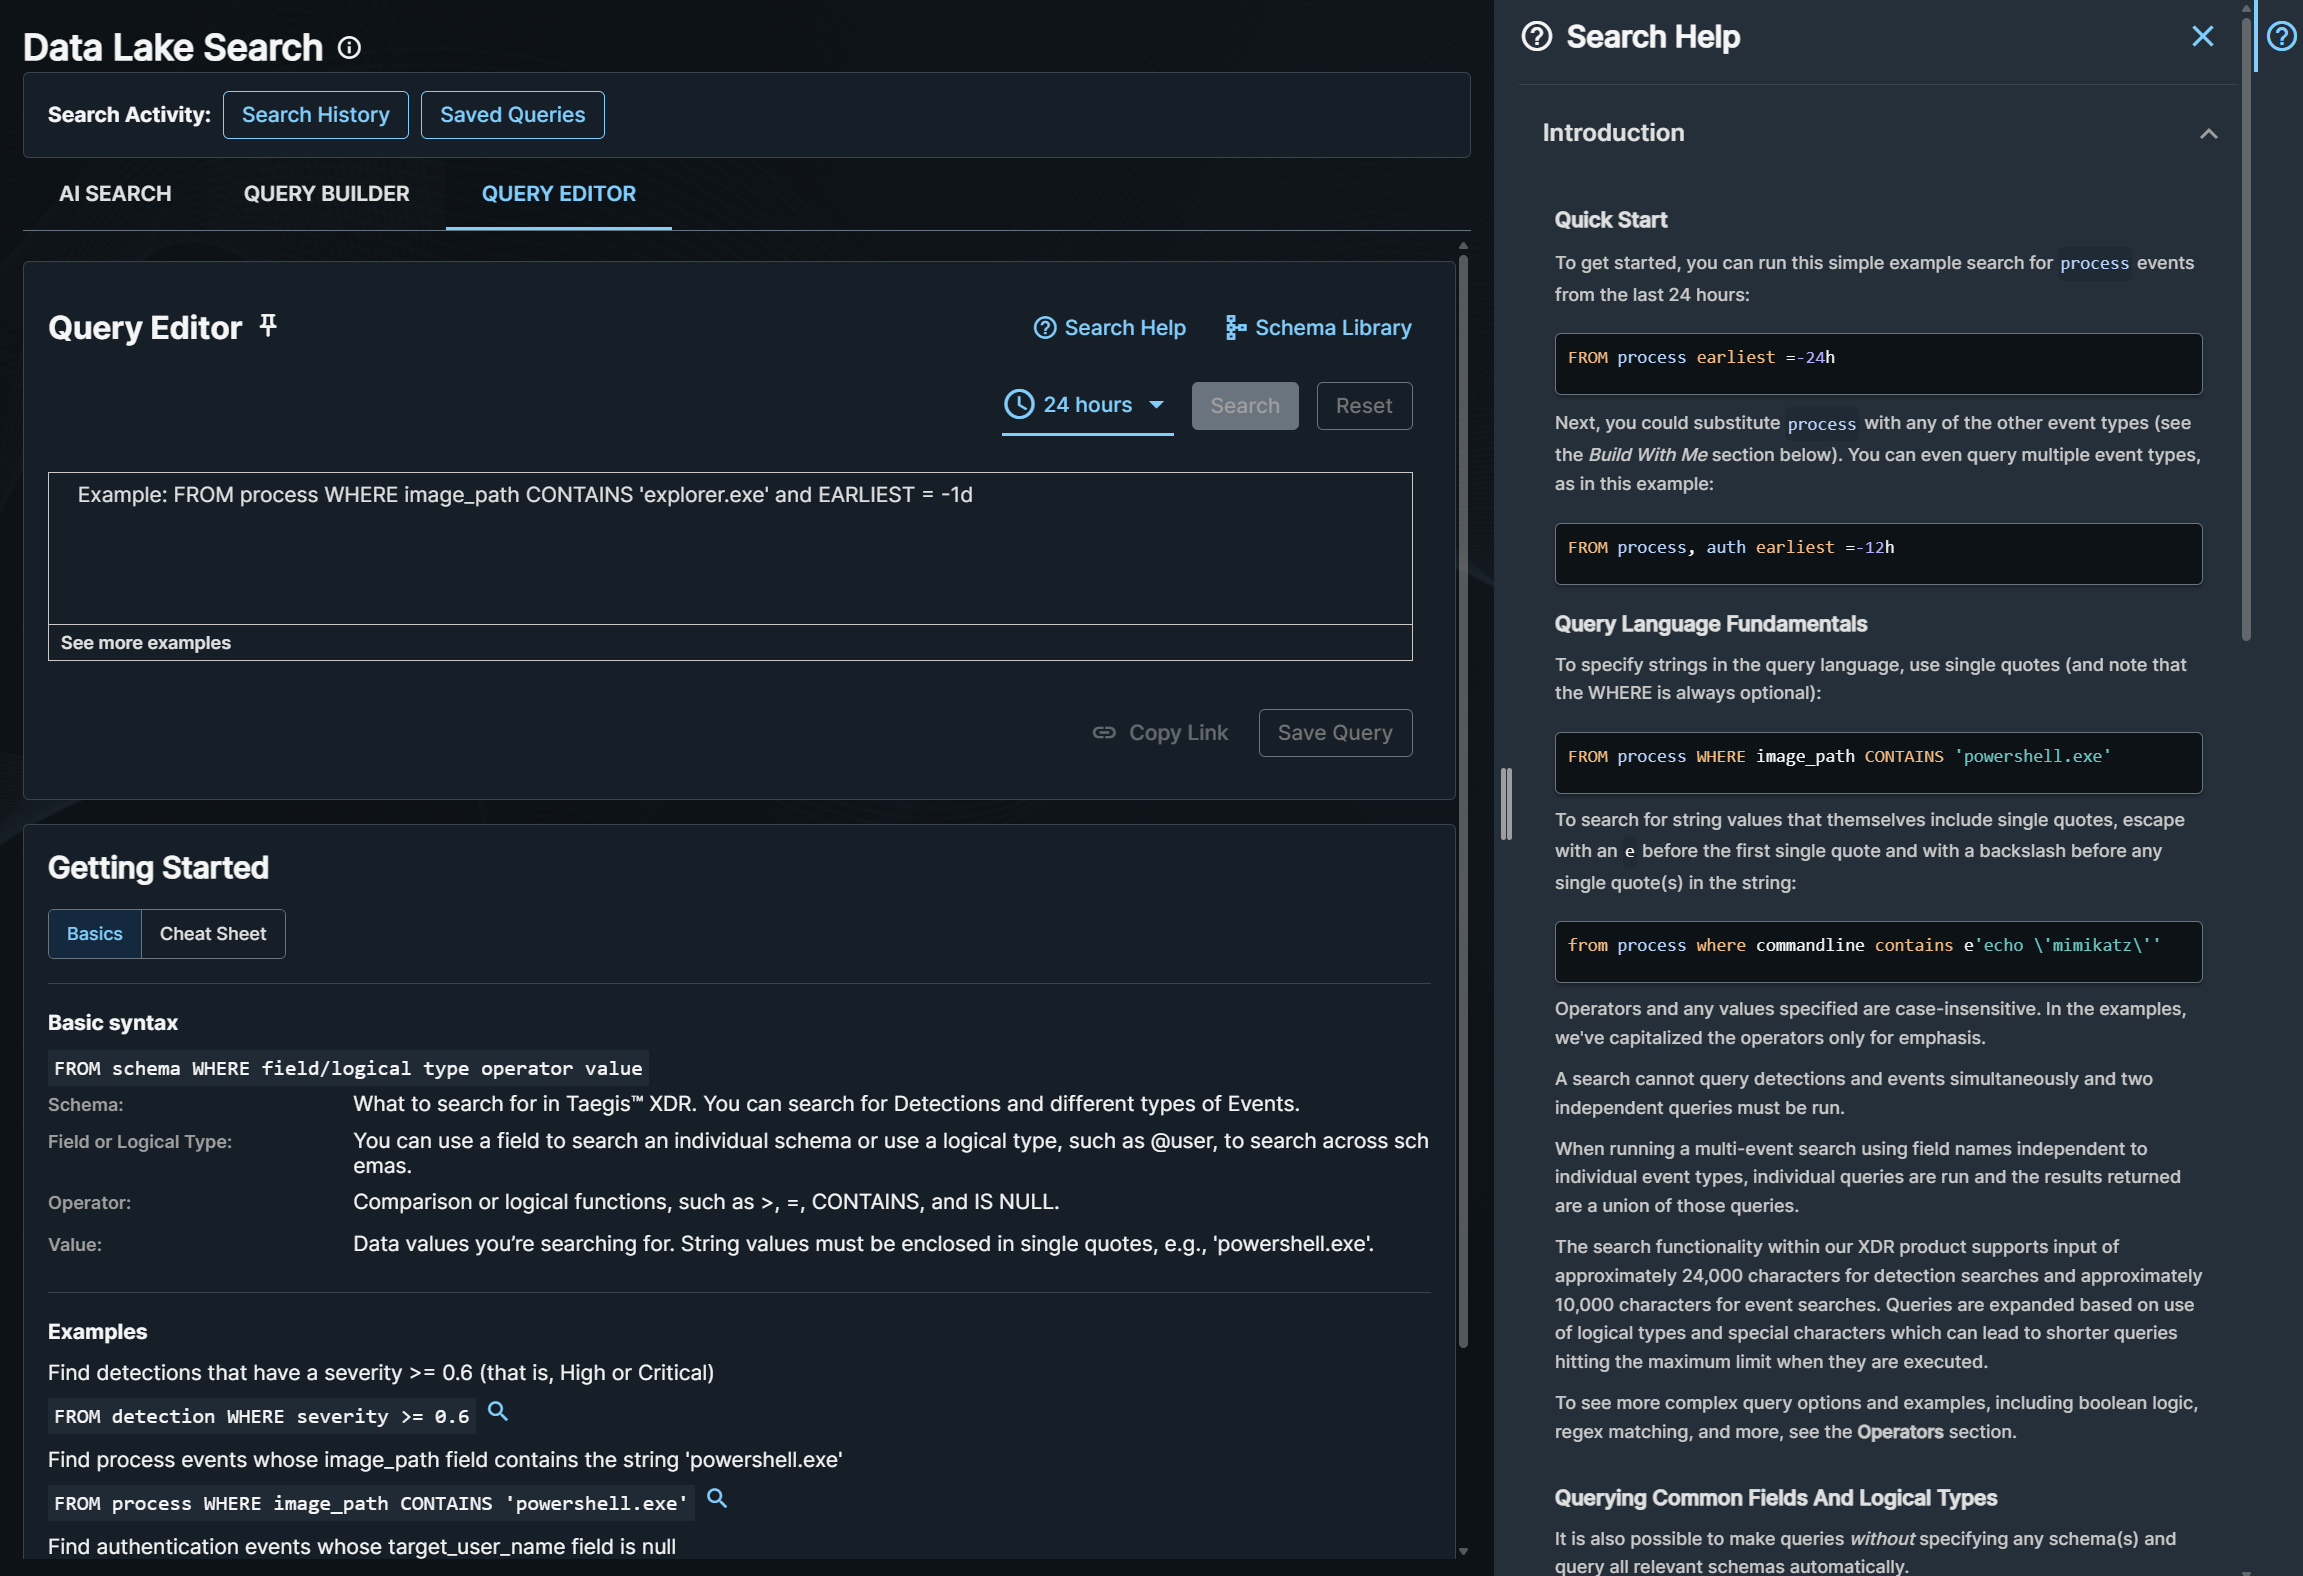
Click the Basics tab in the Getting Started section to learn Advanced Search query language syntax basics and review sample queries. Click Cheat Sheet for quick reference on operators, functions, and more. For detailed documentation, see Query Editor.
Run Your Editor Search Query🔗
When you are ready to run your query, choose the date and time range and click Search or press Shift + Enter.
Tip
Click the Search Help icon to open Query Editor help, including a context-aware Build With Me section that suggests available schemas and fields as you type.
Tip
Click Full Screen above the query results to see them in a larger view. For tips on adjusting the results table, see Filter and Rearrange Columns.
If necessary, refine your query and click Search again.
Save Your Editor Search Query🔗
- Click Save Query.
- Enter a display name for the query.
- Select a category from the dropdown, or click Add New Category and then enter a name and optional description for the new category.
- Optionally enter a description of the query.
- Click Bookmark this Query if you want the query to appear in the My Bookmarked Queries category. For details, see Saved Queries.
- Click Save Query.
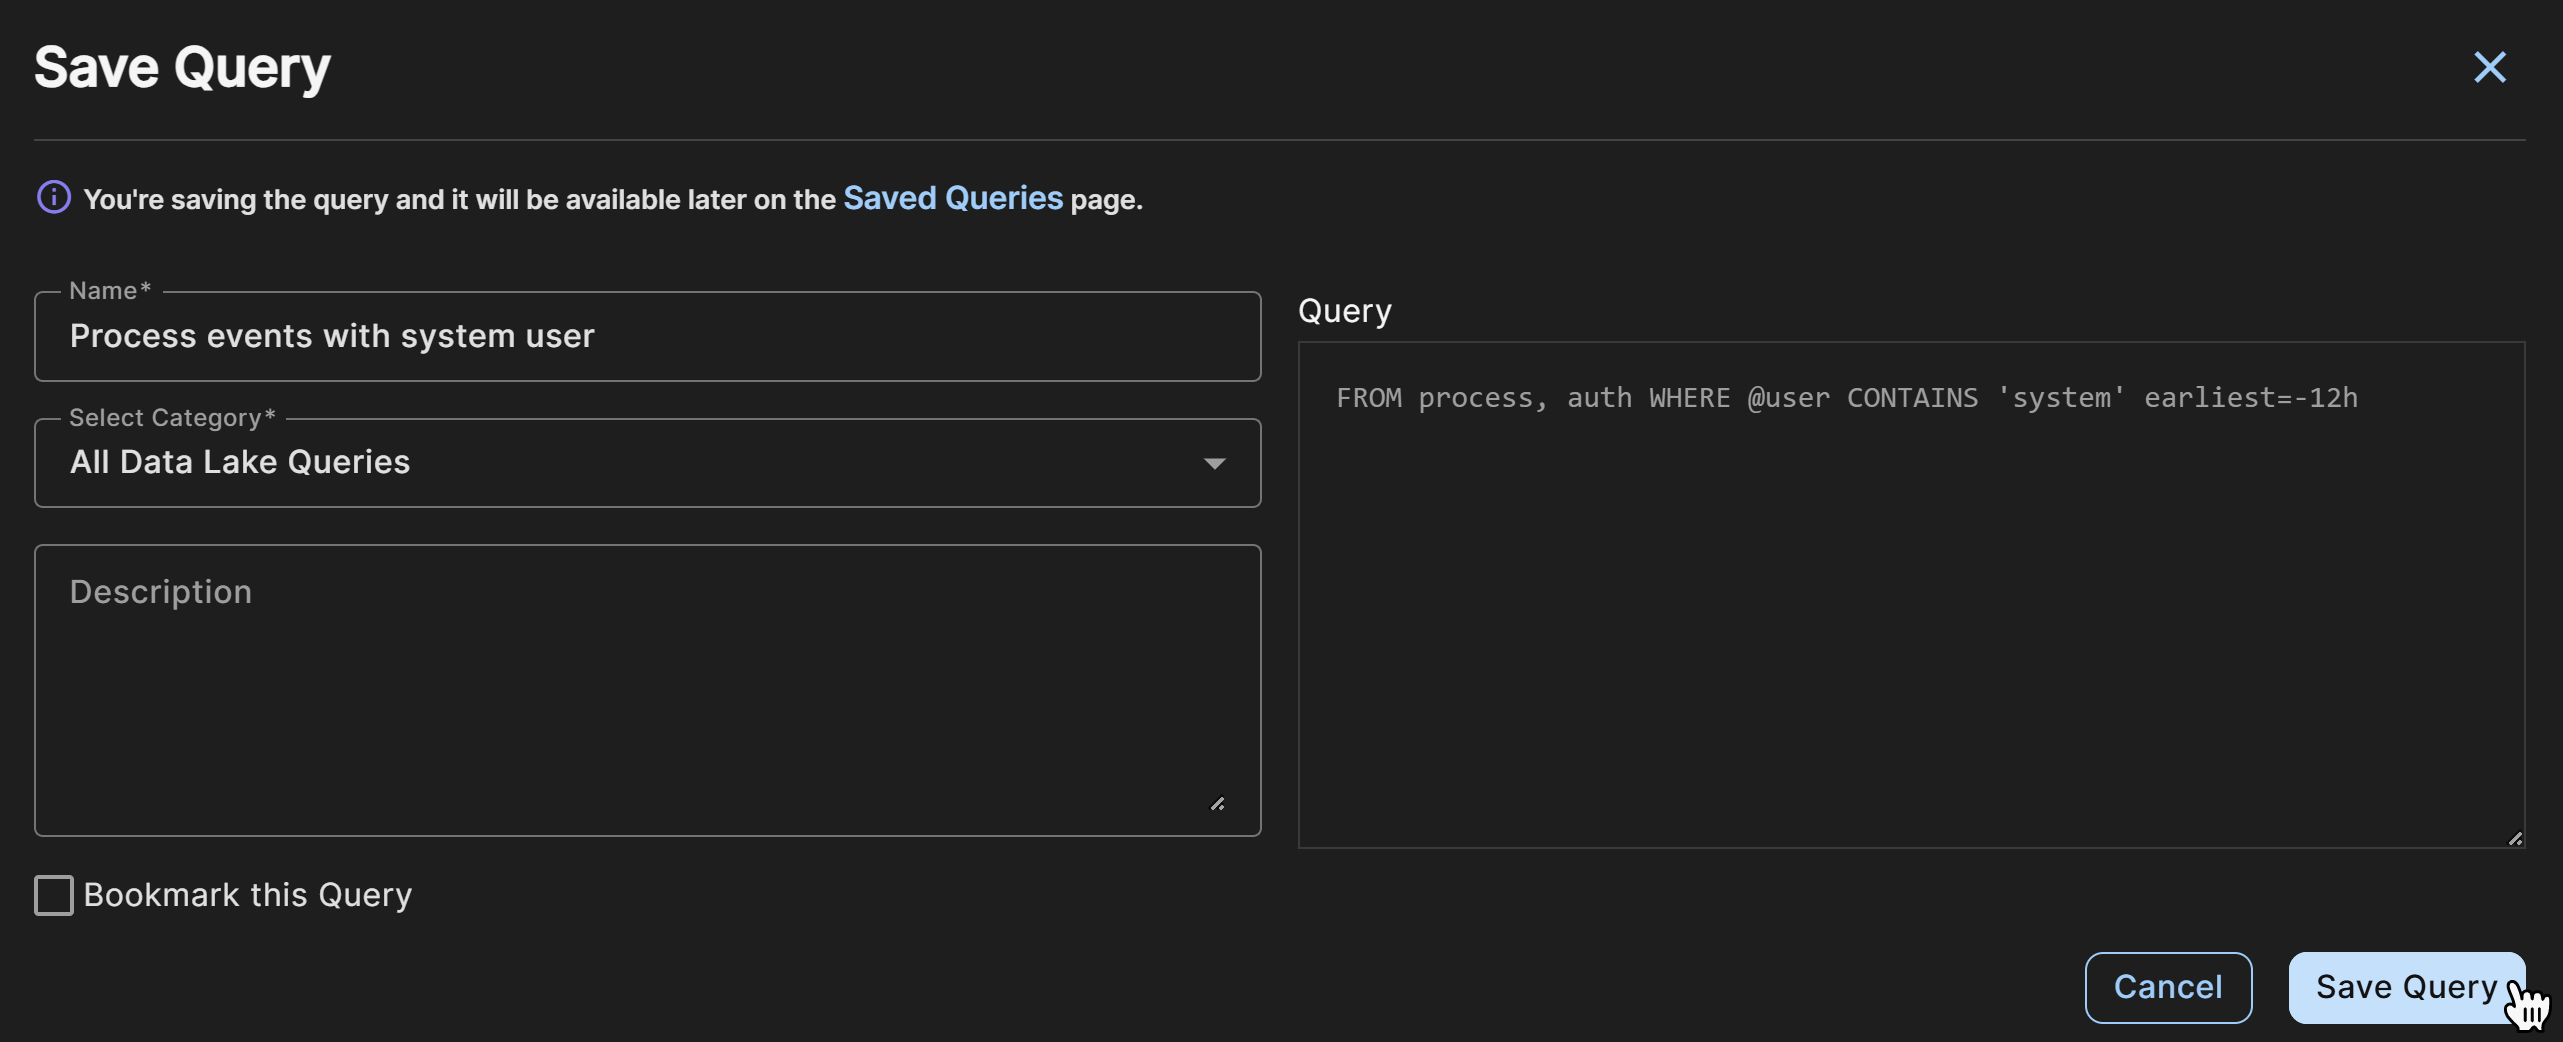
You can access saved searches by clicking Saved Queries at the top of Data Lake Search. For more information, see Saved Queries.
Share Your Search Query🔗
To share a search query, click Copy Link above the results table, or click the Share Link icon in the Actions column of the Search History and Saved Queries tables to copy the URL to your clipboard.
Filter and Rearrange Columns🔗
Click the Menu icon in a column header to do the following:
- Pin : Pin the column to the left or right.
- Autosize: Autosize the selected column, or autosize all columns.
- Reset: Restore the default column size and order.
- Filter : Narrow results or use checkboxes to show certain values.
- Show/hide : Choose which columns to display.
Rearrange columns by dragging their headers.
Export Search Results🔗
To export your search results, follow these steps:
- Click the checkboxes if you wish to export a subset of the results.
- Click Actions above the results table.
-
Choose to export all results or only those you selected to your desired format.
Note
Available export formats differ for detection and event results.
-
Go to Data Exports to download the file.
Note
Files available for download are limited to 100,000 rows. If a data set larger than 100,000 rows in size is needed, you must refine the search parameters and/or submit multiple requests spanning the full desired dataset.
Create a Report🔗
To create a custom report using your query, click Create Report above the results table. For more information, see Configure Custom Reports.