Taegis Endpoint Agent for Linux Installation🔗
Prerequisites🔗
Prior to installation, review requirements and follow prerequisite steps on Taegis™ XDR Endpoint Agent Information and Prerequisites.
Note
If your system uses SELinux or AppArmor, see SELinux/AppArmor and the Agent for guidance.
Data Provided from Integration🔗
| Detections | Auth | DNS | File Collection | HTTP | NIDS | Netflow | Process | File Modification | API Call | Registry | Scriptblock | Management | Persistence | Thread Injection | Detection Finding | Technique Finding | Software Info | Generic | |
|---|---|---|---|---|---|---|---|---|---|---|---|---|---|---|---|---|---|---|---|
| Taegis Linux Endpoint Agent | ✓ | ✓ | ✓ | ✓ | ✓ | ✓ | ✓ | ✓ |
Secure Boot Enabled Instructions🔗
If Secure Boot is enabled, follow these key enrollment with mokutil steps first; otherwise, proceed to Installation.
-
Download and import the Secureworks driver signing key:
You will be prompted to create a password; record or remember this for Step 3. -
Reboot:
-
Enroll the Secureworks driver signing key:
- Press any key to perform MOK management.
- Choose Enroll MOK, and then Continue.
- Choose Yes to enroll the key and then enter the password created in Step 1.
- Choose Reboot once complete.
Perform MOK Management
Installation🔗
-
Download the GPG Key from the Agent Downloads page in XDR by selecting GPG Key from the Linux section.
-
Import the GPG Key for validation by running the following command as root user:
-
Install on Linux VM or physical CentOS, RHEL, or Ubuntu machine by running the following command as root user:
- CentOS
- Ubuntu
-
Register the agent:
Note
taegisctlis the recommended controller to register, start, and stop the agent. Additionally, it can be used to view agent status and load the driver.taegisctlshould be run assudouser.- In order to proceed further, you need the
Registration KeyandRegistration Server URLfrom Agent Groups.
The following are the options for
taegisctl:Usage: /opt/secureworks/taegis-agent/bin/taegisctl [command] [--key <regkey>] [--server <servername>] [--allow_missing_driver] [--enforce_apparmor] [--enforce_selinux] [--use_proxy] commands: insmod Attempt to install driver register Attempt to register start Starts services if not already running. Calls insmod, background registration status Lists status of components and configuration stop Stops services if runningRegister the agent using the copied registration parameters:
sudo /opt/secureworks/taegis-agent/bin/taegisctl register --key REGISTRATIONKEY --server REGISTRATIONSERVERIn order to run
taegisctlwithout entire file path in front, the directory must be added to$PATH. To do so, run the following command:Expect:
registration successlogged to consoleNote
Find additional information for registering the agent on CentOS-based systems using SELinux in the following SELinux/AppArmor section.
-
Start the agent:
Proxy Support🔗
Beginning with Taegis Endpoint Agent for Linux 1.1.27, the agent looks for http_proxy and https_proxy environment variables to identify and use a proxy to communicate with the Taegis backend. Credentials are obfuscated in the agent.log file.
To use this feature, issue the following commands:
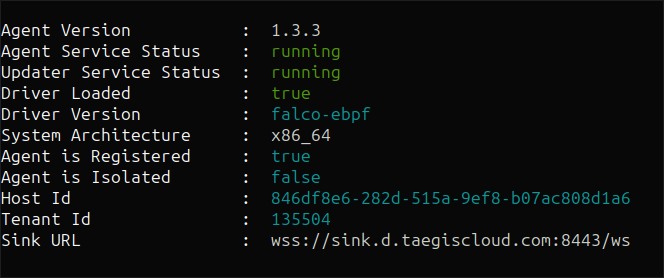
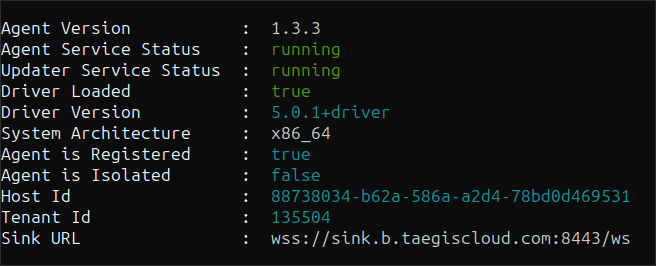
Validate Installation🔗
Check services status after installation using the following command:
Examples of successful output:
SELinux/AppArmor and the Agent🔗
If your system uses SELinux or AppArmor, follow the guidance in this section.
Secureworks provides SELinux policies and AppArmor profiles designed to protect the agent from tampering. Note that AppArmor and SELinux self-protection support is experimental.
To enable SELinux self-protection, use --enforce_selinux. To enable AppArmor self-protection, use --enforce_apparmor.
Important
To change SELinux and AppArmor states from enforcing to permissive or back, you must stop and restart the agent via taegisctl stop and taegisctl start for SELinux and AppArmor enforcement changes to be picked up.
SELinux🔗
SELinux runs in two modes: enforcing and permissive. The permissive mode doesn't protect the system at all and can be ignored. To see which mode is active, run getenforce:
If a system is in enforcing mode, you can enable self-protection with SELinux or AppArmor by passing --enforce_selinux or --enforce_apparmor, respectively.
Important
Currently SELinux and AppArmor support is experimental and you may receive some security-related log messages such as the following that can be ignored. As development of SELinux and AppArmor support continues, these log messages will begin to disappear and eventually cease.
SELinux:
Aug 26 15:55:10 localhost setroubleshoot: SELinux is preventing unix_chkpwd from write
access on the file /usr/sbin/unix_chkpwd. For complete SELinux messages run:
sealert -l da4bbcb0-b962-4627-89e8-d50541fd77d8
AppArmor:
Aug 26 15:57:25 dw-ubuntu20-vm kernel: [ 8988.538364] audit: type=1400
audit(1661543845.962:11736): apparmor="ALLOWED" operation="chmod"
profile="/opt/secureworks/taegis-agent/bin/taegis" name="/opt/secureworks/taegis-agent/var/status/"
pid=9098 comm="taegis" requested_mask="w" denied_mask="w" fsuid=0 ouid=0
Additional Info: SELinux Policy Types🔗
If in enforcing mode, it's helpful to know which SELinux policy is being enforced. This is available in /etc/selinux/config, as SELINUXTYPE:
# This file controls the state of SELinux on the system.

# SELINUX= can take one of these three values:

#     enforcing - SELinux security policy is enforced.

#     permissive - SELinux prints warnings instead of enforcing.

#     disabled - No SELinux policy is loaded.

SELINUX=enforcing
# SELINUXTYPE= can take one of three values:

#     targeted - Targeted processes are protected,

#     minimum - Modification of targeted policy. Only selected processes are protected.

#     mls - Multi Level Security protection.

SELINUXTYPE=targeted
The following table summarizes our supported and unsupported SELinux system configurations:
| SELinux Status | SELinux Policy | Support Status |
|---|---|---|
enforcing |
targeted |
Supported (use --enforce_selinux for self-protection) |
enforcing |
Not targeted |
Best effort |
permissive |
All policies | Supported |
Review Endpoint Agents Summary🔗
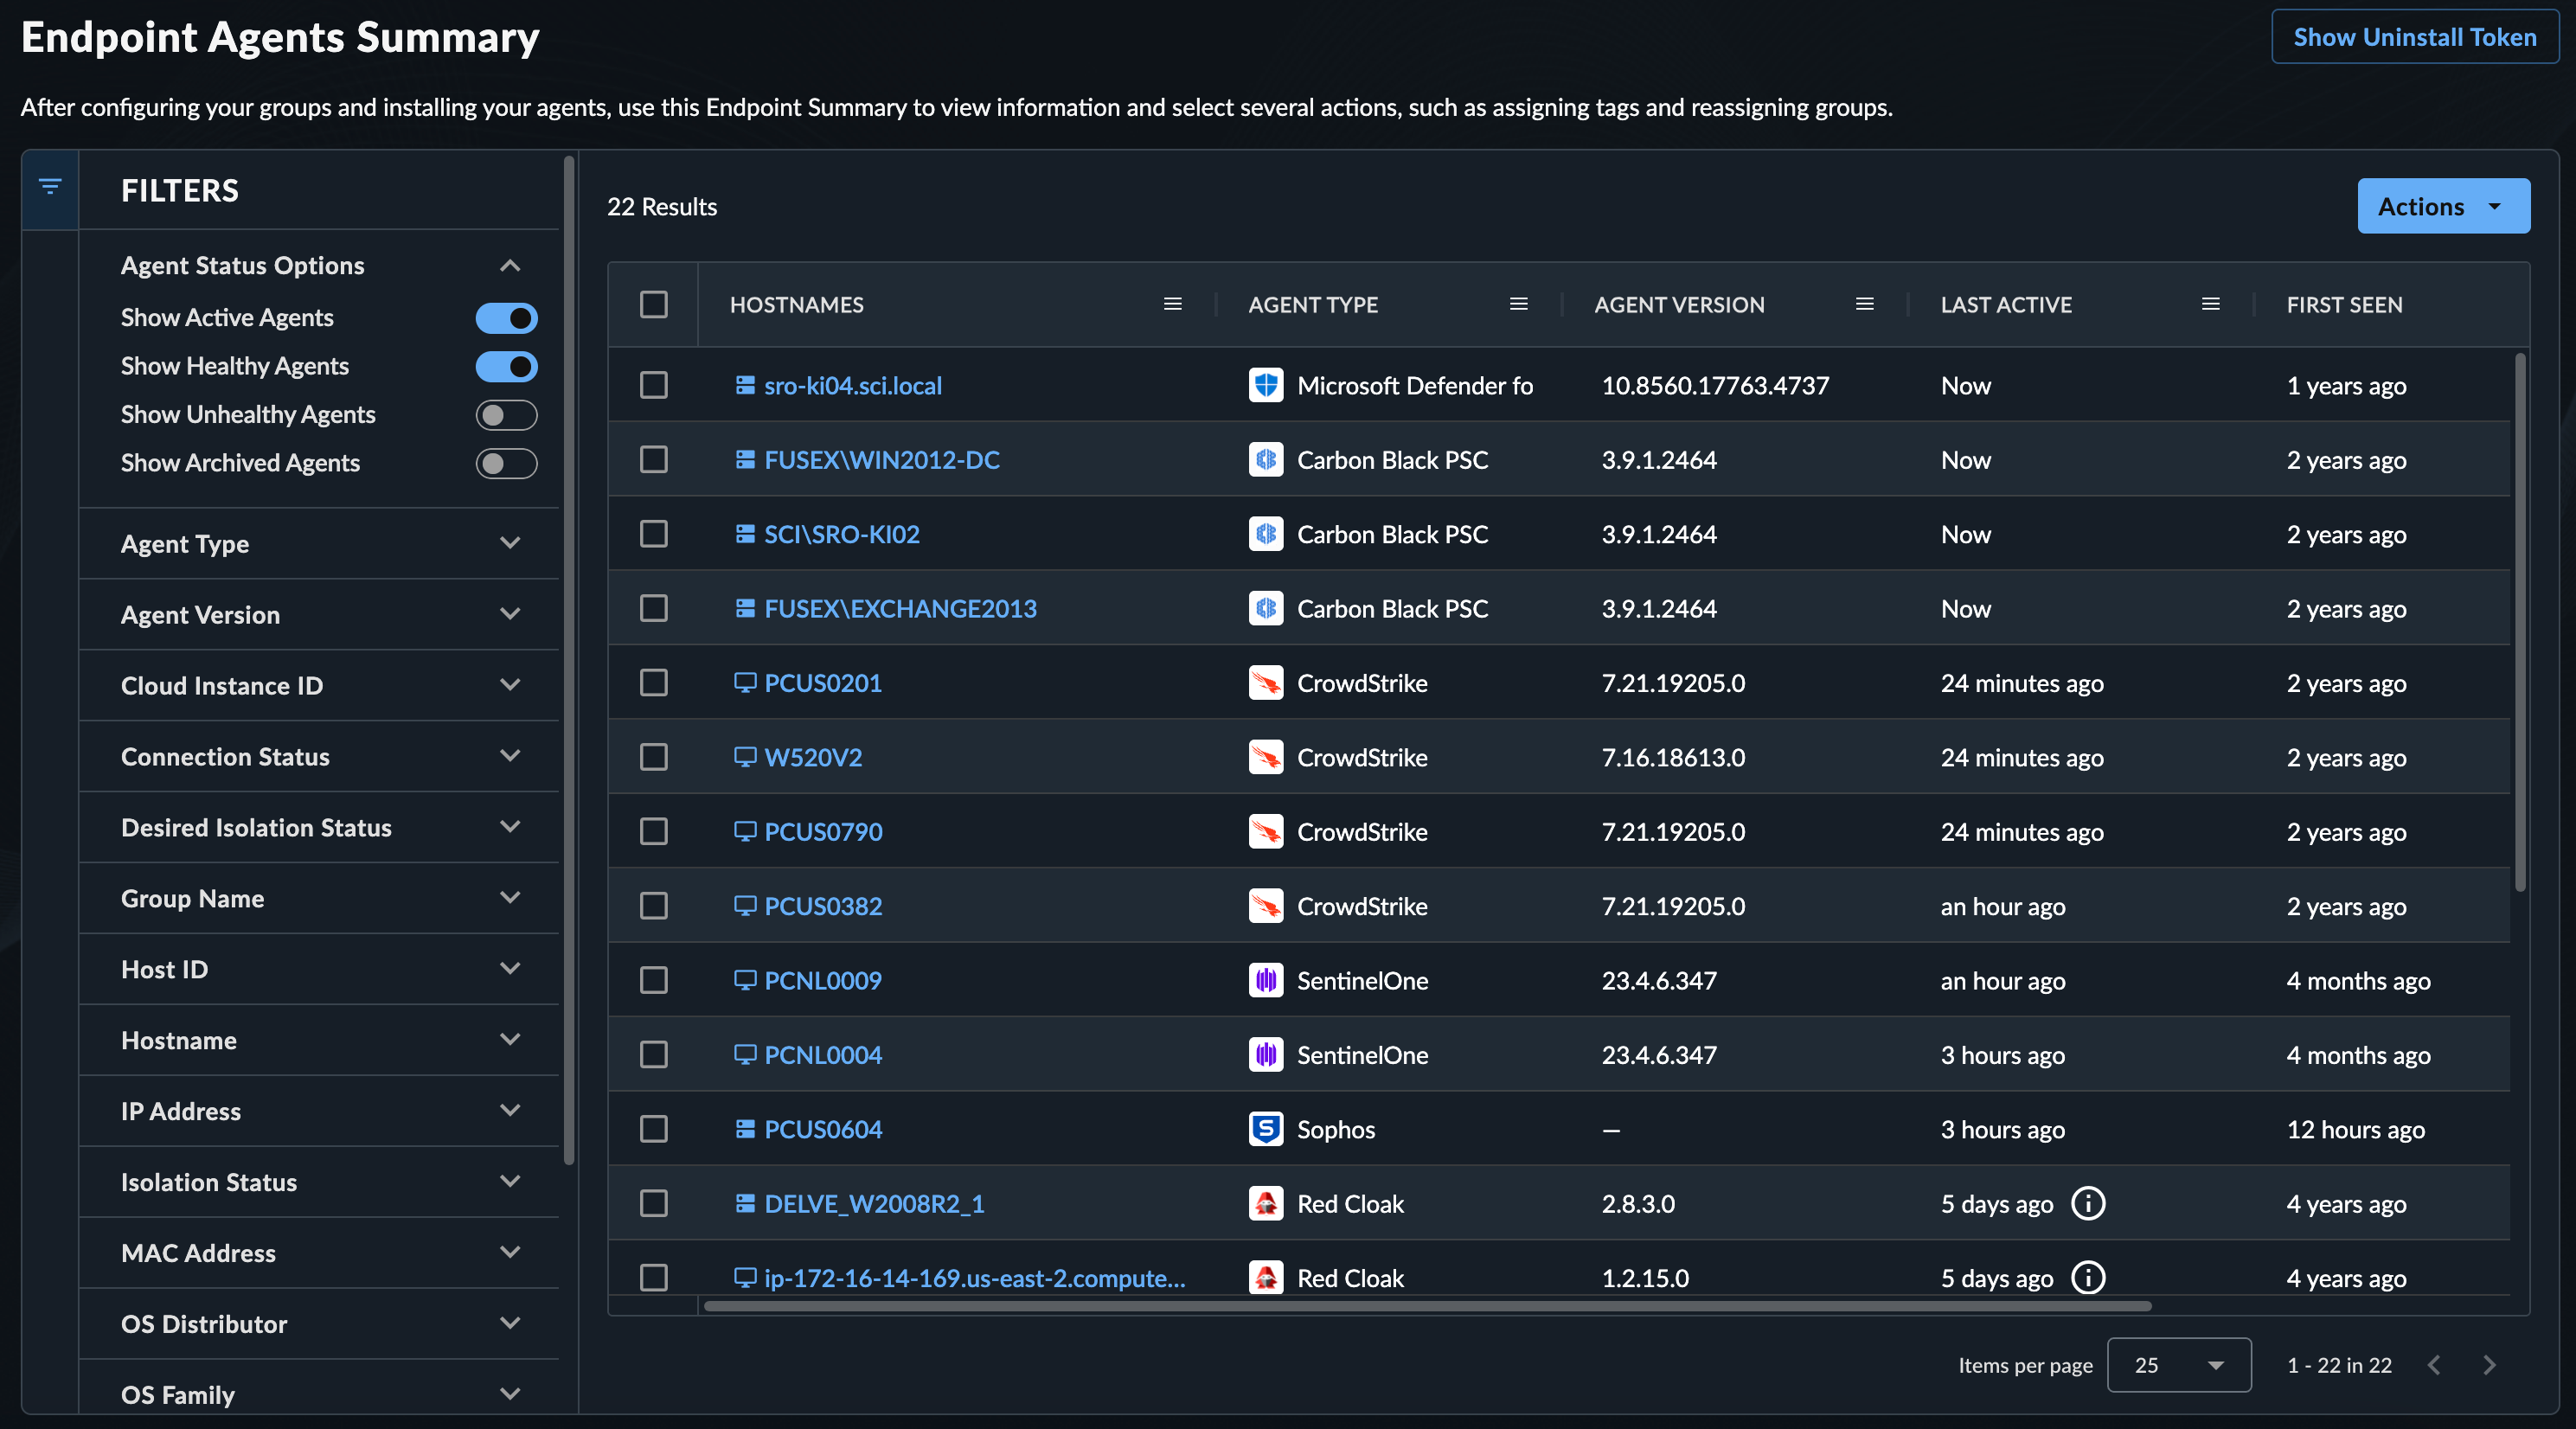
As XDR processes endpoint telemetry, a list of endpoints is generated. Review these by navigating to Endpoint Agents → Summary from the Taegis XDR menu. For more information, see Manage Endpoint Agents.